Project 5: Facial Keypoint Detection with Neural Networks
Nose Tip Detection
First step in the process is to get the images and label them. To be noted I
resized the images to 80x60.
Second step is to construct the CNN. The architecture is shown below.

Next step is to finetune hyperparameter, I played around with the learning rate and adjusted it
from 1e-1 to 1e-5. The results are shown below.
I trained the model for 25 epochs. For the loss function, I used MSELoss, and Adam Optimizer
with a learning rate of 1e-3. With a batch size of 8. The training and validation loss is shown below.

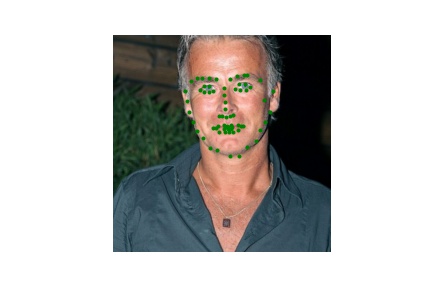
The results of this model is shown below. To be noted the green dots are the label
and the red is the predicted.
This is the successful images
This is the unsuccessful images
We can see that for the failure cases, it normally that the face is not facing the camera.
I believe that with more data, our model will be able to recognize these cases.
Full Facial Keypoints Detection
We follow a similiar process to part 2. However, this time we will conduct data augmentation
and the output will be 116.
First we conduct data augmentation. I did two data augmentation
1. Random rotations of (-15, 15) degrees
2. Random horizontal and vertical shifts of (-10, 10) pixels
In addition to this, I also resized the images to 160x120. Some examples are shown below.
Then we can construct the CNN. The architecture is shown below.

I trained the model for 30 epochs. For the loss function, I used MSELoss, and Adam Optimizer
with a learning rate of 1e-3. With a batch size of 8. The training and validation loss is shown below.

We can also visualize the filters that the convolution layers learnt! The filters that the First
convolution layer learnt is shown below. Since passed in images are grayscale,
the learnt filters are also grayscale.

Last but not least our results! Again, the red dots are predicted and green is ground truth.
This is the successful images
This is the unsuccessful images
I'm guessing for the first image failed due to fact that the facial features are a bit flat.
I believe with more data, the results would be better.
Train With Larger Dataset
I folloede same steps from previous parts for the data augmentation. However, this part, I also cropped
the images based on the bounding boxes. For this, I also considered the labels, as some of the labels
were outside the bounding box. What I did was I took the min and max of the labels and added or deducted
20 pixels to form the new bounding box. Of course, if that exceeded image limits, I just used the image
limit as the bounding box.
I can then start building the model! For this part, I used ResNet18 and changed the input channels to 1.
This is to let the model take in grayscale images. I also changed the output channels to 136, which is
the amount of coordinates that we have. The detailed architecture is shown below.
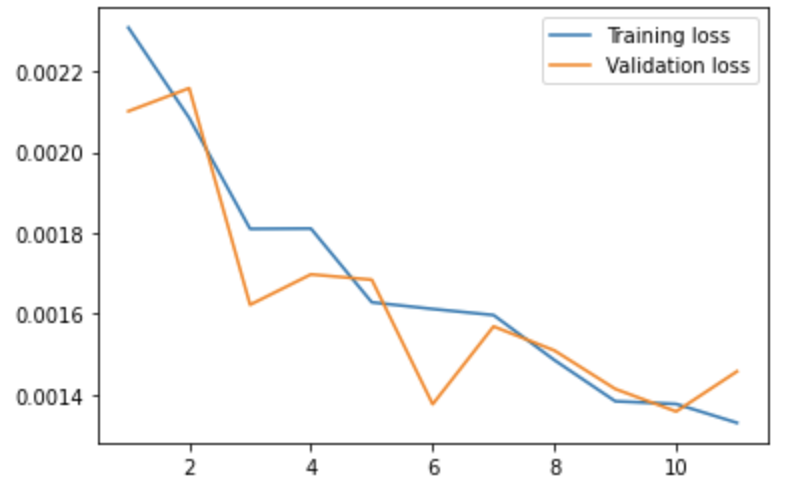
I trained this model for 11 epochs, and with MSELoss as my loss function and Adam Optimizer with
a learning rate of 1e-3. We can now inspect the training and validation loss.
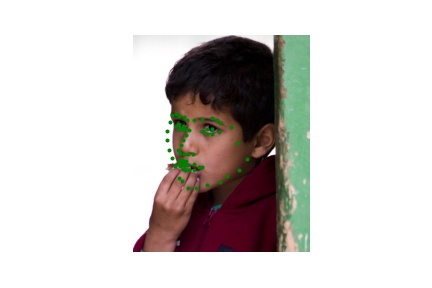
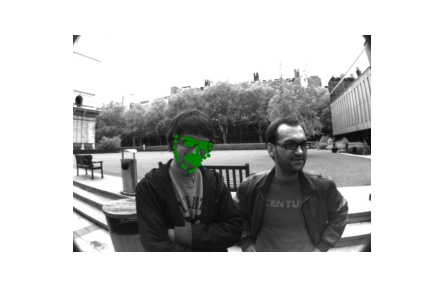
The results were really good! My Kaggle Submission is under the name Benjamin Chou with
a score of 12.42911. Shown below is sample test data with predictions
The model works partially on my data. The first image is pretty accurate as the face is clear.
On the other hand, the other images, the model didn't perform as well, since the images are blurry
and the faces were small.
This is the accurate image
These are the unaccurate images