Overview
In this project, we trained Convolutional Neural Networks to detect facial keypoints.
Part 1: Nose Tip Detection
In this part, we used a simple convolutional network to detect where the nosetip is in a picture.
Result
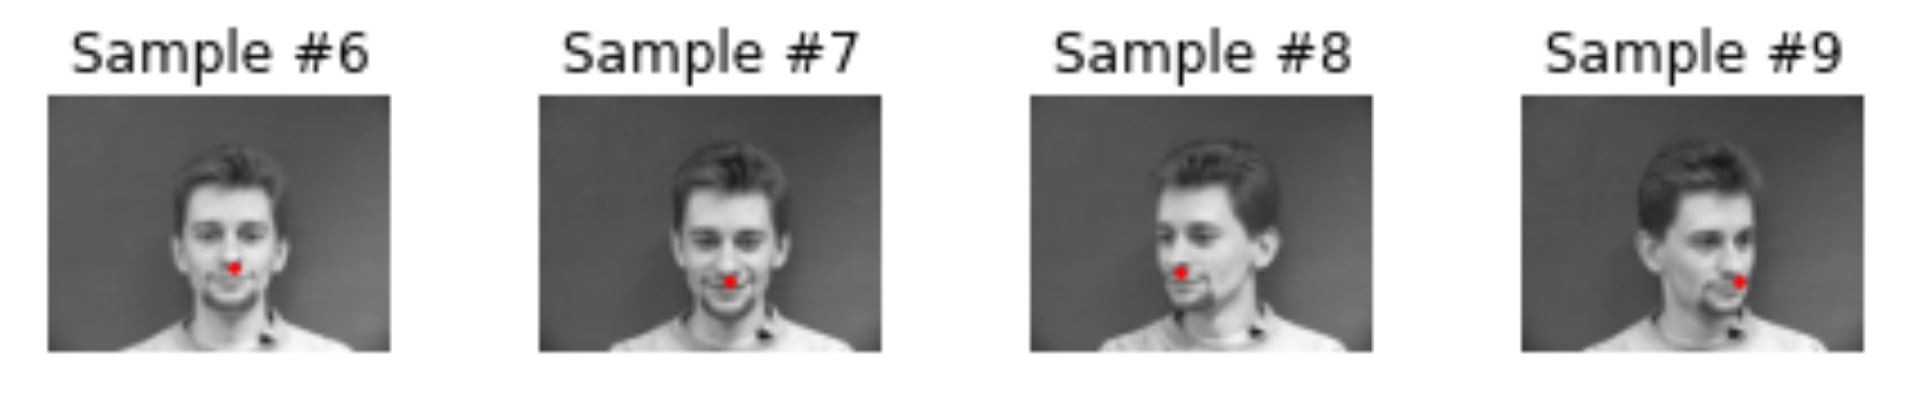
1) Ground Truth Keypoints:
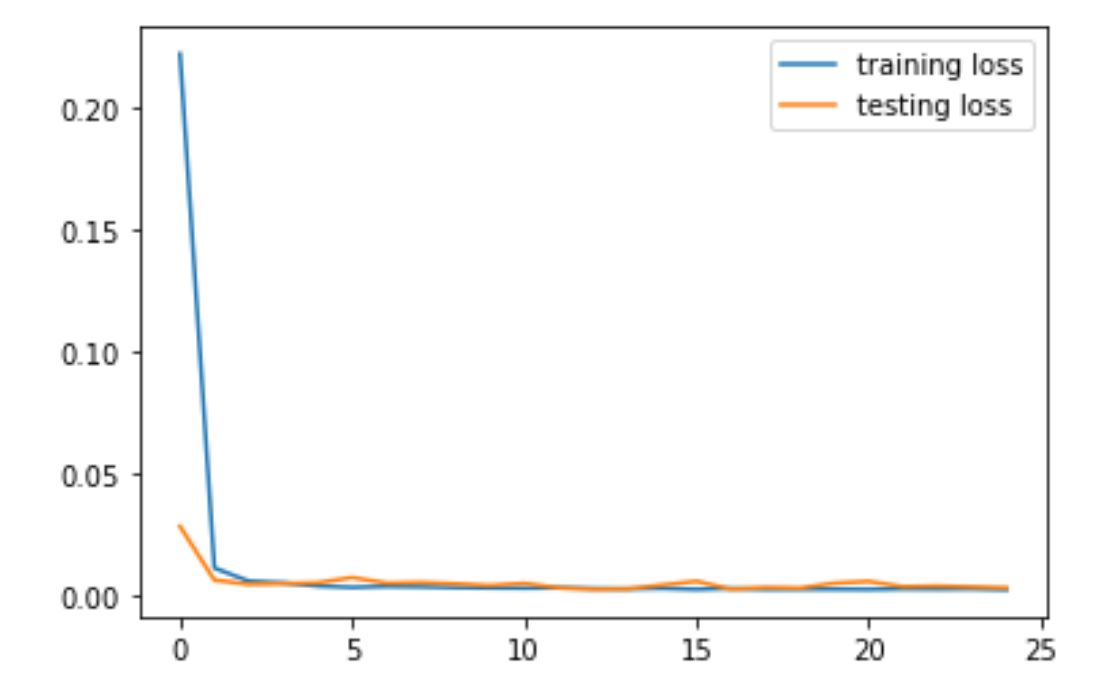
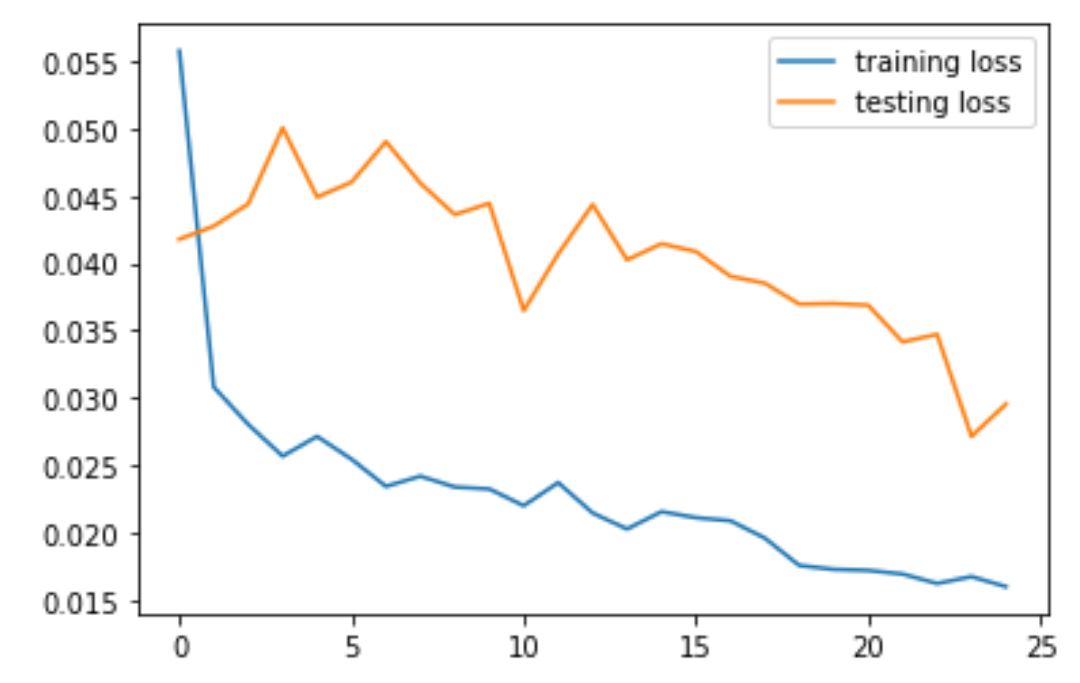
2) Train and Validation Loss
I played around with several different hyper parameters, and they are plotted below.
Version 1
for version 1, we used CNN structure: Net(
(conv1): Conv2d(1, 32, kernel_size=(7, 7), stride=(1, 1))
(conv2): Conv2d(32, 24, kernel_size=(5, 5), stride=(1, 1))
(conv3): Conv2d(24, 32, kernel_size=(3, 3), stride=(1, 1))
(conv4): Conv2d(32, 32, kernel_size=(5, 5), stride=(1, 1))
(fc1): Linear(in_features=64, out_features=1000, bias=True)
(fc2): Linear(in_features=1000, out_features=2, bias=True))
For hyperparameters, we used LR = 1e-3 and Epoch = 25, batchSize = 1.

Version 2
for version 2, we used the same CNN structure as version 1: Net(
(conv1): Conv2d(1, 32, kernel_size=(7, 7), stride=(1, 1))
(conv2): Conv2d(32, 24, kernel_size=(5, 5), stride=(1, 1))
(conv3): Conv2d(24, 32, kernel_size=(3, 3), stride=(1, 1))
(conv4): Conv2d(32, 32, kernel_size=(5, 5), stride=(1, 1))
(fc1): Linear(in_features=64, out_features=1000, bias=True)
(fc2): Linear(in_features=1000, out_features=2, bias=True))
For hyperparameters, we used LR = 2e-3 and Epoch = 25, batchSize = 1.
Version 3
for version 3, we used a slightly different CNN structure as version 1&2: Net(
(conv1): Conv2d(1, 32, kernel_size=(7, 7), stride=(1, 1))
(conv2): Conv2d(32, 24, kernel_size=(7, 7), stride=(1, 1))
(conv3): Conv2d(24, 32, kernel_size=(5, 5), stride=(1, 1))
(conv4): Conv2d(32, 32, kernel_size=(3, 3), stride=(1, 1))
(fc1): Linear(in_features=64, out_features=100, bias=True)
(fc2): Linear(in_features=100, out_features=2, bias=True))
For hyperparameters, we used LR = 1e-3 and Epoch = 25, batchSize = 1.
Version 4
for version 4, we used another CNN structure: Net(
(conv1): Conv2d(1, 32, kernel_size=(7, 7), stride=(1, 1))
(conv2): Conv2d(32, 24, kernel_size=(5, 5), stride=(1, 1))
(conv3): Conv2d(24, 24, kernel_size=(5, 5), stride=(1, 1))
(conv4): Conv2d(24, 12, kernel_size=(3, 3), stride=(1, 1))
(fc1): Linear(in_features=36, out_features=500, bias=True)
(fc2): Linear(in_features=500, out_features=2, bias=True))
For hyperparameters, we used LR = 1e-3 and Epoch = 25, batchSize = 1.
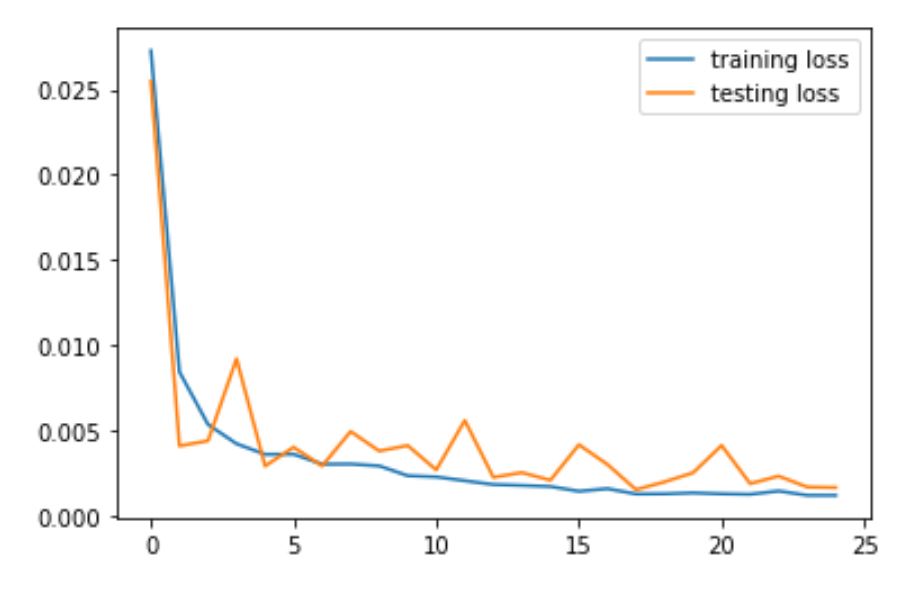
In the following part, I am going to show the result of the fourth version.
3) Training Results
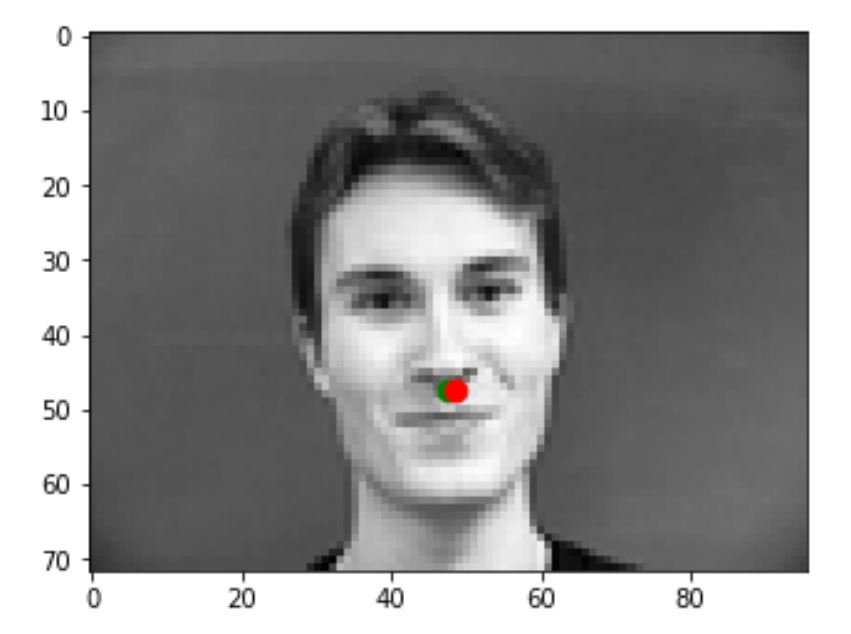
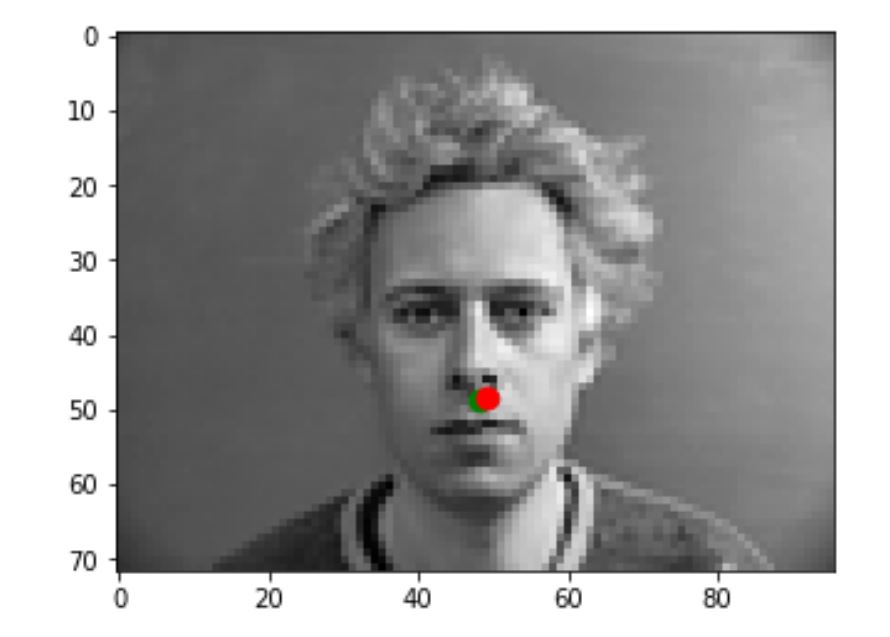
Correct Results
The following are some pictures that my model predicts correctly. The green dot is the ground truth while the red dot is the prediction.

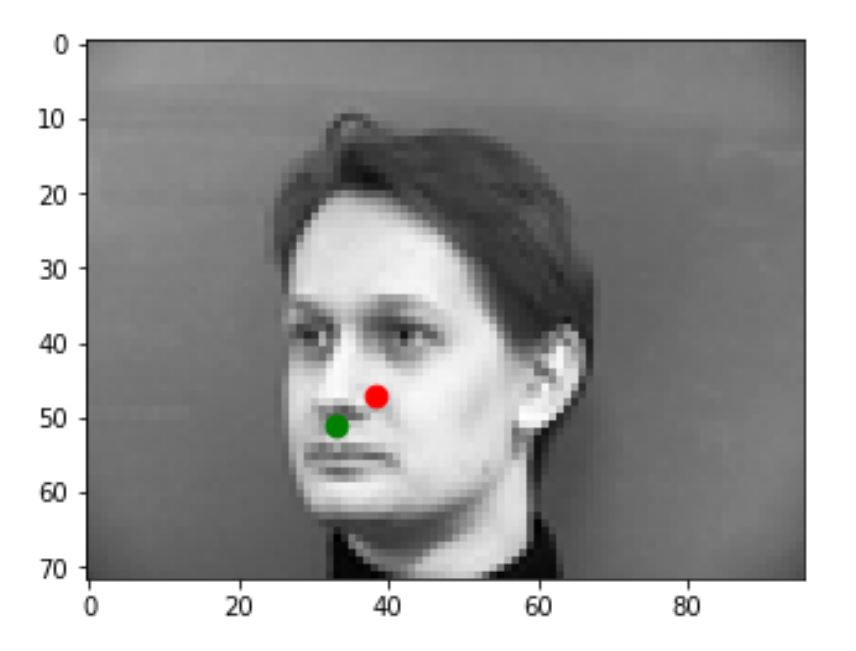
Incorrect Results
The following are some pictures that my model predicts incorrectly. The green dot is the ground truth while the red dot is the prediction. I think the reason my model is not predicting these correctly is that the faces in these pictures are turning too much, and we don't have enough this kind of data to train on.

Part 2: Full Facial Keypoints Detection
In this part, we used a larger network than part one to train a model that can predict all 58 keypoints of the face.
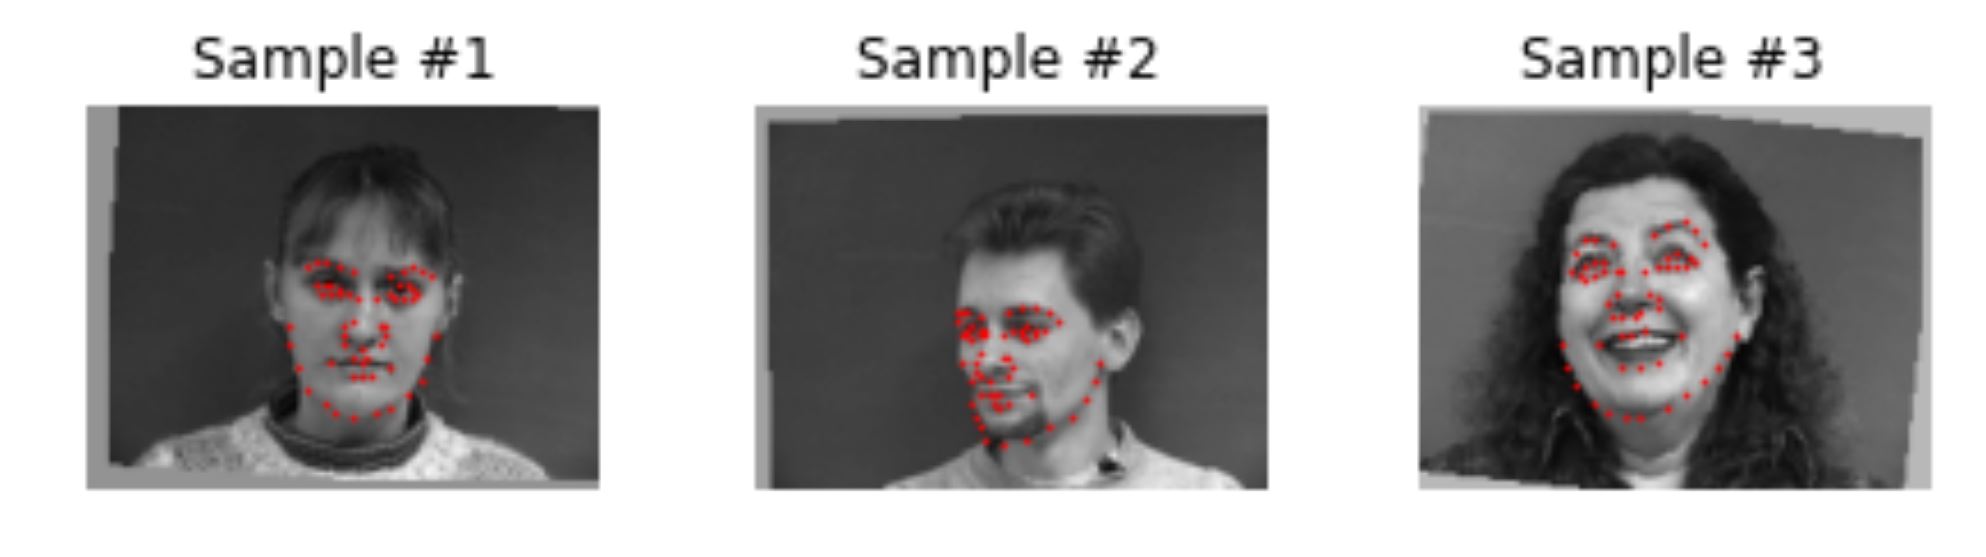
1) Sample image and ground truth
To augment the images, I added rotation randomly between +- 10 degrees, as well as random shifting between +- 10 pixels in both x and y directions. I also changed the keypoints correspondingly. The result images with ground truth looks like:

2) Detailed Architecture of the Model
The detailed model structure is shown as follows:
The hyperparameters are LR = 5e-5, epoch = 20, batchSize = 1.
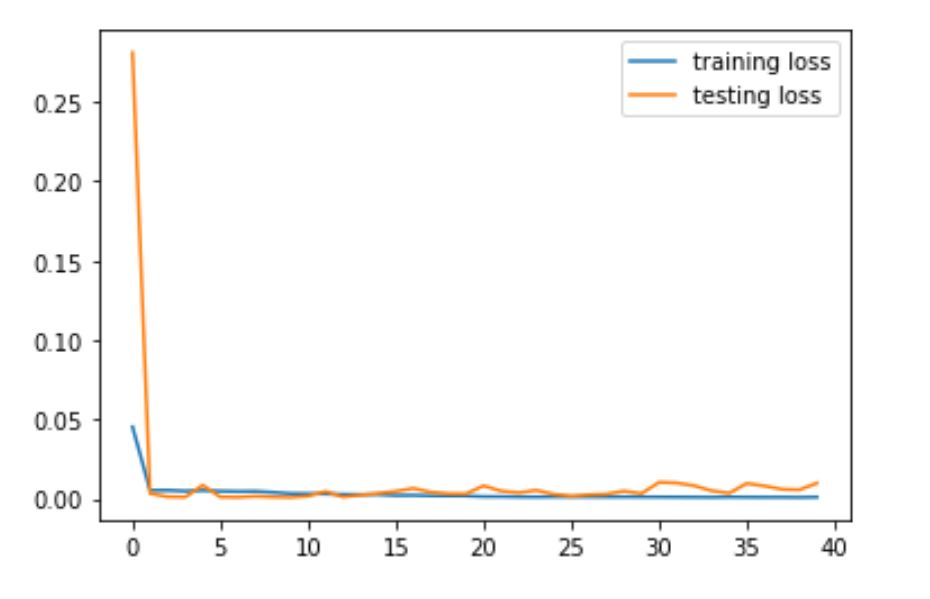
3) Training and Validation loss
As shown below is the training and validation loss in this part.
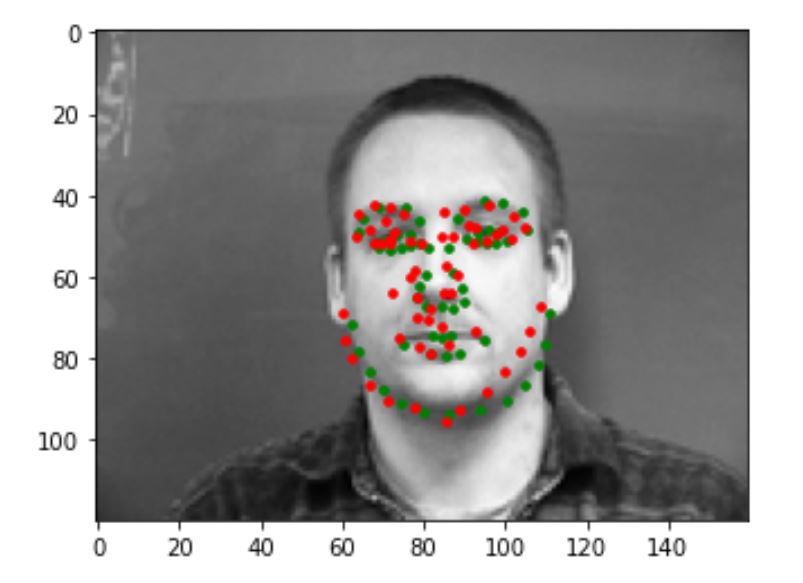
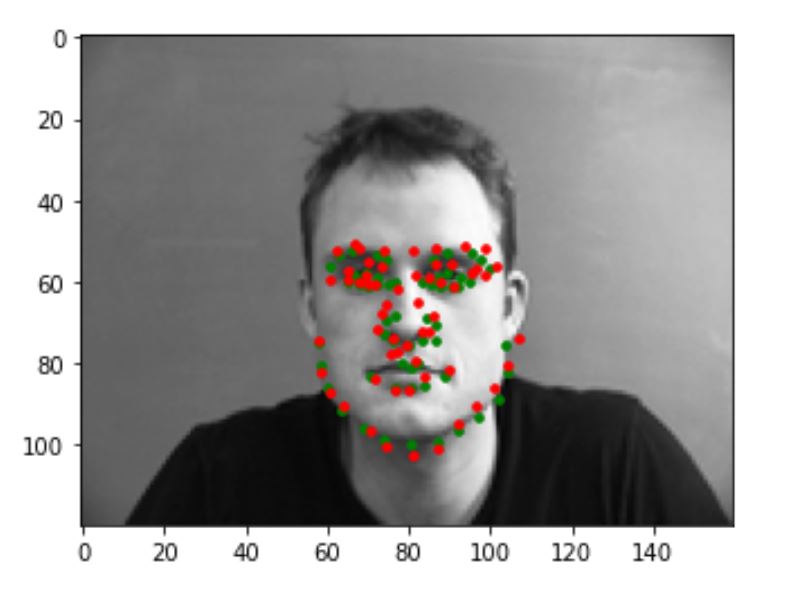
4) Training Results
Correct Results
The following are some pictures that my model predicts correctly. The green dot is the ground truth while the red dot is the prediction.
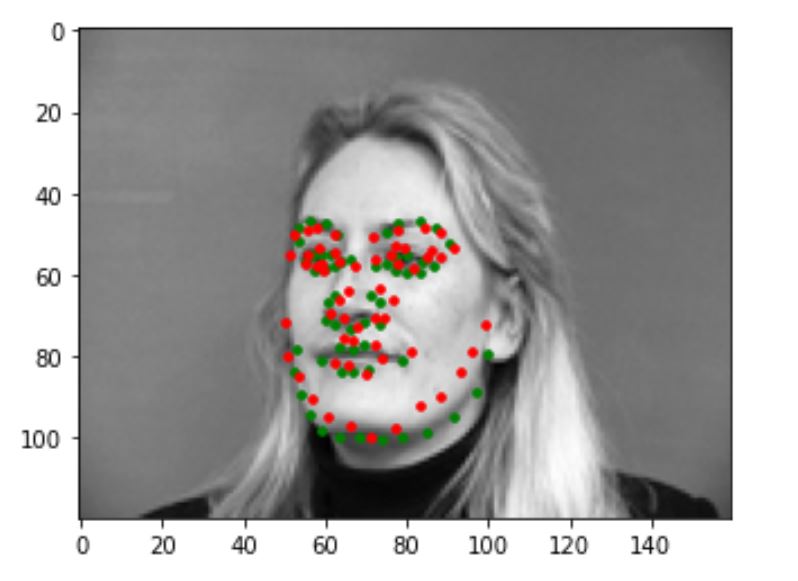
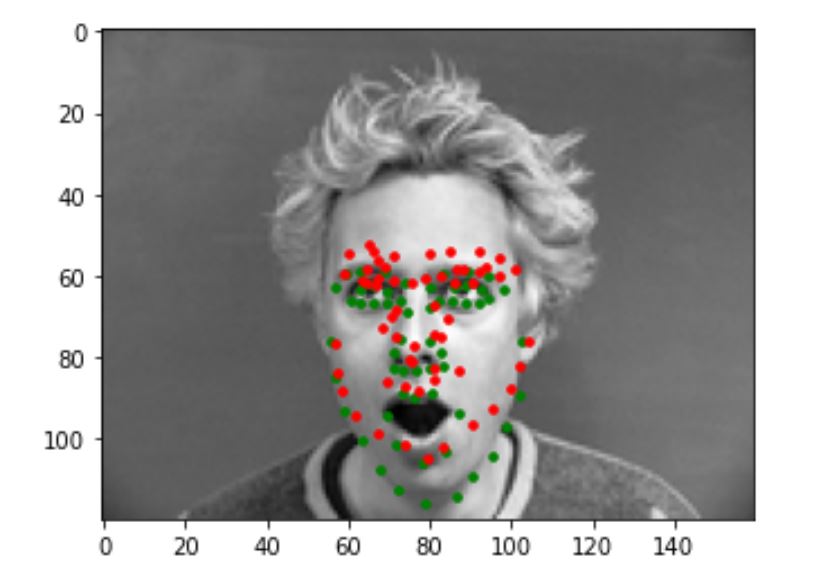
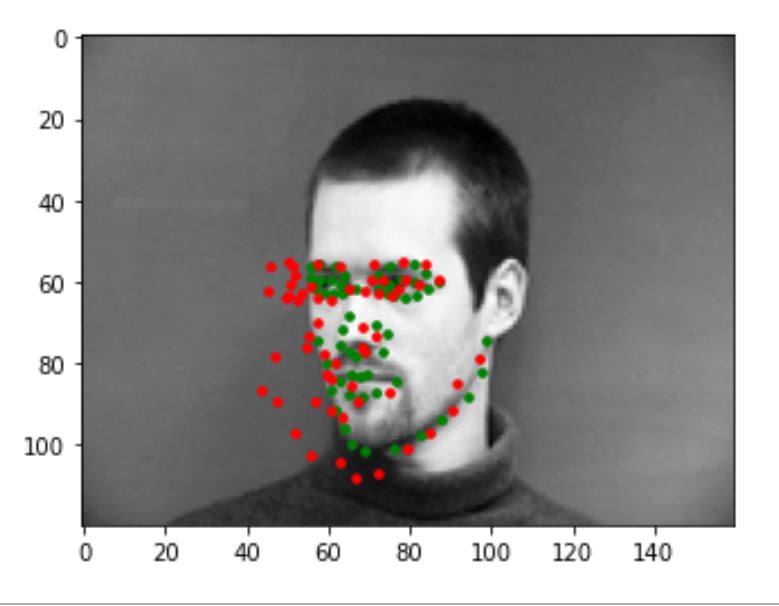
Incorrect Results
The following are some pictures that my model predicts incorrectly. The green dot is the ground truth while the red dot is the prediction. I think the reason my model is not predicting these correctly is that the faces in these pictures are either turning too much, or showing an expression not common in the training set(eg: surprised), and we don't have enough this kind of data to train on.
5) Learned filters
The following is the learned filter(first convolutional layer):

Part 3: Train With Larger Dataset
In this part, we trained a pretrained ResNet18 on a very large dataset on Google Colab
1) Kaggle Submission
See kaggle
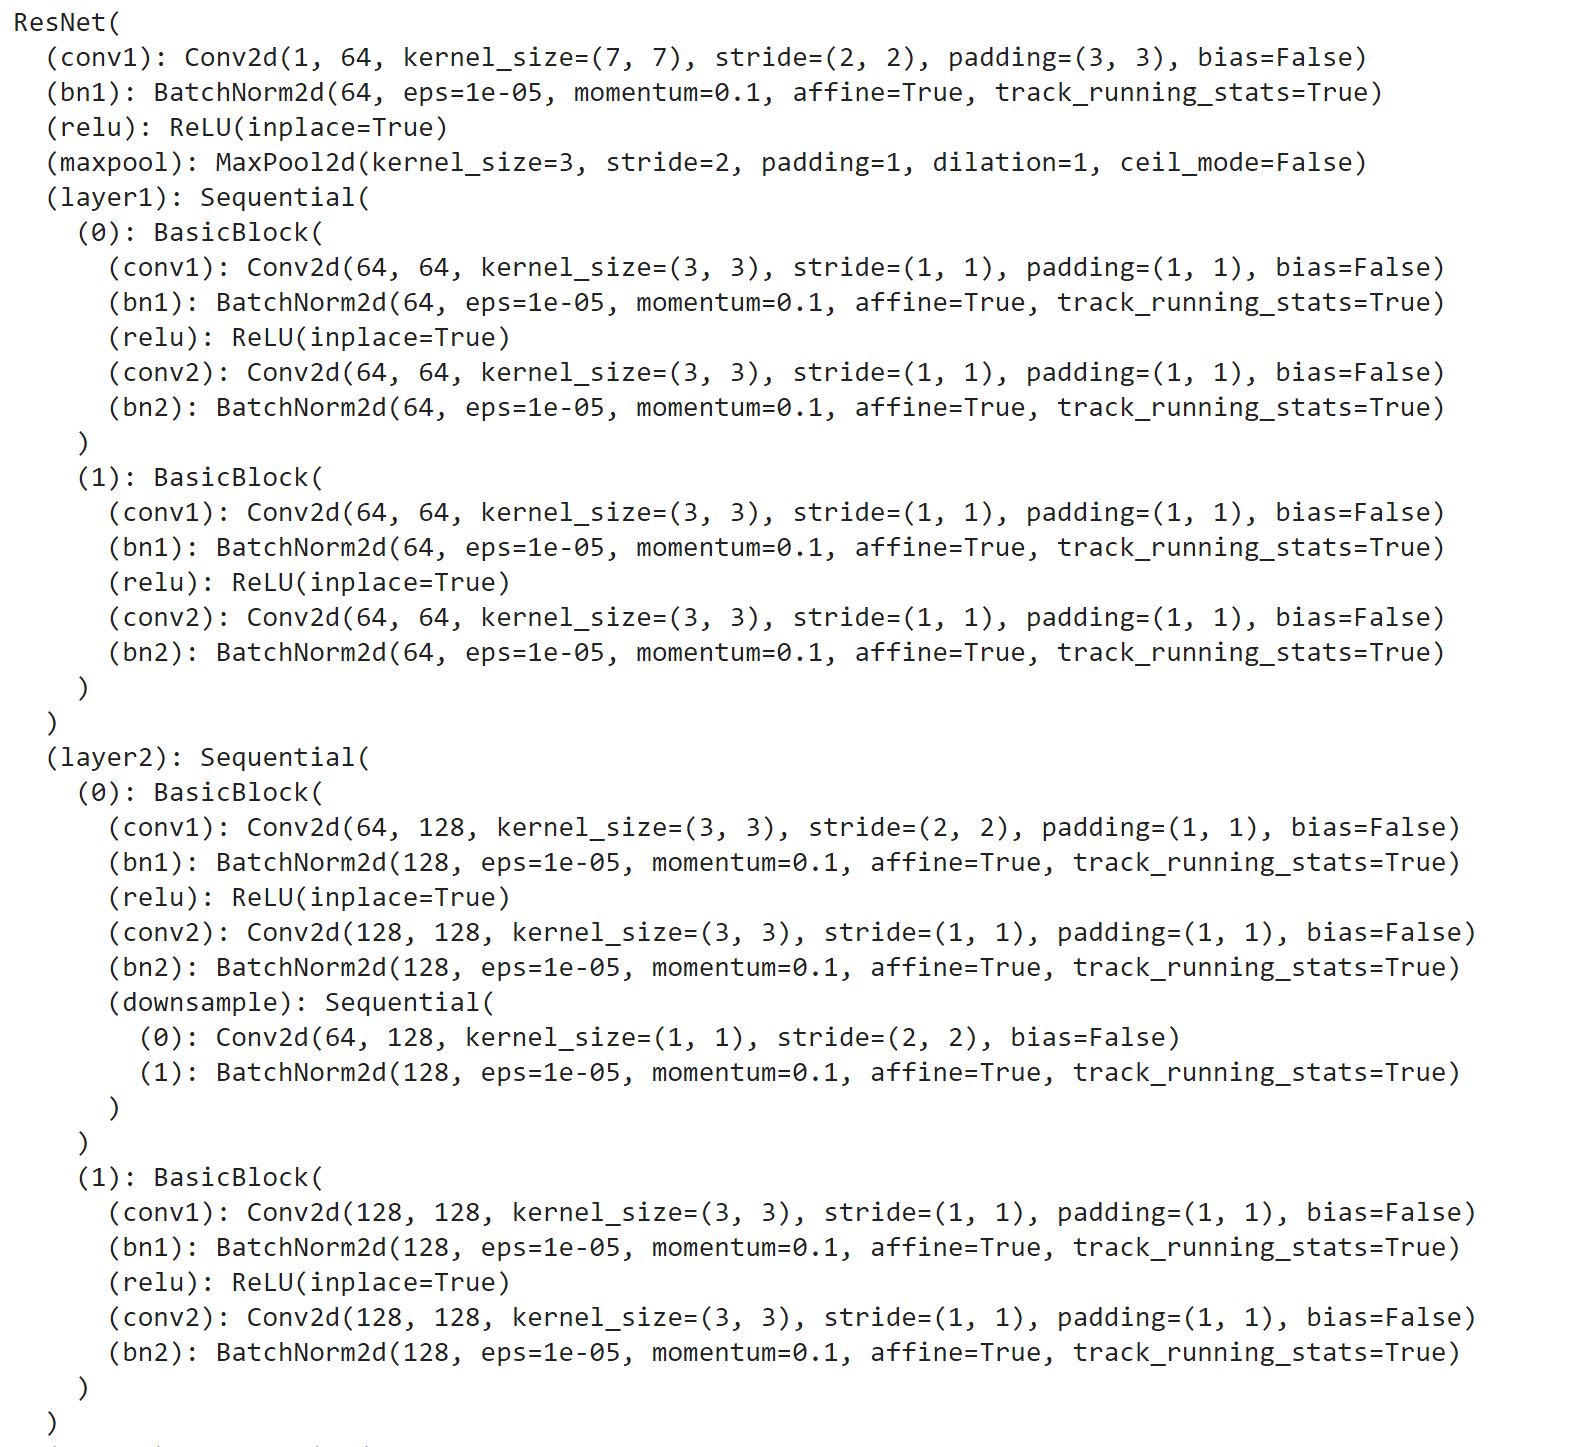
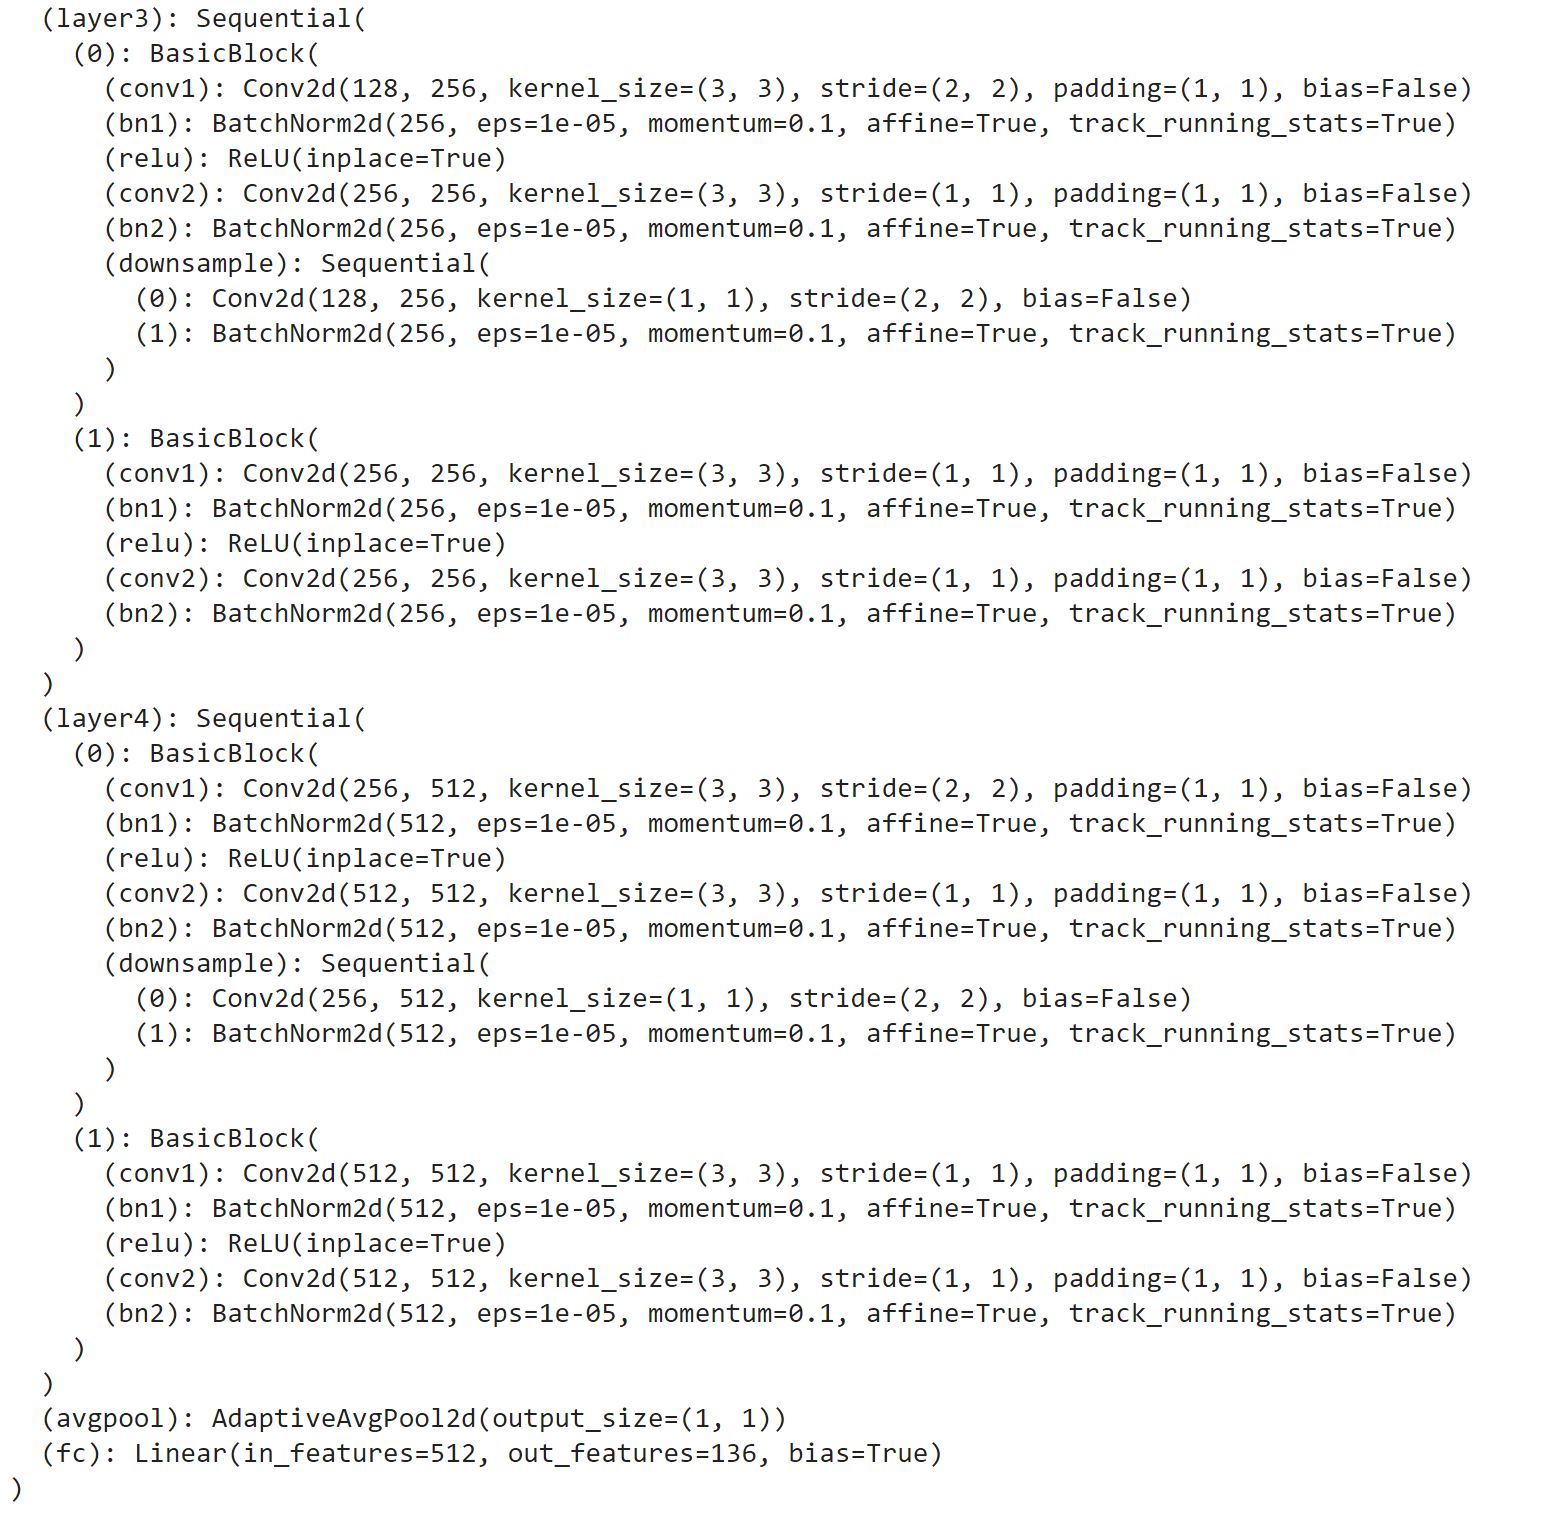
2) Detailed Structure of model
I took a pretrained ResNet18 and changed the first and last layer to fit our data. Specifically, I got the model by running:
resnet18 = models.resnet18(pretrained=True)
resnet18.conv1 = nn.Conv2d(1, 64, kernel_size=(7, 7), stride=(2, 2), padding=(3, 3), bias=False)
resnet18.fc = nn.Linear(in_features=512, out_features=68 * 2, bias=True)
Specifically, the structure looks like:
I train the model in batch size of 128. I first trained the model with 5e-5 Learning Rate for 12 epochs, then I trained the model with 2e-5 Learning Rate for 5 epochs.
3) Training and Validation loss
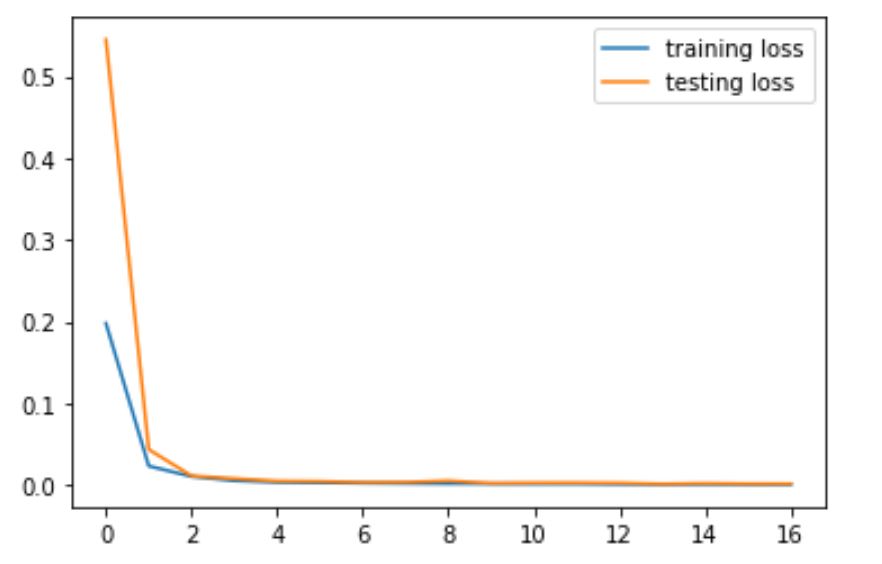
4) Visualize Images in Testing Set
The following are some visualization of the prediction on the testing set.
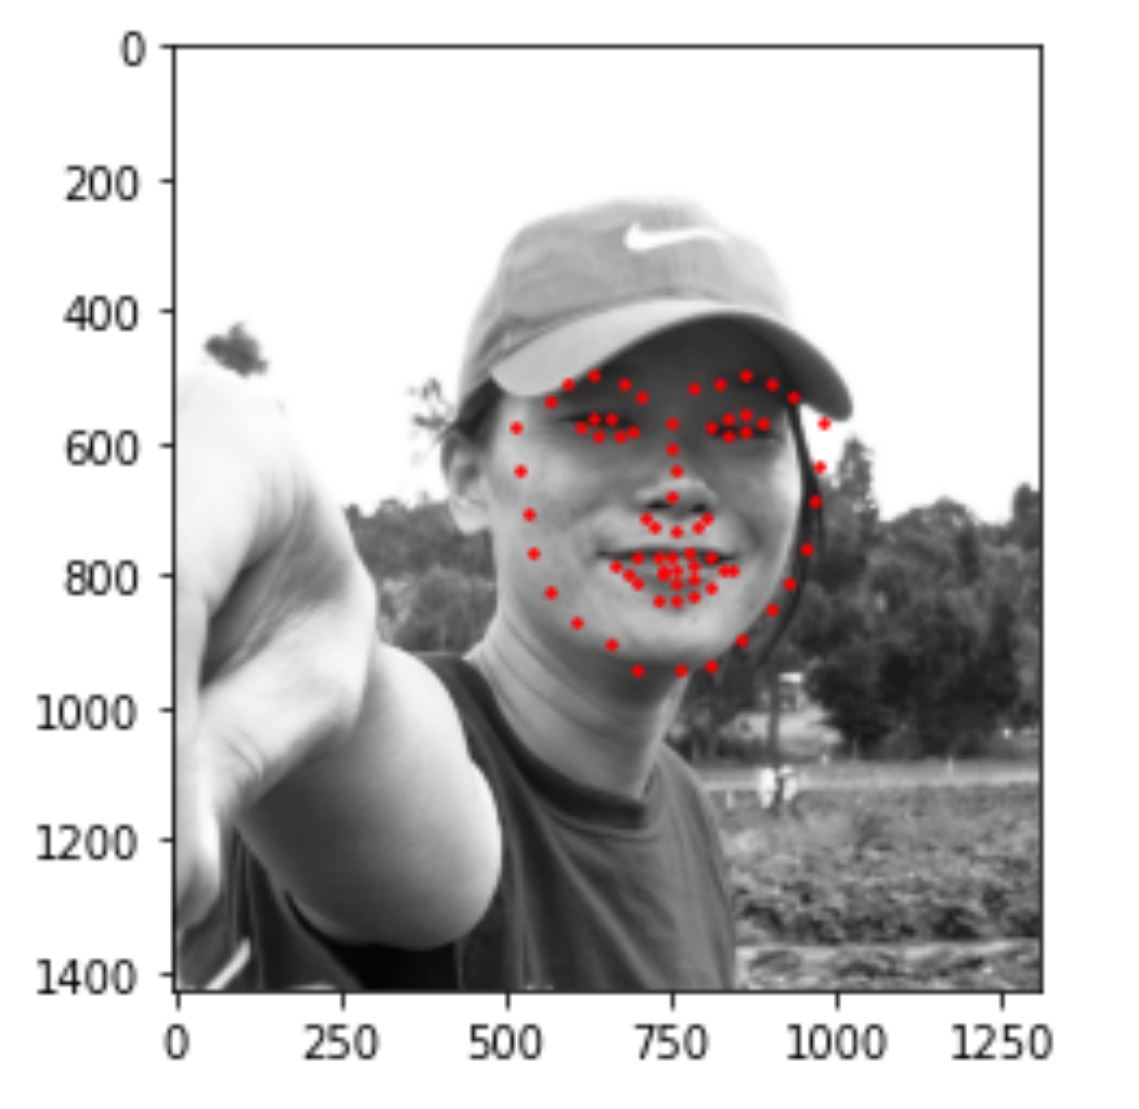
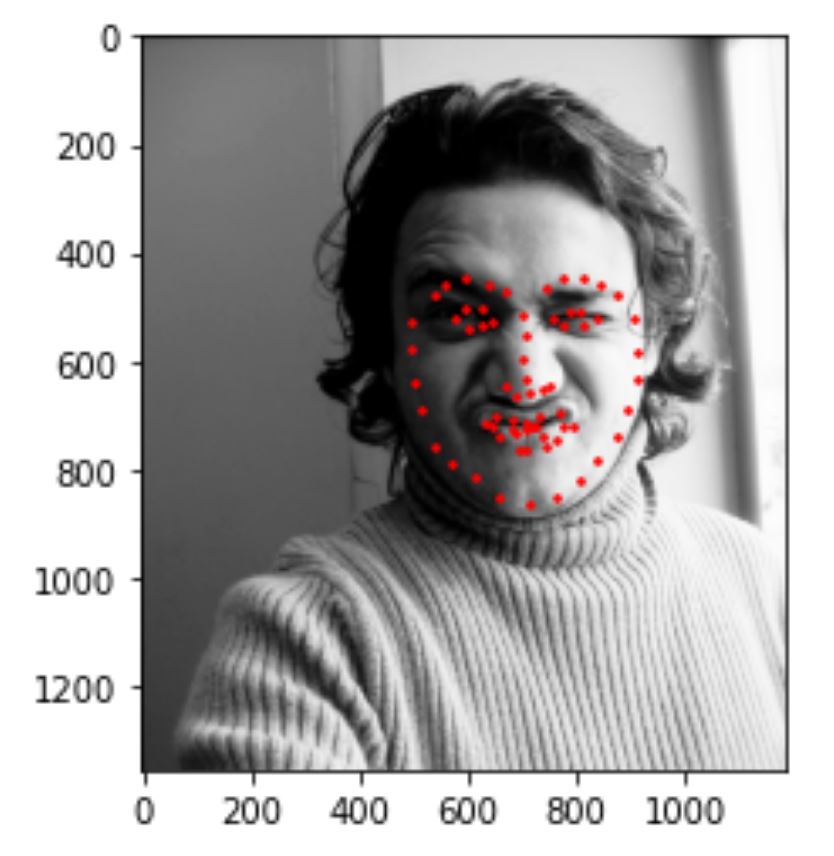
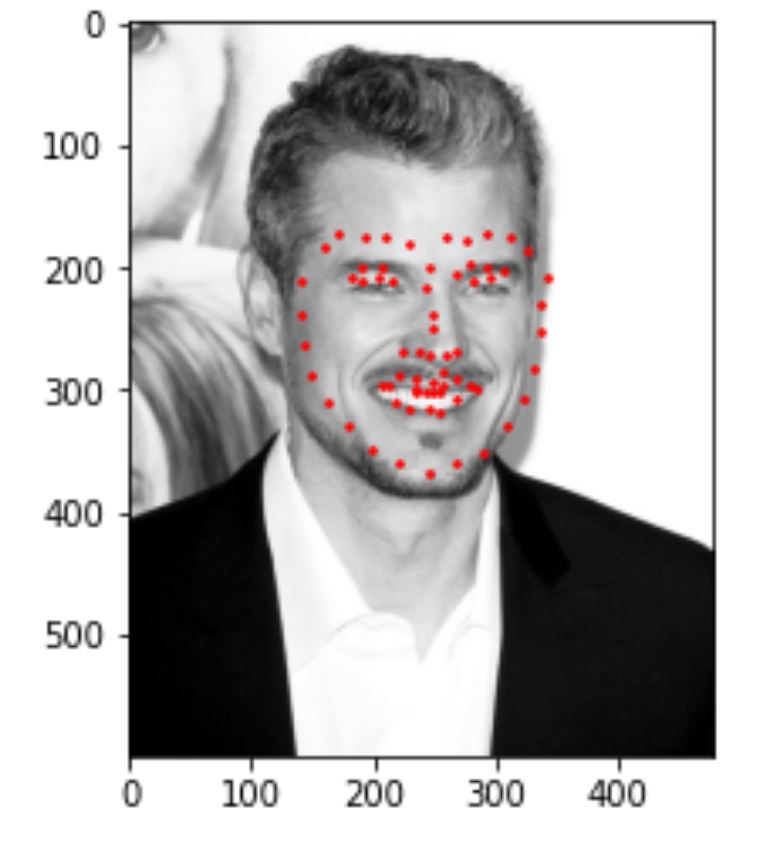
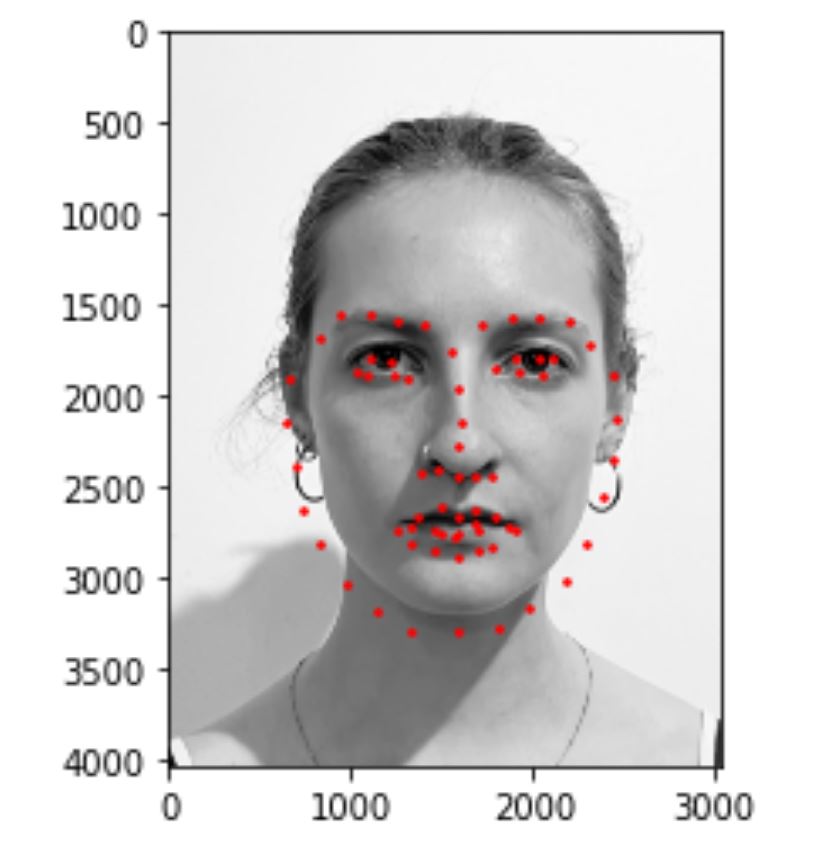
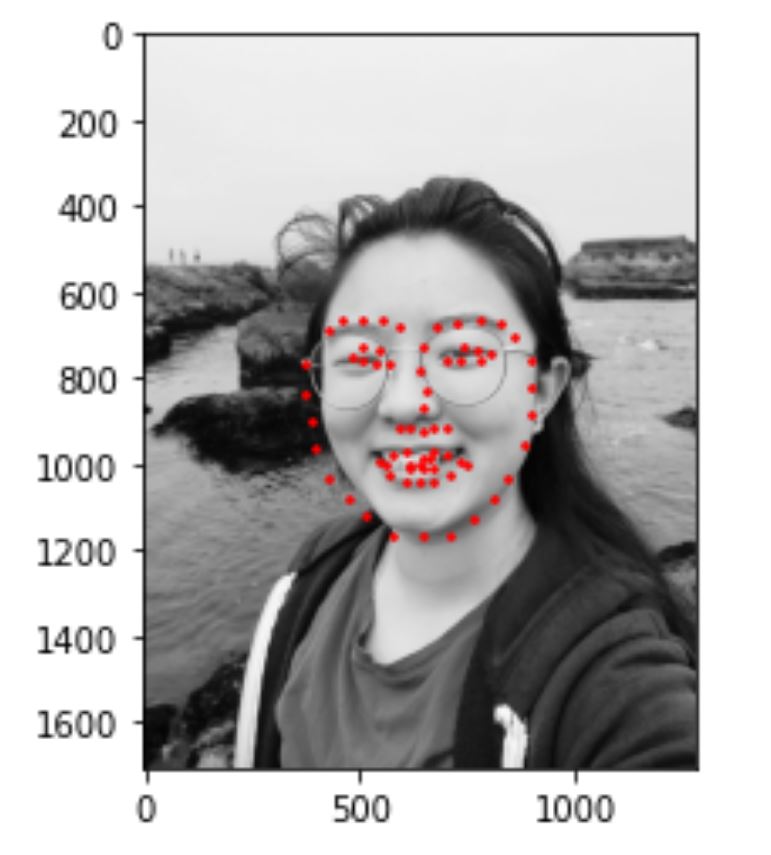
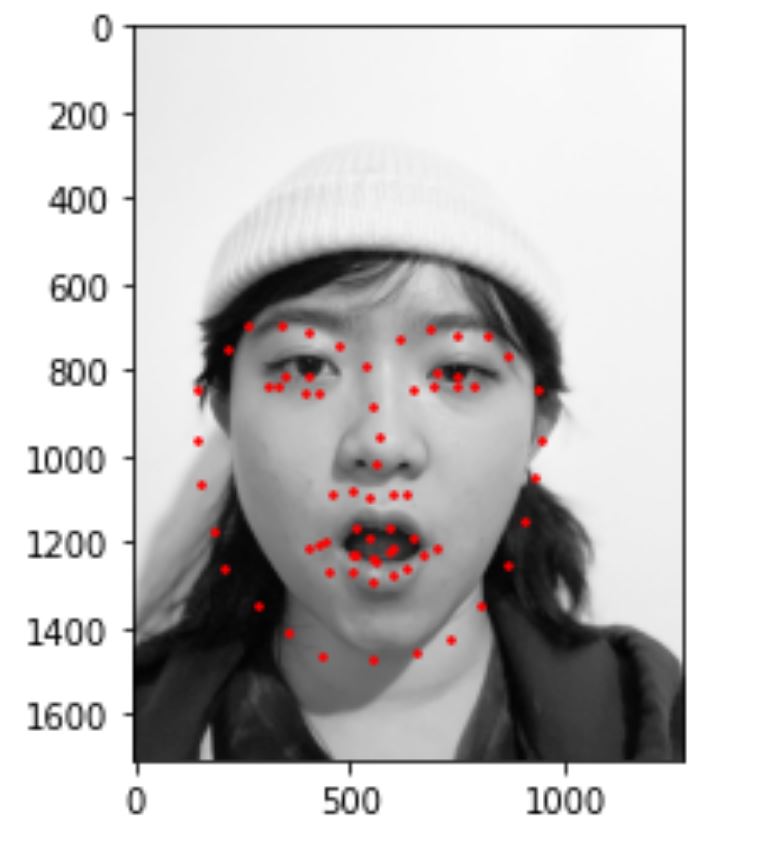
5) Run model on my own collection
I tried to run the program on some of my own photos and results look like this. I realized that my model works well with frontal faces without glasses, like image 1. It works less well with face that are rotated(more than 10%) and faces that turns more than a certain threshold (for example, image2). It also works less well when my facial expression is not very common in the dataset (for example, image 3).