In this project I used convolutional neural networks (CNNs) to detect keypoints in pictures of faces.
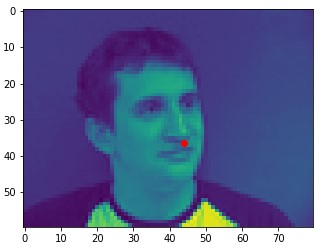
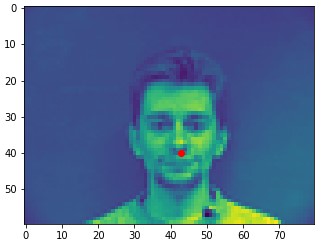
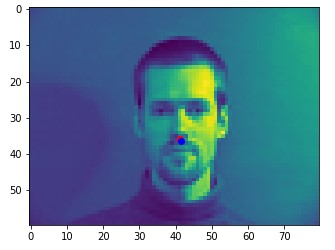
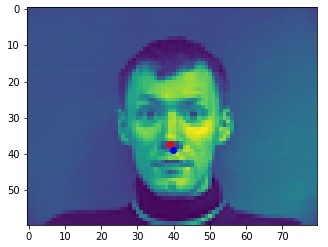
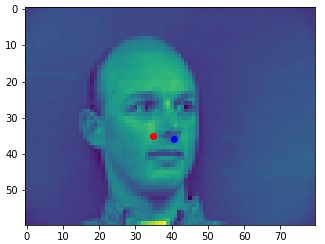
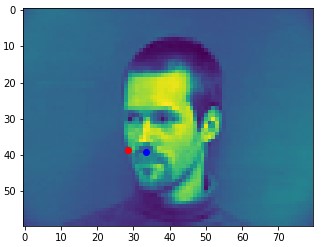
In this part, I trained a small CNN to detect just noses. My network was just a few convolutional layers followed by a couple fully connected layers. I trained it on the IMM Face Dataset. Here are a few example images from the dataset.
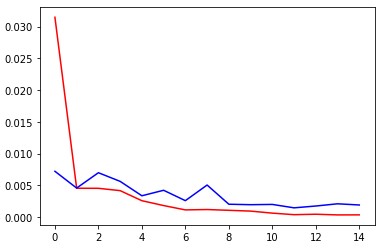
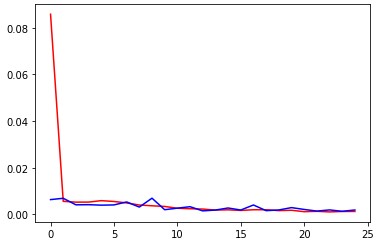
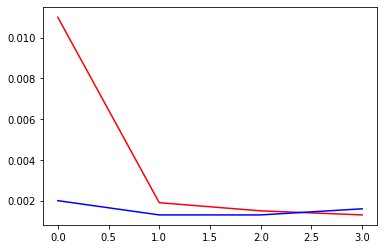
Here are my training plots over 15 epochs. Red is training loss, blue is validation loss.
During training, I tried tuning the learning rate and batch size. Here is the validation loss on a couple configurations I tested. Ultimately I found that a batch size of 4 and a learning rate of .001 worked the best.
batch size: 4, learning rate: . 001, validation loss: .0014
batch size: 4, learning rate: . 01, validation loss: .0057
batch size: 32, learning rate: . 001, validation loss: .0046
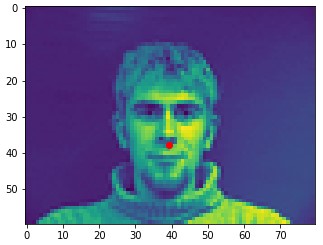
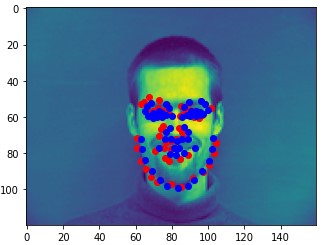
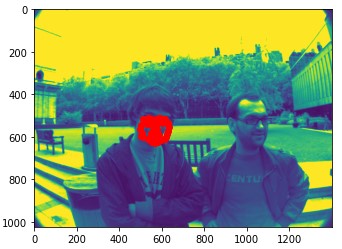
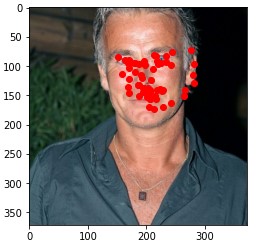
Here are two of my network's correct predictions, and two incorrect predictions. Red is the model's prediction and blue is the annotated keypoint. For the incorrect predictions, I found that my model seemed to struggle to detect noses when the person's head was turned to the side. This may be because the MSE loss doesn't penalize the model that badly for just predicting the dataset's average face.
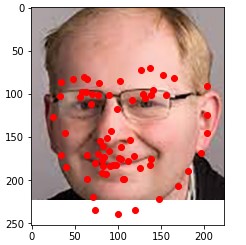
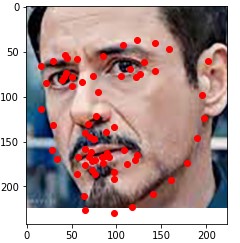
In this part, I expanded to predicting the full 58 keypoints in the IMM Faces Dataset. I also increased my network size and applied data augmentations like color jittering, and random translations and rotations. For the random translations and rotations, I also had to update the annotated keypoints to reflect the image transformation. Here are a few examples images from the augmented dataset.
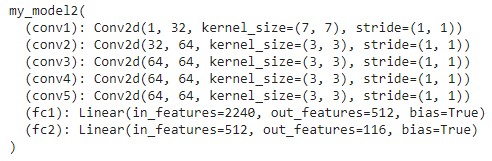
During training, I used a batch size of 4 and a learning rate of .001. Here are my model's architecture details. There is a 2x2 max pooling layer after every convolutional layer except the first one.
Here are my training plots over 25 epochs. Once again, red is training loss, blue is validation loss.
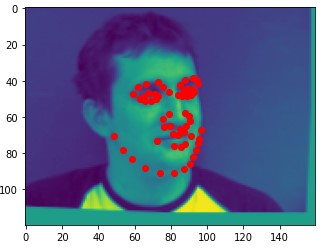
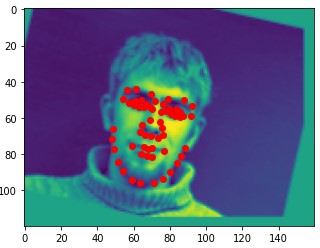
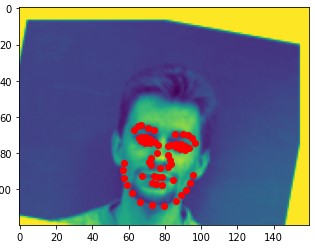
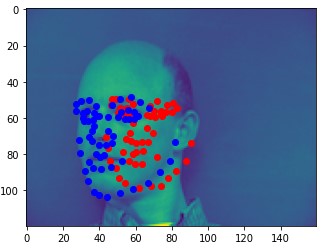
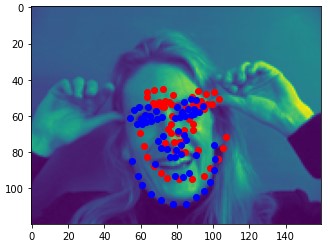
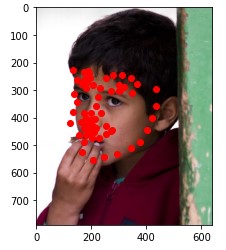
Here are two of my network's correct predictions, and two incorrect predictions. For the incorrect predictions, I once again found that my model seemed to struggle to predict the correct keypoints when the subject's head was turned to the side, and that most of the time in these situations it would just predict the average face.

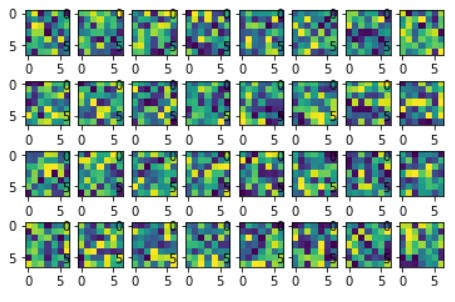
Here are the 32 learned filters in the first convolutional layer of my network.
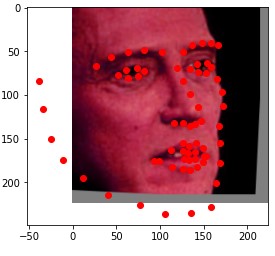
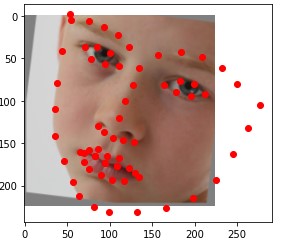
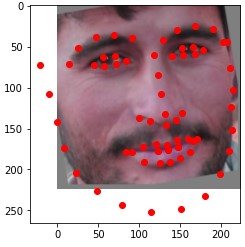
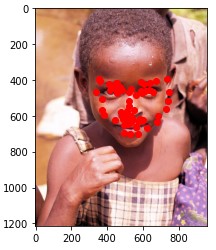
In this part, I expanded to training on the larger ibug Dataset. This dataset also provided bounding box annotations for the faces, so instead of predicting over the entire image, I only predicted on the region inside the bounding box, and then scaled and shifted the network predictions to to their corresponding positions in the original image. I also used a larger ResNet18 network. Here are a few example images from the dataset.
For this task, I used PyTorch's pretrained ResNet18 network. After the global average pooling, I applied two fully connected layers of size 256 and 136. I used a batch size of 32, a learning rate of .001, and trained for 4 epochs. Here is my training plot.
On the Kaggle competition, I achieved a mean absolute error of 35.4.
Here are some of my networks predictions on the test dataset, as well as on my own images. While the network seemed to do well on all of my own images, on some of the test dataset images, the model seems to somehow get the chin and the mouth mixed up.

The coolest thing I learned from this project is how much batch size can effect the network training!