Project 5
Jerry Lai
Part 1:
I followed the instructions. I loaded the faces as 80x60 grayscale images, centered around 0.
I used a simple model “Nosenet”. It follows the guidelines but its on the small side.
Its layers and activations are as follows:
Type | In | Out | Kernel | Stride |
Layer 1: Conv2d | 1 | 12 | 5x5 | 1x1 |
Activation: Relu -> Maxpool 2x2 | ||||
Layer 2: Conv2d | 12 | 12 | 5x5 | 1x1 |
Activation: Relu -> Maxpool 2x2 | ||||
Layer 3: Conv2d | 12 | 12 | 5x5 | 1x1 |
Activation: Relu -> Maxpool 2x2 | ||||
Layer 4: Dense | 288 | 100 | X | X |
Activation: Relu | ||||
Layer 5: Dense | 100 | 2 | X | X |
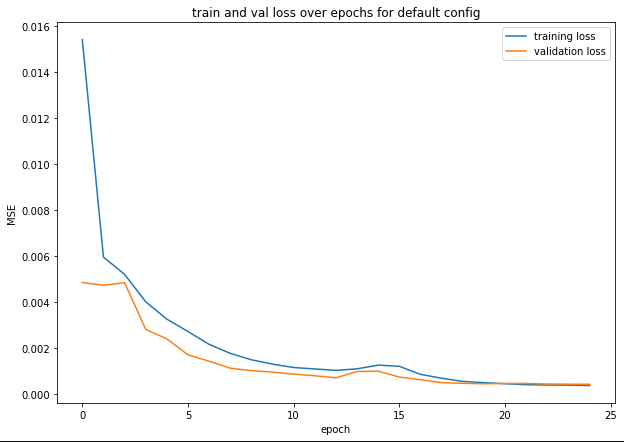
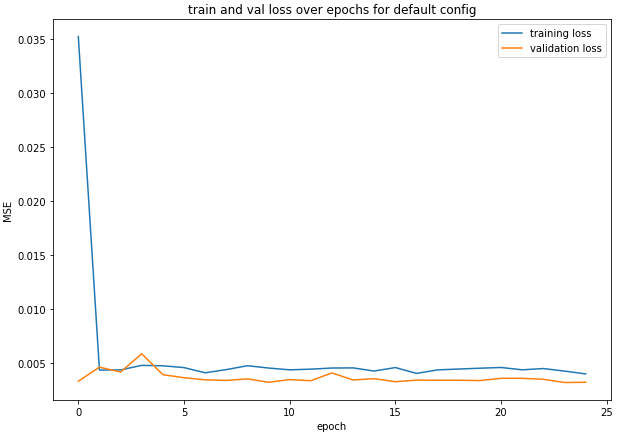
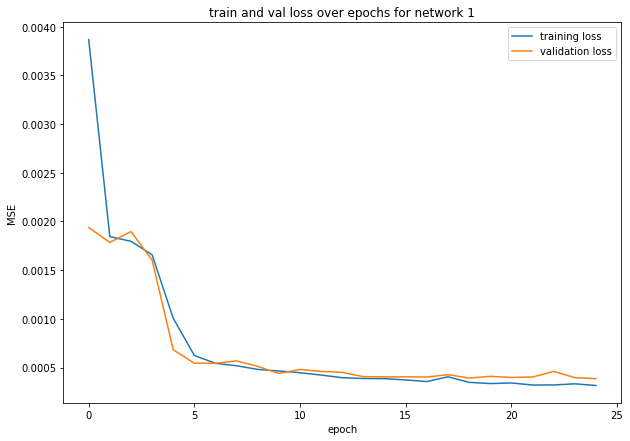
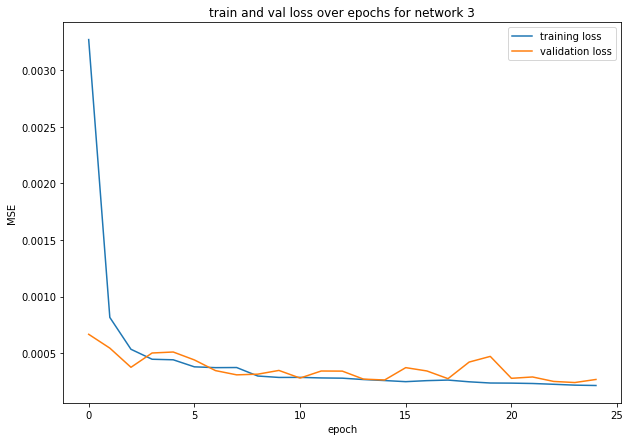
I trained for 25 epochs.
Thus, I decided to just stick with the model and hyperparameters I started out with.
Training Progression:
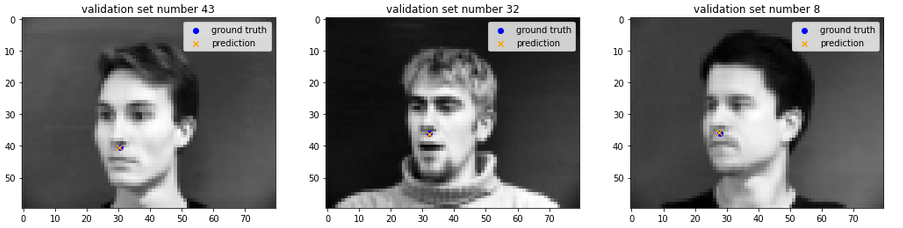
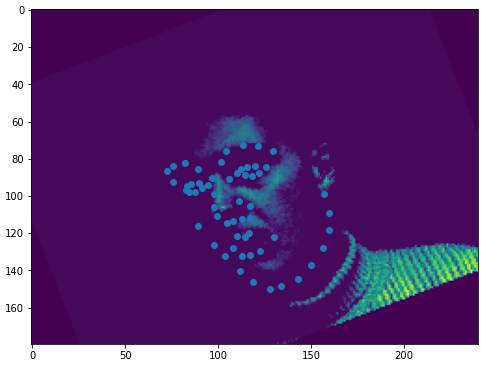
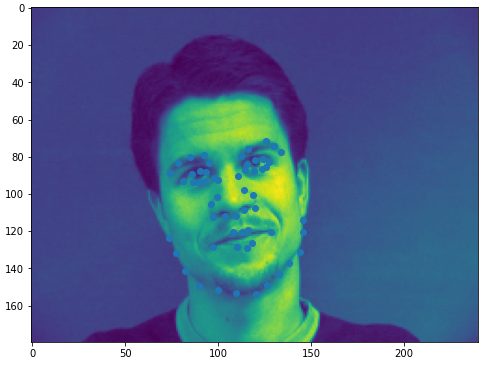
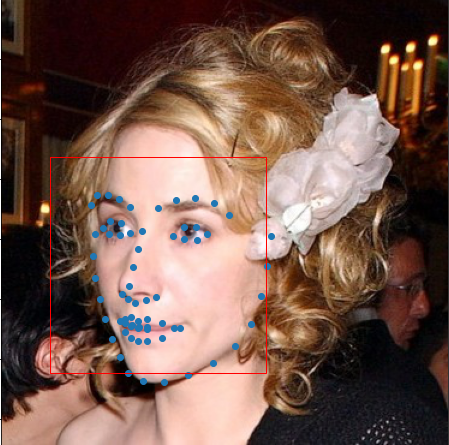
Some examples (from validation set) that did well:
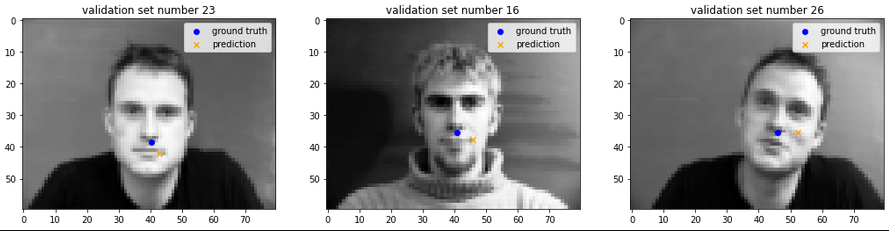
Some that did not:
One thing a lot of the bad ones had in common is that they skewed towards the right, and also, they all seemed to pick up parts of the lip.
One possibility for why this occurs is that that particular part of the lip is located in a spot that is close to where the nose could be, and also it might look a little like the dark underside of a nose.
I put them at the end of the page (Appendix), because it is honestly too much to put here there are like 3 pages worth of those
Part 2
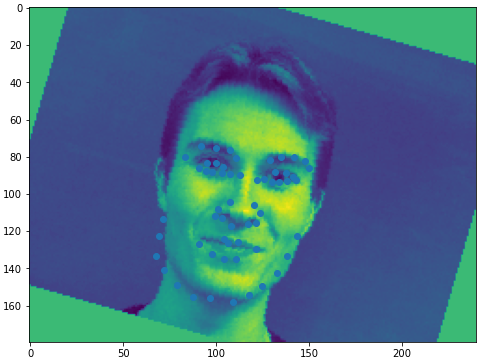
I set up the dataloader that, when called (when training, NOT when validating), has a 50% chance of doing a color jitter and a 50% chance of doing a random rotation.
Instead of using the usual way of using Pytorch transforms, I had to use the functional API so I could apply the same transform to the keypoints.
Here are some results:
I used a slightly more complex model here. A few more layers.
Its layers and activations are as follows:
Type | In | Out | Kernel | Stride |
Layer 1: Conv2d | 1 | 12 | 8x8 | 1x1 |
Activation: Relu | ||||
Layer 2: Conv2d | 12 | 12 | 8x8 | 1x1 |
Activation: Relu -> Maxpool 2x2 | ||||
Layer 3: Conv2d | 12 | 12 | 8x8 | 1x1 |
Activation: Relu | ||||
Layer 4: Conv2d | 12 | 12 | 8x8 | 1x1 |
Activation: Relu -> Maxpool 2x2 | ||||
Layer 5: Conv2d | 12 | 12 | 8x8 | 1x1 |
Activation: Relu -> Maxpool 2x2 | ||||
Layer 6: Dense | 3276 | 500 | X | X |
Activation: Relu | ||||
Layer 7: Dense | 500 | 116 | X | X |
I trained for 25 epochs, again.
I played around with the hyperparameters a little bit this time too, but like previously, I didn’t get much better results than the initial configuration.
Some dataloader samples are displayed above.
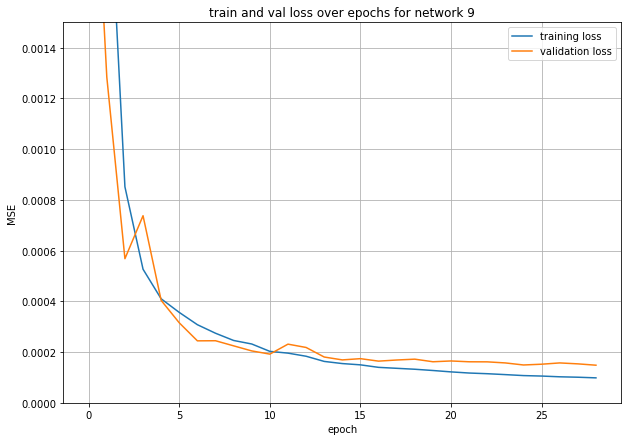
Training Progression:
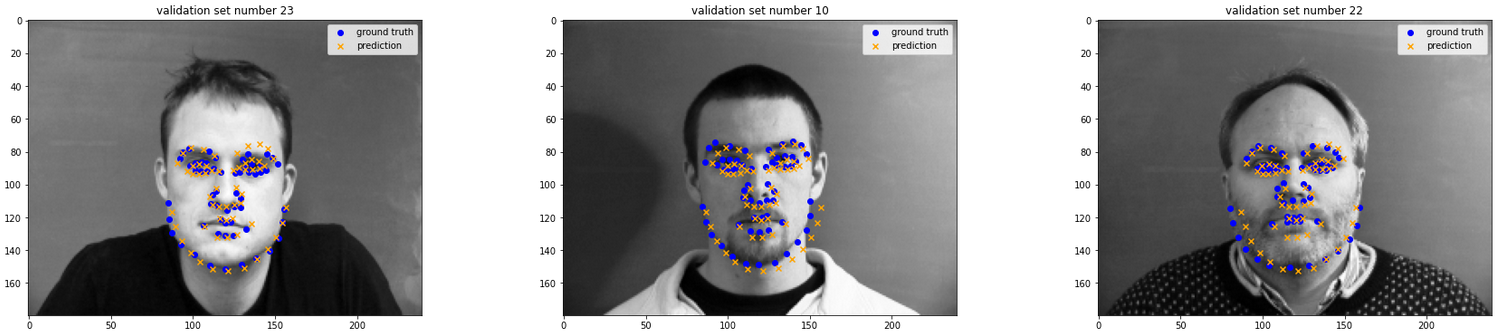
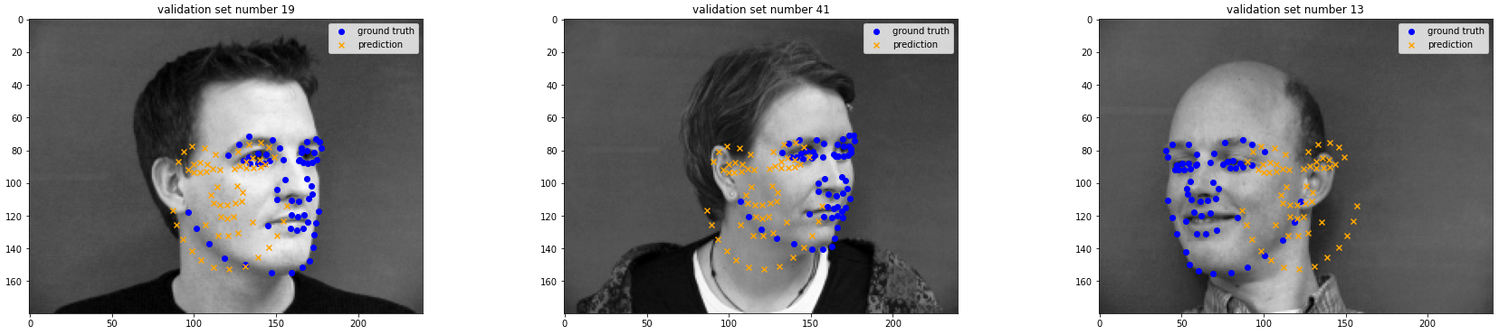
Some examples (from validation set) that did well:
Some that did not:
I discovered something very upsetting here, which is that the model decided it could achieve the best accuracy by just always putting itself in the place where the keypoints appeared the most.
So I suspect that it is not actually learning the faces.
With this painful lesson, I decided to apply what I learned in Part 3, to ensure that my Part 3 model performs better. This led to pretty good results for part 3.
I put them at the end of the page (Appendix), because it is honestly too much to put here there are like 3 pages worth of those
Part 3
According to the Kaggle website, my loss is 6.02. I achieved that by running my preferred model on the whote training set for 90 epochs (as opposed to the 30 epochs I did when trying out different models).
For the kaggle submission, my team name is “howdidanantget4.8”. This because I tried like 12 times to submit different outputs, and never cracked 6.0. But somehow, the team called Anant Sahai has a 4.8? It’s astonishing.
The first thing I did with the data was I first increased the size of all the boxes by a factor of 1.8x. This ensured that the points were actually inside the boxes and some important info don’t get cropped out.
Next, I scaled the data down to 224 by 224. That is because I wanted to use Pytorch’s pretrained networks which all take this size (Except for EfficientNet, which I also used, but I resized it back up for that one.)
Pytorch pretrained networks also wanted me to normalize the images. Doing so, for me, caused nan losses, so I decided not to normalize.
I used data augmentation. I tried several different methods of probabilistic data augmentation. The one I ultimately went with is described in the next section.
I used a 4866:1800 data split at first. Once I settled on a model, I used a 6586:80 split to train the model used for submission.
I trained 9 different models. Models 1-3 were trained without data augmentation. Models 4-9 were trained with data augmentation. I ended up using the 9th model for my submission. The rest, I put in the appendix.
My data augmentation thing does the following to ALL data (training, validation, and test):
Then it does the following to training data ONLY:
I got test loss of 6.21682 according to kaggle. I got this by rounding all the predictions to the nearest integer. If I do not round, the test loss is slightly lower.
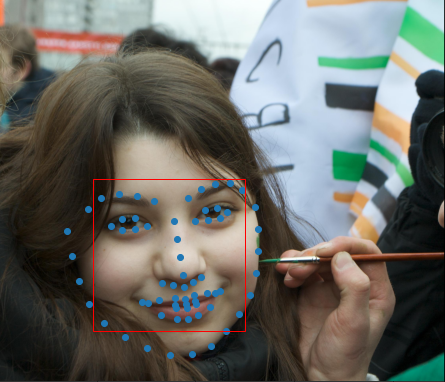
How the model did on some examples from the test set:
Honestly, the model did really well on most of these images. I don’t think, as a human, I would have been able to do much better.
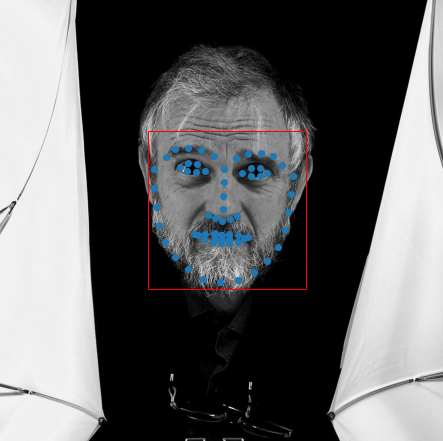
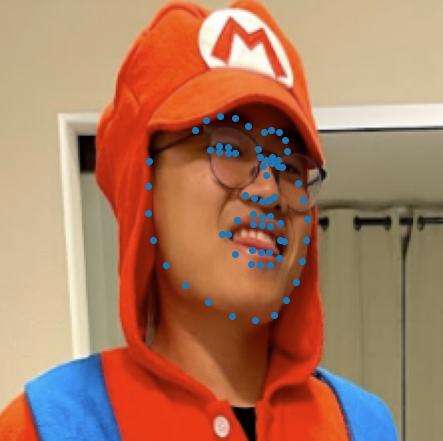
Then I gave it some of my own images. First one is anakin, second one is me, third is the guy from the Berkeley Code Code poster:
Overall, this performed well at getting the face shape of all 3. It has near-perfect performance for Anakin. But for me and poster guy, the model struggled with our eyes.
This made me realize that maybe the model doesn’t perform well with glasses.
If I had a lot more time, I would augment the data by probabilistically adding fake glasses to the pictures.
Appendix
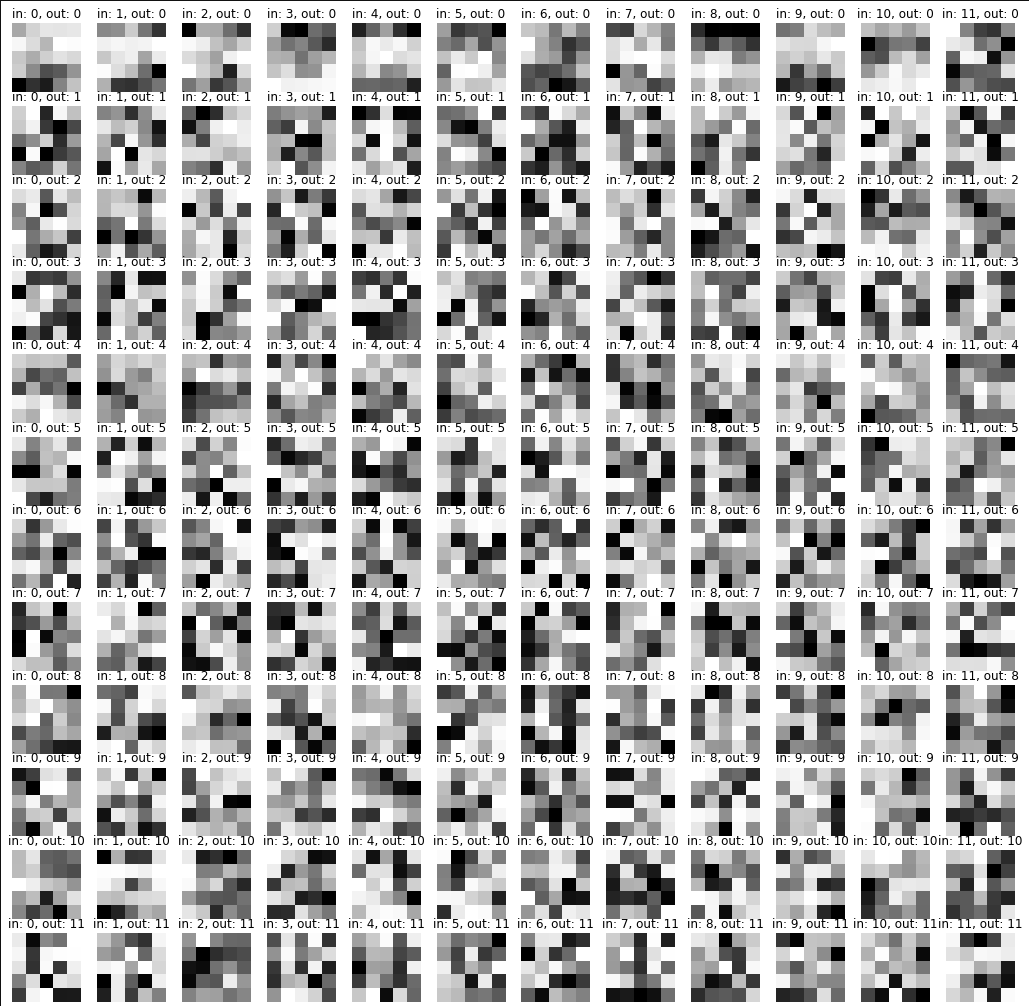
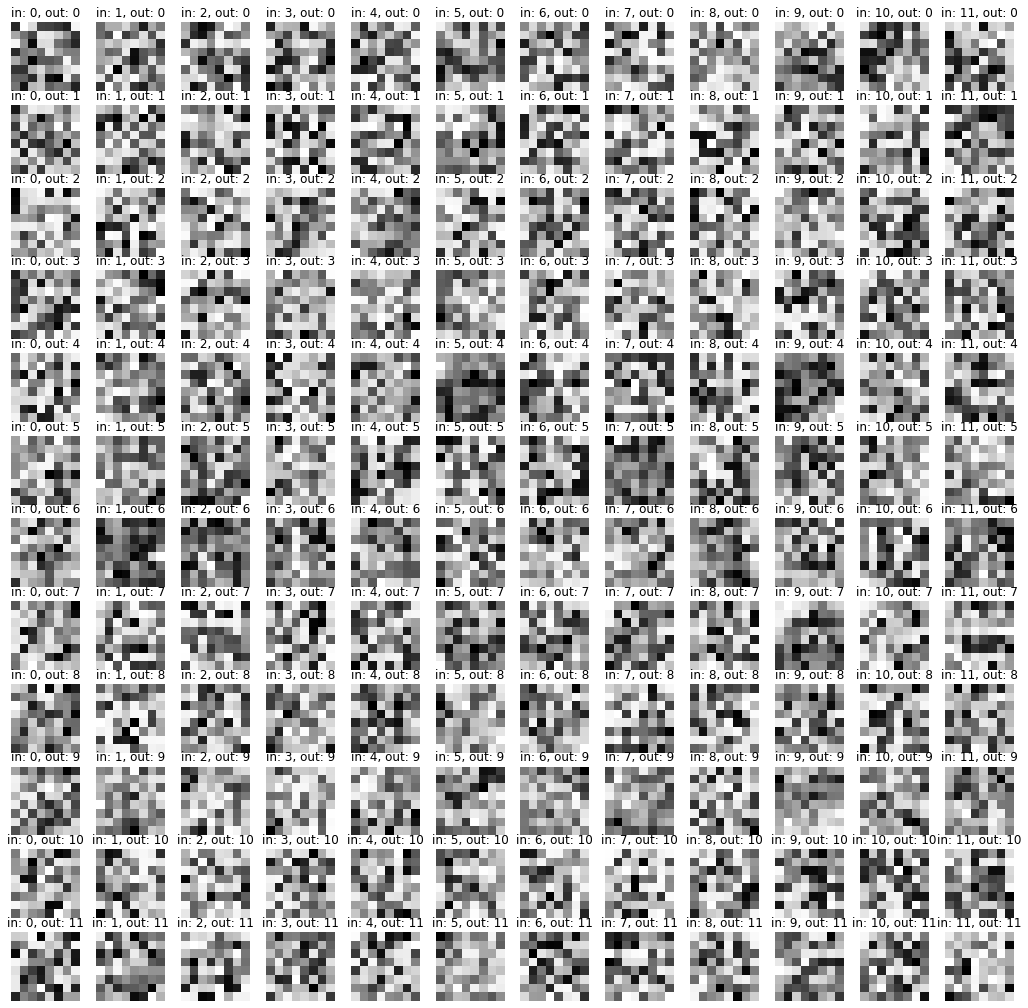
Conv 1
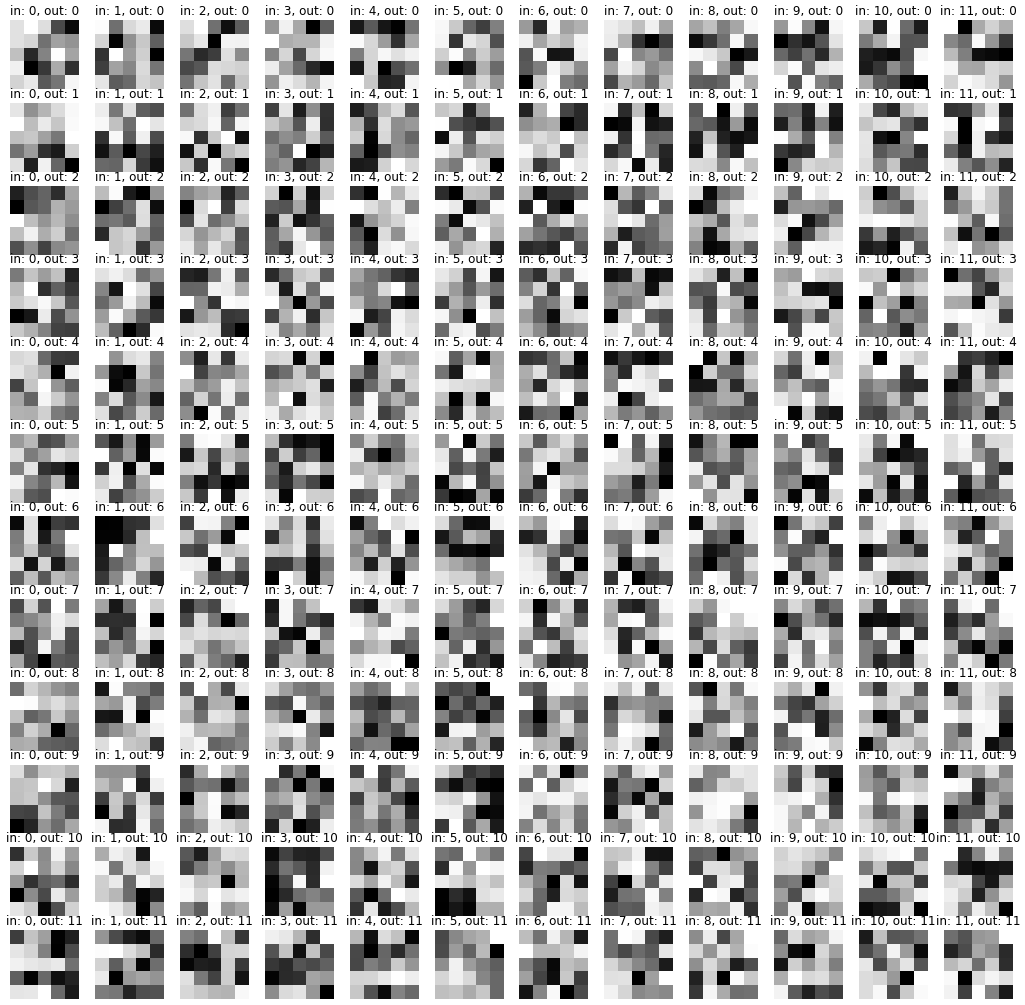
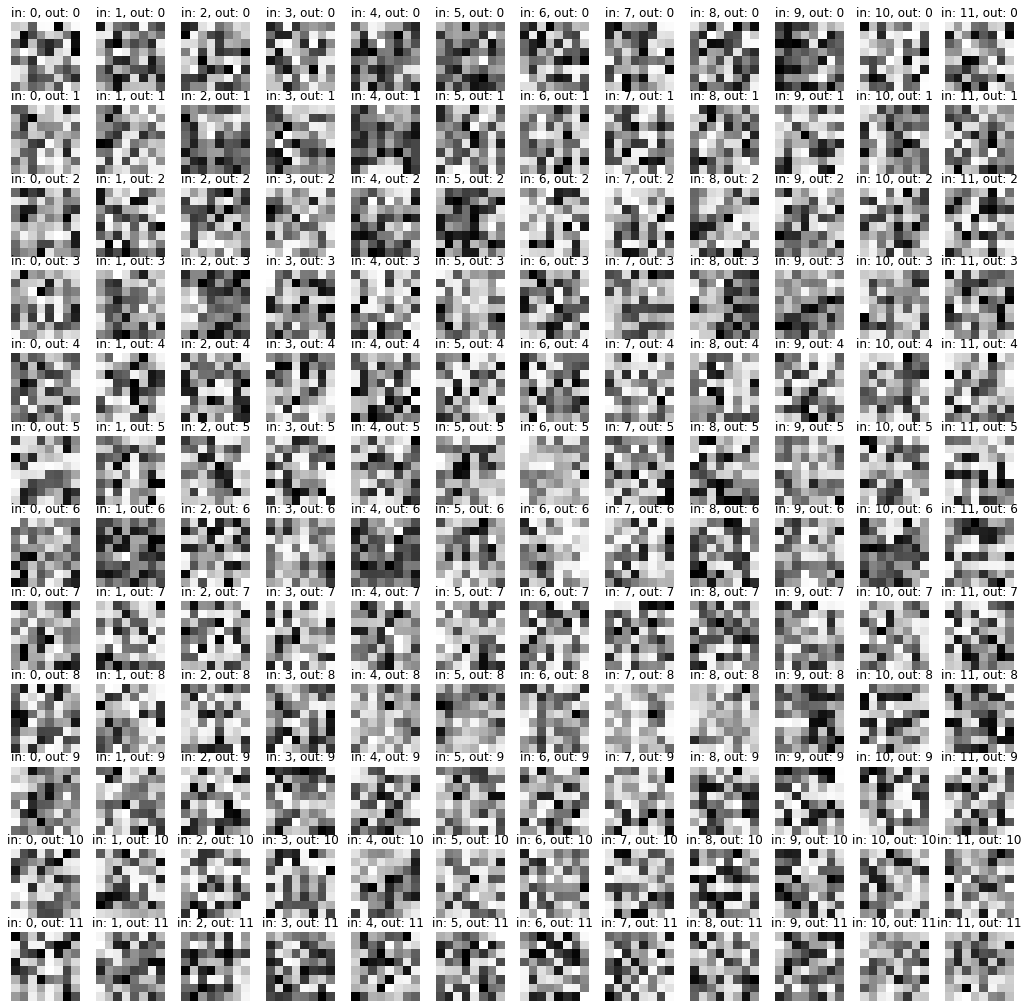
Conv 2
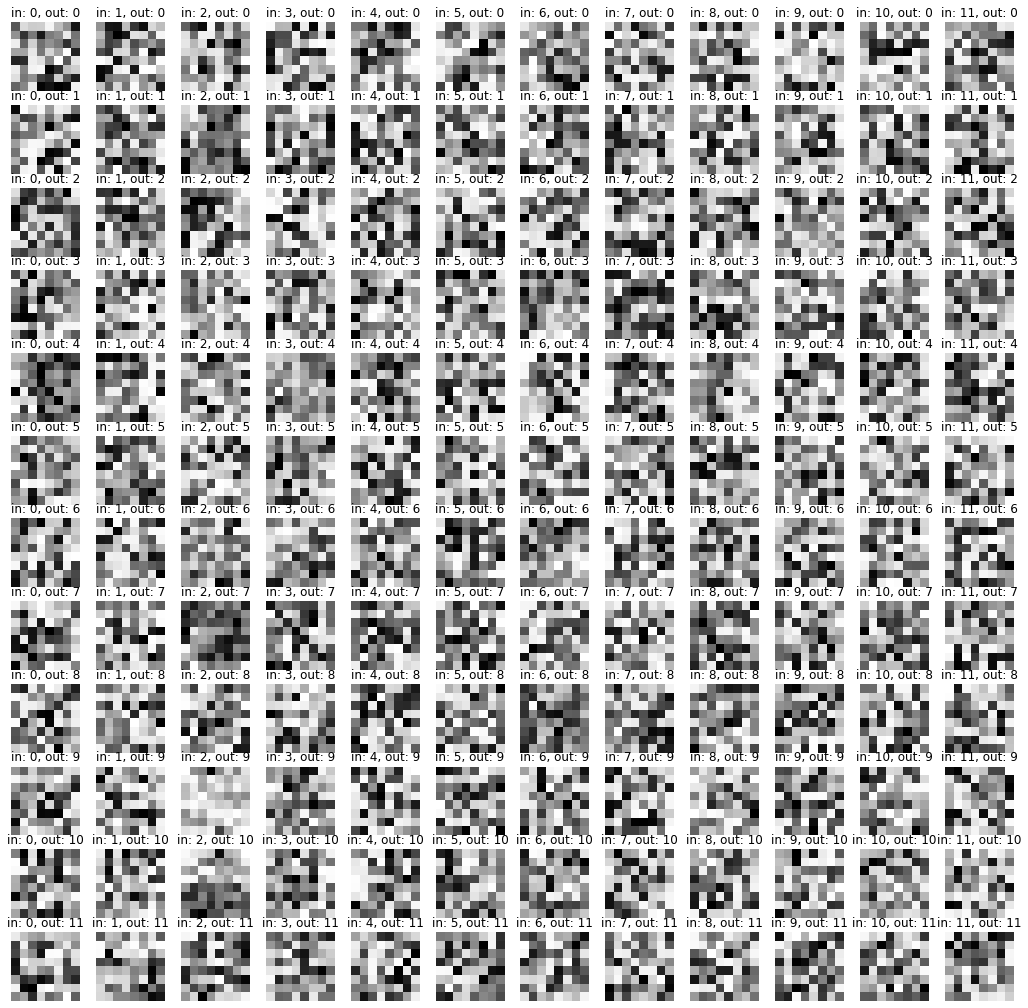
Conv 3
,,,
,
Final Valid acc: 4e-4
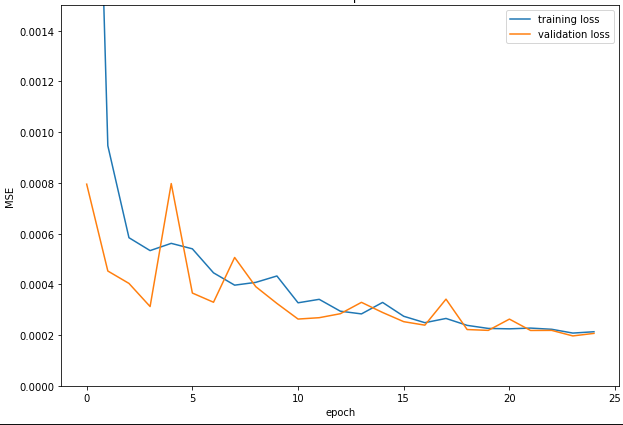
Final Valid acc: 2.6e-4
This was actually very promising, so for many of the remaining models I used Resnet34 with different hyperparameters.
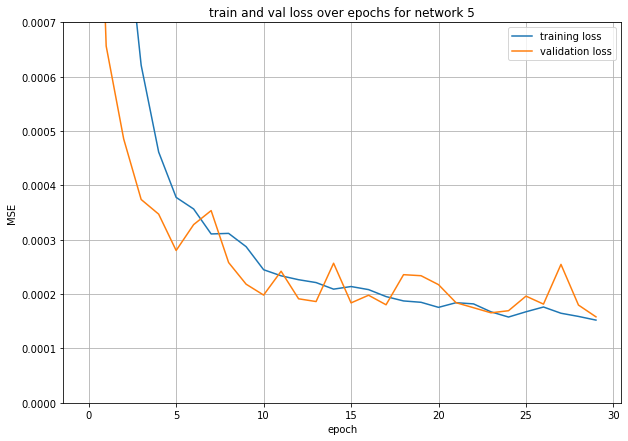
Final Valid acc: 2.3 e-4
This was better than the previous one.
It was at this point, I realized that the training loss wasn’t converging enough. So I started playing with the learning rate.
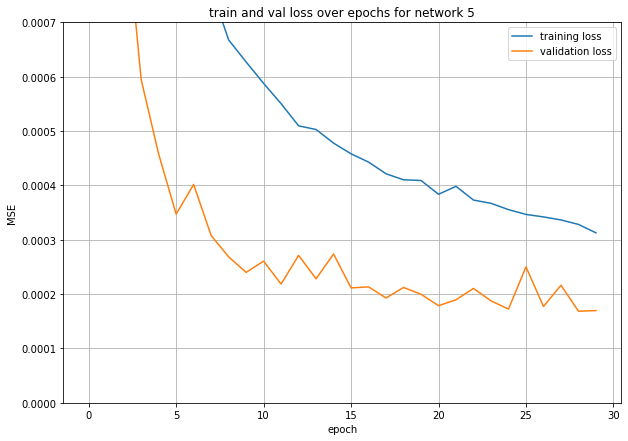
This gave me a big jump in final valid acc. It is 1.5e-4. But the problem here is that it’s a little slow.
Now that I can reliably get the training loss to keep going down, I started wondering if I was overfitting. So I started using other networks to see if they would be better or worse. I started with the smaller Resnet 18.
Final valid acc: 1.8e-4. Resnet 18 is worse.
I don’t really understand all the math behind this thing, but it seems to be pretty hyped so I tried it.
Final Valid Acc: 1.7e-4
This thing generalizes really well compared to Resnet. However, it was SUPER SUPER SLOW. Even on a RTX 3090, it took like 2 minutes per epoch.
Plus, it messed with TQDM so I didn’t even get to see my progress. So psychologically, it’s even worse.
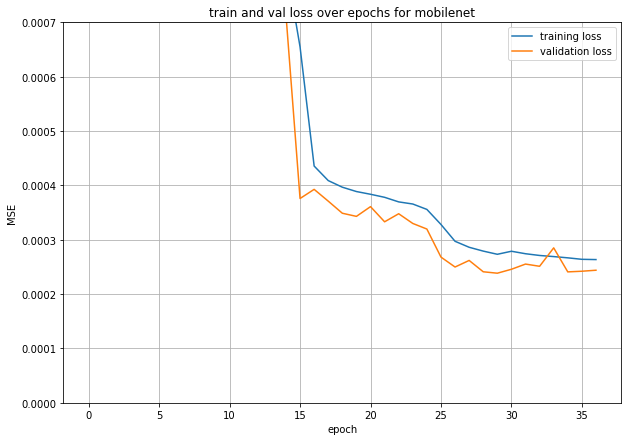
I recall reading somewhere that someone won a kaggle competition using a version of Mobilenet, so I decided to try it out for myself.
I used the LR decay thing to speed things up.
Its behavior was not good. Final valid acc was 2.4e-4.