CS 194-26 Final Project Report
Kristy Lee
kristylee@berkeley.edu
For my final project, I decided to work on the Light Field Camera and Image Quilting Projects.
Light Field Camera
The Light Field Camera project is inspired by the "Light Field Photography with a Hand-held Plenoptic Camera" paper by Ng et. al. Multiple effects on photo can be achieved after capturing multiple photos of the same object at slightly different views by using shifting and averaging.
Depth Refocusing
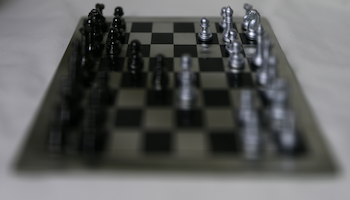
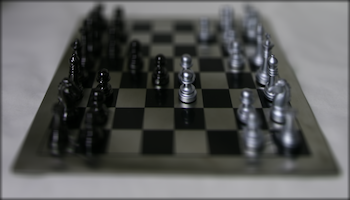
Depth refocusing involves using all the grid images to simulate a camera at different depths through operations like shifting and averaging. The images are organized into a 17x17 grid for the chessboard and the center image is the 8x8 image. For simulating the camera at different depths, I shifted all images in the grid to the center image by taking differences in the camera coordinates (grid position) relative to the center image's camera coordinates: for x, I calculate shift using image_x_position - 8 (8 is the center) and for y, I calculate shift using 8 - image_y_position. Then, once I have obtained the x and y shifts for a particular image, I scale the shifts by a value C to add refocusing effects. Then after shifting (by the scaled shifts) all images to the center image, I average all the images.
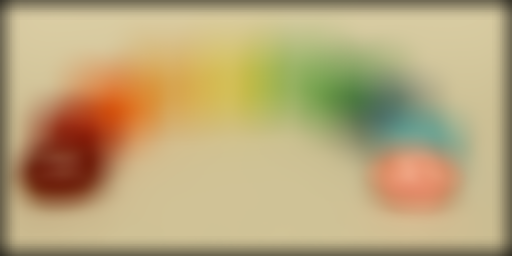
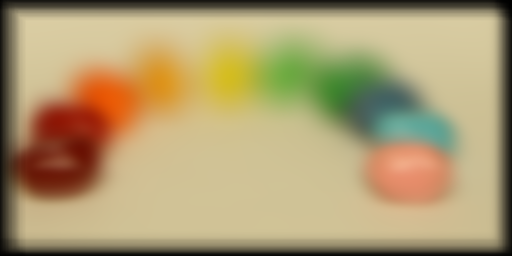
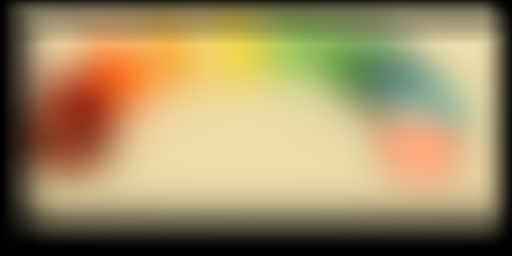
First, without shifting, here is the photo generated by averaging all chessboard images:

|
Here are the results of depth refocusing on the chessboard:

|

|

|

|
|

|

|

|

|

|

|
One thing noticeable here is that when we use lower values of C, the focus of the camera tends to be on objects further away, while when we use higher values of C, the focus of the camera tends to be on objects closer. Here's a .gif that goes through the different C values in order:

|
Aperture Adjustment
Aperture Adjustment involves selecting grid images whose distance from the center image fall within a certain radius, and shifting all those images to the center image after applying a scale C = 1.5 to the shifts. Then after shifting all images to the center image, I average all the images. Here are the results on the chessboard:

|

|

|

|

|

|

|

|

|

|

|
|
Here's a .gif that goes through the different radius values in order to display aperture adjustment:

|
Another Example
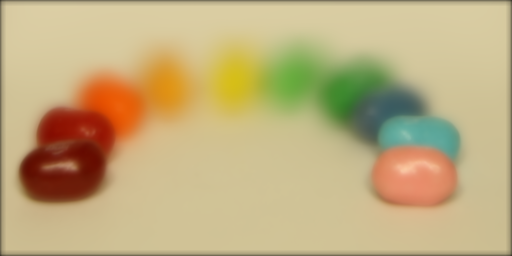
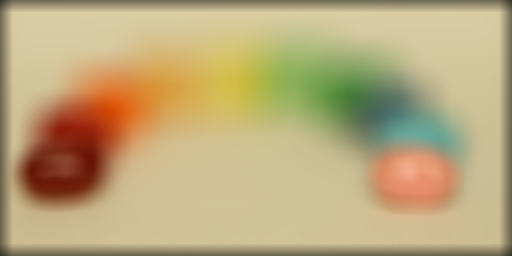
Here's a similar example using jellybeans on a 17x17 grid:

|

|

|

|

|
|

|

|
|

|
|
Here are the results of depth refocusing on the jellybean:

|

|

|

|

|

|
|

|
|

|

|

|

|
Here's a .gif that goes through the different radius values in order for aperture adjustment:

|
Bells & Whistles
I attempted to perform the light field camera depth refocusing and aperture adjustment on some images of a tissue box taken at various angles. I used a 5x5 grid for the tissue boxes, and the center image is the (2,2)th image (0 indexed). You can find the images in this Google Drive folder. My result is not perfect but this is an attempt. Depth refocusing showed some blurry flashes but noticeable color changes. Aperture adjustment worked as expected: as radius gets larger, the image gets blurrier. Here are the top left, center, and bottom right images.

|

|

|
Here are the depth refocusing and aperture adjustment gifs (used YouTube Videos instead of displaying actual gifs)
(The video link in case): https://www.youtube.com/watch?v=UgMNQiQ12ws. Depth Refocusing.
(The video link in case): https://www.youtube.com/watch?v=BvTEixM5r0Q. Aperture Adjustment.
Summary
I learned about how multiple images of the same object taken at different viewpoints over a grid can be used to mimic camera depth refocusing and aperture adjustment. I learned how scaling shifts can be important for bringing focus to different areas of an image.
Image Quilting
The image quilting project is inspired by the SIGGRAPH 2001 paper by Efros and Freeman, "Image Quilting for Texture Synthesis and Transfer" and implements the image quilting algorithm in multiple phases. I first look at randomly sampling texture to create an image quilt, and then using overlapping patches to create an image quilt. Then, I look at finding precise seams in the overlapping regions between patches in order to stitch patches together to form the image quilt, and finally I implement a texture transfer algorithm to transfer corresponding patches onto a target image's figure.
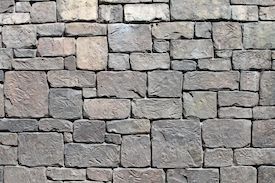
Here are the textures I look at in this project:

|
|

|

|

|
Randomly Sampled Texture
For this part, given a source image, I randomly sample patches (sampling with replacement applies) from a large set of patches I have generated from the source image and then tile an output image with those patches. Here are the randomly sampled textures I've produced:

|

|

|

|

|
Overlapping Patches
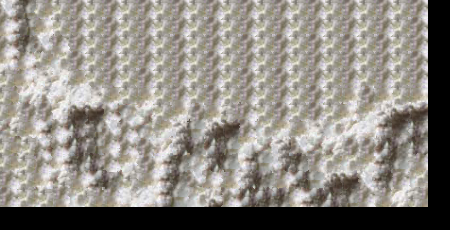
For this part, given a sample texture I populate the output image in the following manner: for the top left corner, I choose a patch at random, and then each subsequent patch will have an overlap either at the top or left or both top and left. To populate the overlapping patches in the output image, for each position of the output image I examine the overlap region of the output image that I'm currently generating, and I go through all the patches, compute the ssd between the patch overlap region and the output image overlap region (using a function I defined called ssd_patch), and select one patch randomly from the patches that fit the constraint that its SSD < (lowest SSD * (1+tol)), where I define tol = 0.0001. I perform the aforementioned patch selection process in the choose_sample function I've coded. Once I selected the patch, I replaced the output image's overlap region with (output image's overlap region + patch's overlap region) / 2, and then fill the rest of the output image with the remainder of the patch. Note that if there is a top and left overlap involved when patching, my ssd computation would involve both the top and left overlap of the patch with the overlap of the generated output image. Here are the resulting textures from overlapping patches. If you zoom in, you can see the patches more clearly defined but they look like they integrate more smoothly than in the randomly sampled case (obviously):

|
|

|

|

|
Seam Finding
Here, we perform a similar computation with SSD and tol (set tol=0.001 for this section) as stated above to select patches in order to find one of the best patches to overlap with the generated output image following the procedure described above. However, once the patch is selected, we don't just compute (output image's overlap region + patch's overlap region) / 2 to fill the overlap portion of the output image. Instead, we compute a cut through the overlapping region to find the min-cost contiguous path mask through the overlapping region that would dictate which pixels of the overlap region the generated output image's overlap region would contribute to and which pixels of the overlap region the patch's overlap region would contribute to. We compute the min-cost contiguous path cut through examining the error patch (each pixel of the error patch is the corresponding difference between one pixel of the output image's overlap region and one pixel of the patch's overlap region). The customized_cut function finds the min-cost contiguous path from left to right, but if the overlap is along a vertical edge, I would compute the cut mask on the transpose of the err_patch, then transpose the cut mask again to gain the correct orientation. If there are top and left overlaps, then I would obtain both cut masks and intersect them to form one whole mask for the top and left overlaps. Here are some example masks:

|

|

|

|
After using the masks, the boundaries between patches are distinct paths: for example, here, you can see that the cut is not linear but instead a distinct path:

|

|
For a specific example of mask, cost (squared difference) (https://docs.google.com/document/d/1Tcl8Vu3egsqBiH12ID_eaPXydLxmglnS3FVB0oRZy_E/edit), and corresponding two patches, see the following:

|

|

|

|
Here are the generated output image quilts from deriving cuts that are min-cost contiguous paths between adjacent patches rather than blocked-out overlaps. I defined a quilt-cut function that outputs the quilt.

|
|

|

|

|
The resulting quilts here have smoother transitions in texture than the quilts produced by overlapping patches without finding precise seams.
Other examples:

|

|
|

|
Texture Transfer
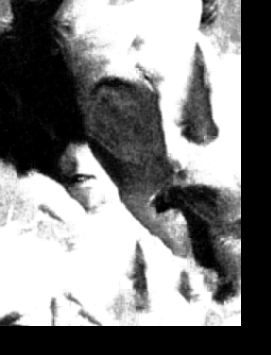
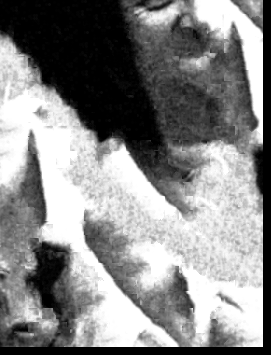
Now, in this part we try to transfer patches of texture from a source image onto a target image, where the target image dictates the pattern that we want to match with the patches. To perform the following operation, I basically perform the same operations as I've done in the seam-finding section (for determining the boundaries between patches). However, to account for texture transfer the SSD calculation is updated in the following way: we calculate two SSDs - one between the overlapping regions of the output (patched) image and the patch and one between the patch and the corresponding region of the target image. We use a weight term \(\alpha\) to place weight on both SSDs to produce the final SSD that would contribute to the choosing the patch in choose_sample. In choose_sample and ssd_patch, I used \(\alpha = 0.1\) and computed SSD = \(\alpha\) * SSD_overlap + \(1 - \alpha\) SSD_guidance_im for each candidate patch and select one patch randomly from the patches that fit the constraint that its SSD < (lowest SSD * (1+tol)), where I use tol=0.001. The reason why SSD_guidance_im is a useful measure is because patches that are similar to the target image's region will have less difference in pixel colors (and thus pixel values) than dissimilar patches, so it makes sense to minimize the SSD in this context. Here are some example texture transfer images:
|
|

|
Some of the lighter patches are gathered around in such a manner as to represent the man's face.
Here are other examples where the object is distinct against the background:

|

|

|
|

|

|

|
Bells & Whistles
- I worked on a Python version of the cut code. My code is in the ipynb. I looked at cut.m and also at the program methodology described in https://yxw.cs.illinois.edu/course/CS445/F21/projects/quilting/ComputationalPhotography_ProjectQuilting.html for assistance.
Summary
I learned about how to sample patches smartly to create a image quilt: I learned about how to blend patches together to form a contiguous-patterned image quilt and also how to transfer patch texture to form the pattern of a target image.
Acknowledgements
- Project Description for Light Field Camera
- Project Description for Image Quilting
- Chessboard, Jellybean, Bricks, Feynman, Sketch, Text, White Small images all obtained from respective websites.
- I took the tissue box photos myself.
- I've obtained the potato, black brick wall, and stone wall images from Google search (using exact/similar terms stated). I obtained the banana from this website http://graphics.cs.cmu.edu/people/efros/research/quilting/results3.html
- I looked at https://yxw.cs.illinois.edu/course/CS445/F21/projects/quilting/ComputationalPhotography_ProjectQuilting.html.