Overview
For the final project, I decided to do both Poor Man's Augmented Reality and Image Quilting. The first project involves taking a video of a static
box with a simple pattern/distinct points on it and using camera calibration, homographies, and world2image transformations to project a cube onto the video that respects the camera's viewing direction and position.
For the second project, Image Quilting, I had to re-implement the paper, Image Quilting for Texture Synthesis and Transfer (Efros, Freeman). This involved using a minimum error boundary cut on overlapping patches sampled from the original texture. Using this method, we could perform texture synthesis and also texture transfer onto a new image.
Project 1: Poor Man's Augmented Reality
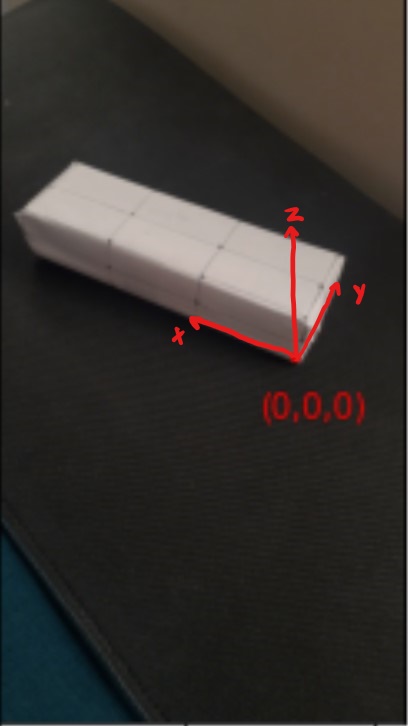
Setup & Keypoints with known 3D world coordinates:
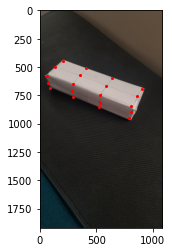
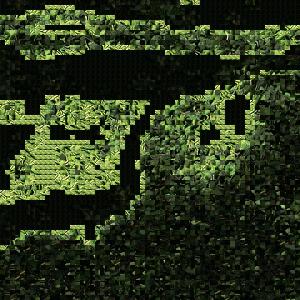
I first captured the following video and identified both the image and world coordinates of the keypoints. I had to ensure that the points were the same distance apart respective to the pattern and that there was a decent amount of contrast within the foreground box and background wall and surface.
|
|
Propagating Keypoints to other Images in the Video:
In order to propagate the 2D keypoints to the other frames within the video, I used an off-the-shelf tracker (MEDIANFLOW) following the provided tutorial. This involved initializing a separate tracker for each of the 20 keypoints that I was attempting to track. For each frame, I update the tracker and stored the 2D image coordinates accordingly-- since the tracker outputted a bounding box with varying widths and heights, I simply calculated the center point of the box to use as my frame i keypoint. The following is the outputted video of the keypoints propagating across all frames:
Calibrating the Camera & Projecting a cube in the Scene
In order to calibrate the camera and project a cube into the scene, I first converted my arrays for the image and world coordinates into homogeneous coordinates. Then, I computed a camera projection matrix for each frame based on the 4D world coordinates and the frame-specific 3D image coordinates outputted from the tracker. I defined the 4D world coordinates for my cube and for each frame, I transformed the cube's world coordinates into image coordinates in order to plot them onto the frame. Here is the outputted gif after combining all of the frames together. At times, the cube jumps around a bit, most likely due to the noise/inaccuracies from the tracker. This is also a much more compressed version as the original GIF was quite large:
Project 2: Image Quilting
Random vs. Overlapped vs. Seam Finding Texture Synthesis:
Randomly Sampled Texture:
Going in raster-scan order, I randomly sampled square patches of size patchsize from sample in order to create an output image of size outsize. I left black borders at any of the borders not fully covered by the square patches.
Overlapping Patches:
Going in raster-scan order, I first randomly sampled a square patch for the upper left corner. Then, I computed the SSD between the sampled patch and the rest of the image, outputting a matrix where each pixel represented the SSD error if that pixel were to be the center of the selected patch and the patches that it would overlap with. As long as the patch remained within the bounds of the image, I selected tol number of pixel centers with the lowest errors and randomly sampled a center from that list. This would be the patch that would be placed down next. If the patch is in the first row, it overlaps with the patch to its left. If it is in the first column, it overlaps with the patch above it. Otherwise, it overlaps with the patches above and to the left of it.
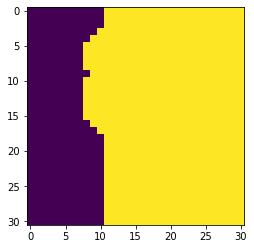
Seam Finding:
Finally, following the paper I incorporate seam finding to remove edge artifacts from the overlapping patches. I also had to ensure to transpose the input cost matrix and seam output if I was finding a vertical cut. Based on the cut and the cut type (vertical, horizontal, or both), I construct a mask for the sampled overlapping patch and apply it to the patch.
|
|

|

|

|
|
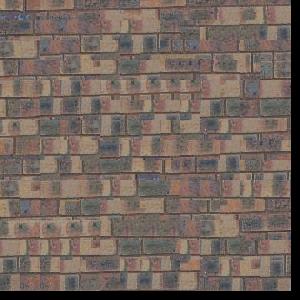
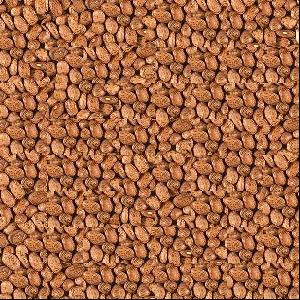
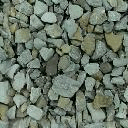
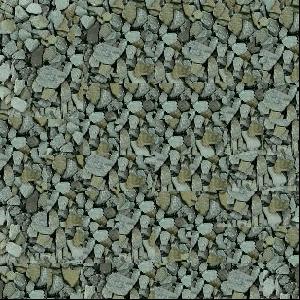
Other Image Quilting Texture Synthesis Results

|
|
|
|
|
|

|

|
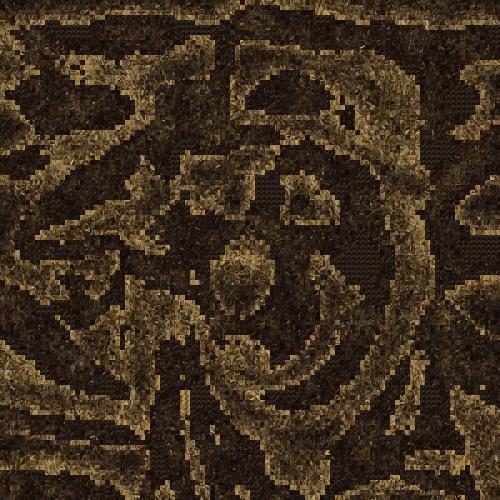
Texture Transfer:
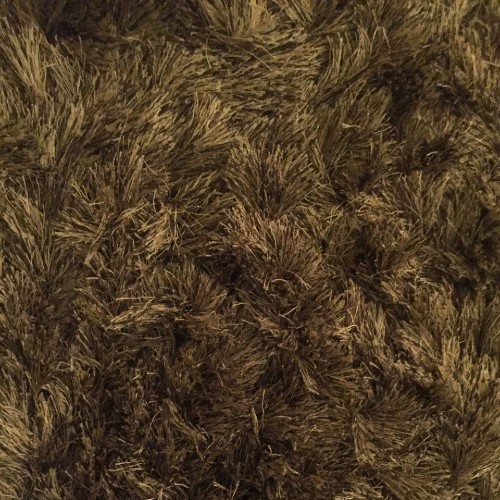
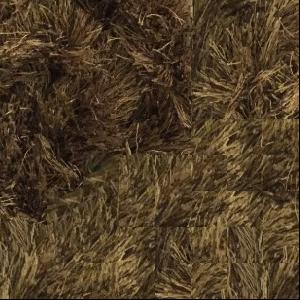
For texture transfer, there is an additional cost term based on the difference between the sampled source patch and the target patch at the location to be filled. This was a bit difficult depending on the texture type; for example, I use a patch size of 5 for OskiCarpet below, but the shag carpet texture features long and thin strands of fur, so getting the texture transfer to emulate this hair-like texture was difficult and inefficient. I also test out this method on a leaf texture-- trying to reflect the finer details in the sunset also served to be a challenge.
|
|

|
|
|
|

|
|