CS194-26 Final Projects
Risheek Pingili, Eric Zhang
[Scroll Down for projects 2 and 3]
Project 1: An Implimentation of A Neural Algorithm of Artistic Style
Don't we all love neural networks? The idea of removing all human knowledge and having an AI learn it for you has been a fascinating subject. But how does this work for art?
Art has always been considered an innately 'human' characteristic. How would an algorithm immitate human style?
In A Neural Algorithm of Artistic Style, Gatys, Ecker, and Bethge propose a network derived from VGG-19 where a blank image is reconstructed to be similar to two images, a style image and a content image.
The network compares the target image to the style images locally so that the style of the painting is immitated in the target. The style is weighted heavily in order to have the small scale "style" resemble the artwork.
The content layers will use a standard MSE Loss, while the style layers will use the mean squared error of the gram matrix of the style vs the target image, which is computed as: for the loss. The total loss for each layer is their individual loss multiplied by the its weight (for content vs style).
The losses are computed using LBFGS , or Limited-memory Broyden–Fletcher–Goldfarb–Shanno algorithm, which has a better loss for images over a short scale as a quasi-Newton's Method solver, as opposed to, for instance, ADAM, which is mainly a first order optimization method.
Here's what our network looks like:
Net(
(0): Normalization()
(conv_1): Conv2d(3, 64, kernel_size=(3, 3), stride=(1, 1), padding=(1, 1))
(style_loss_1): StyleLoss()
(relu_1): ReLU()
(conv_2): Conv2d(64, 64, kernel_size=(3, 3), stride=(1, 1), padding=(1, 1))
(style_loss_2): StyleLoss()
(relu_2): ReLU()
(pool_2): MaxPool2d(kernel_size=2, stride=2, padding=0, dilation=1, ceil_mode=False)
(conv_3): Conv2d(64, 128, kernel_size=(3, 3), stride=(1, 1), padding=(1, 1))
(style_loss_3): StyleLoss()
(relu_3): ReLU()
(conv_4): Conv2d(128, 128, kernel_size=(3, 3), stride=(1, 1), padding=(1, 1))
(style_loss_4): StyleLoss()
(content_loss_4): ContentLoss()
(relu_4): ReLU()
(pool_4): MaxPool2d(kernel_size=2, stride=2, padding=0, dilation=1, ceil_mode=False)
(conv_5): Conv2d(128, 256, kernel_size=(3, 3), stride=(1, 1), padding=(1, 1))
(style_loss_5): StyleLoss()
)
Mainly, convolution layers 1 through 5 will take the style loss, but only layer 4 will take the content loss.
Results
Lets try to mimic the paper. note: produced images have been made smaller to fit in website. Sorry!
The main settings that we can alter, are the size and the epoch count, and then the weighting of the style vs. content. We'll keep the content at 1 and manipulate the style to get varying results.
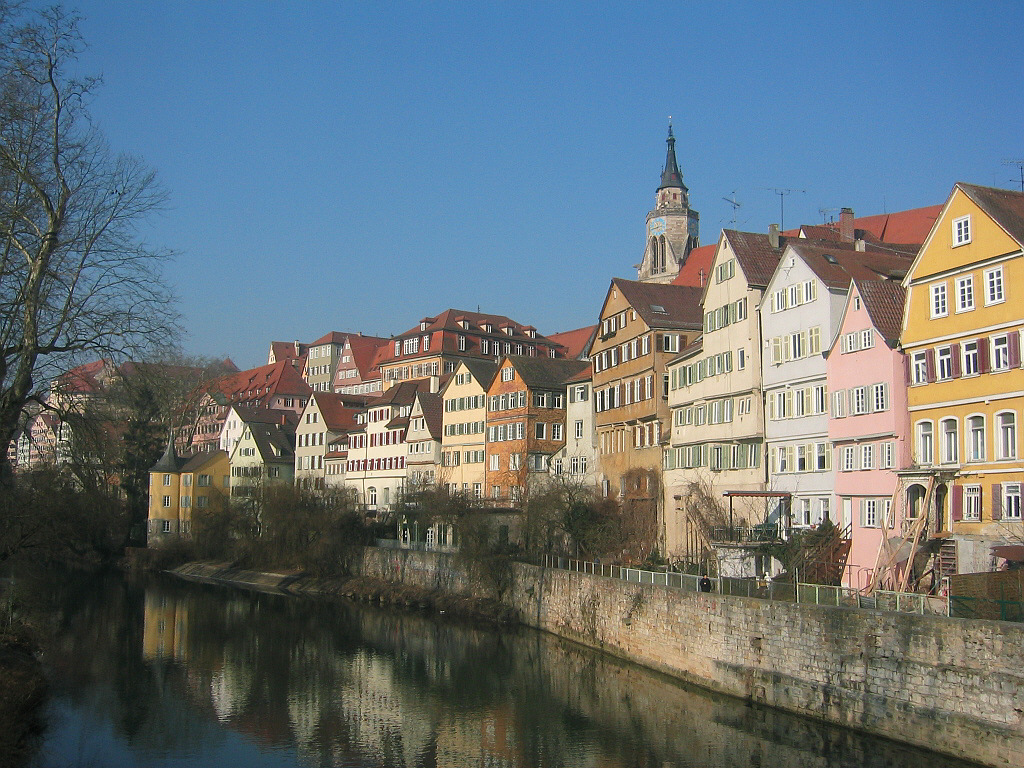
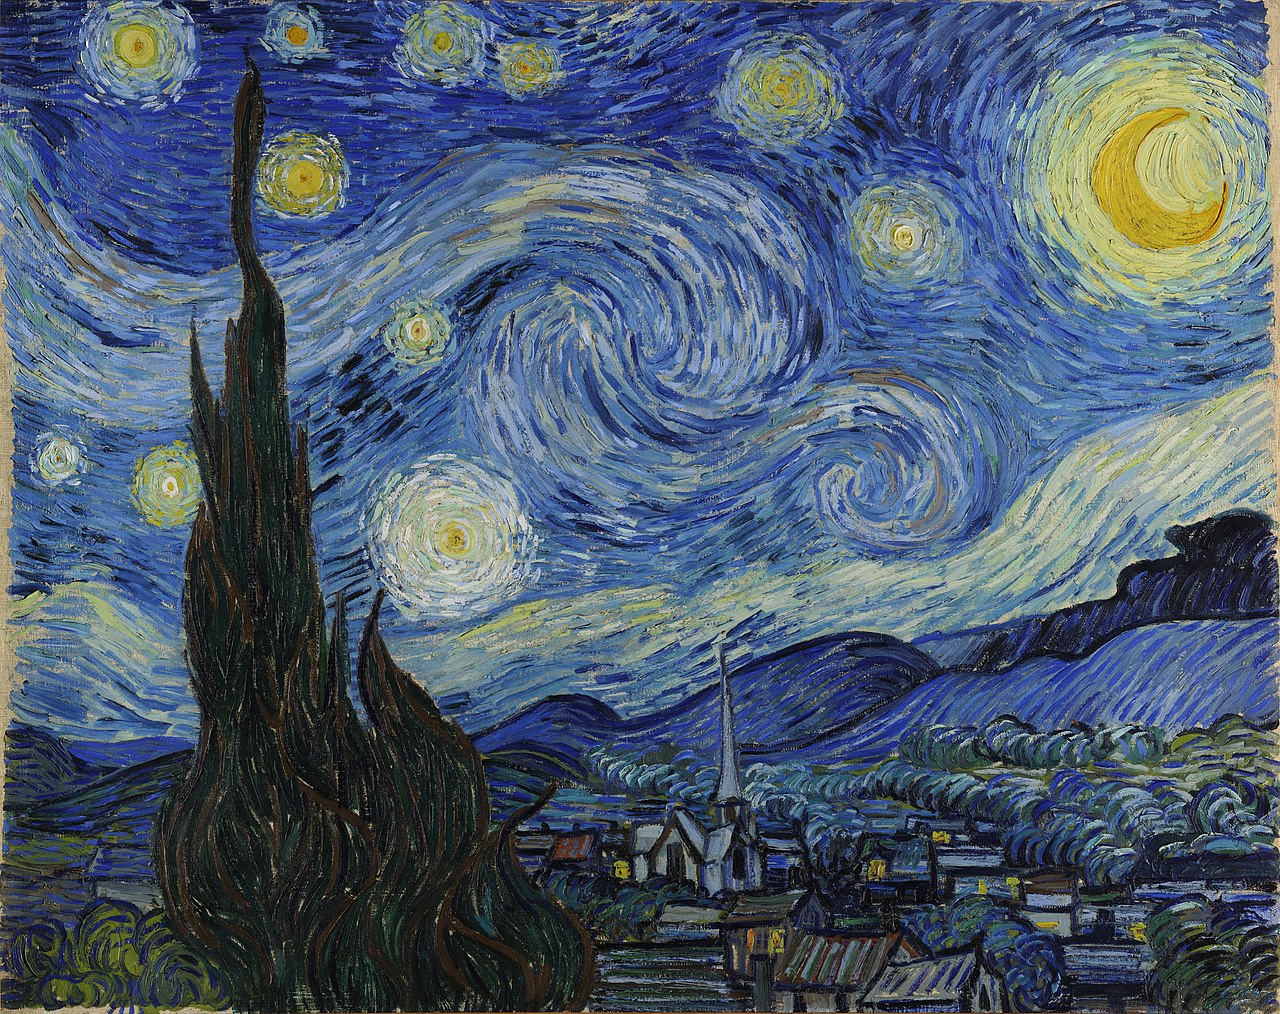
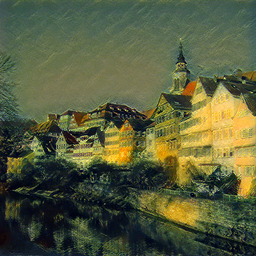
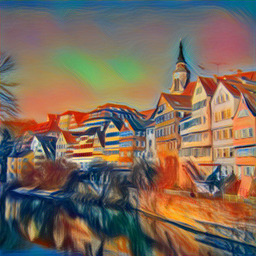
Starting with the Initial Image of a german landscape as our content image and Van Gogh's Starry Night as our style image, we'll run the network for 500 epochs, with a style weighting of 1,000,000 to 1 in content. Here's the result:
Not bad! We have less stars in our sky compared to the original papers, and our style and 'strokes' seem much farther apart. Unfortunately, increasing the style weighting won't change the former issue, but the later is a quirk of our network.
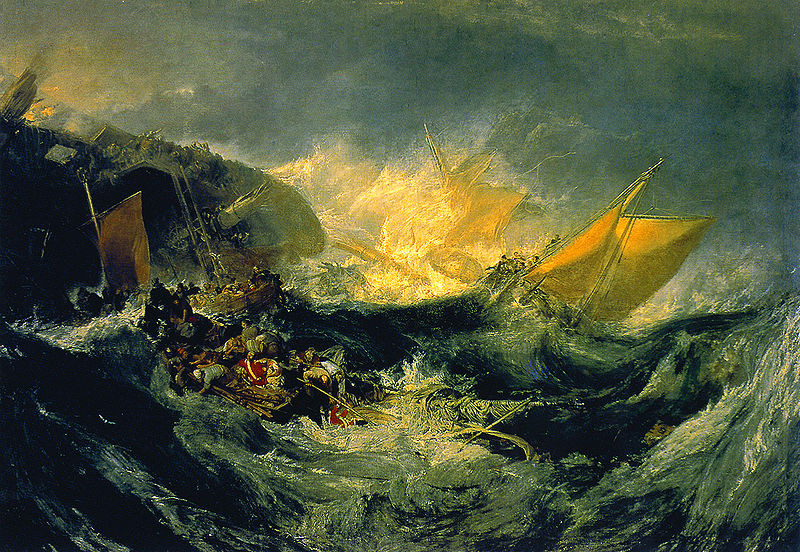
Next, we'll use the same content image and the The Shipwreck of the Minotaur by J.M.W. Turner, with a style weighting of 9.9e6 and 1500 epochs:
This one is quite close, mainly differing in the shading/coloring compared to the original image.
Another classic, we'll contrast Edvard Munch's The Scream with our content image, with a style image of 50000 and epoch count of 300:
Our image is sufficiently stylized, but doesn't have the same wavy features as in the original paper's sky. This style required a much lower weighting to still achieve an artistic feel (as determined by a human), so it makes why we have less local style features.
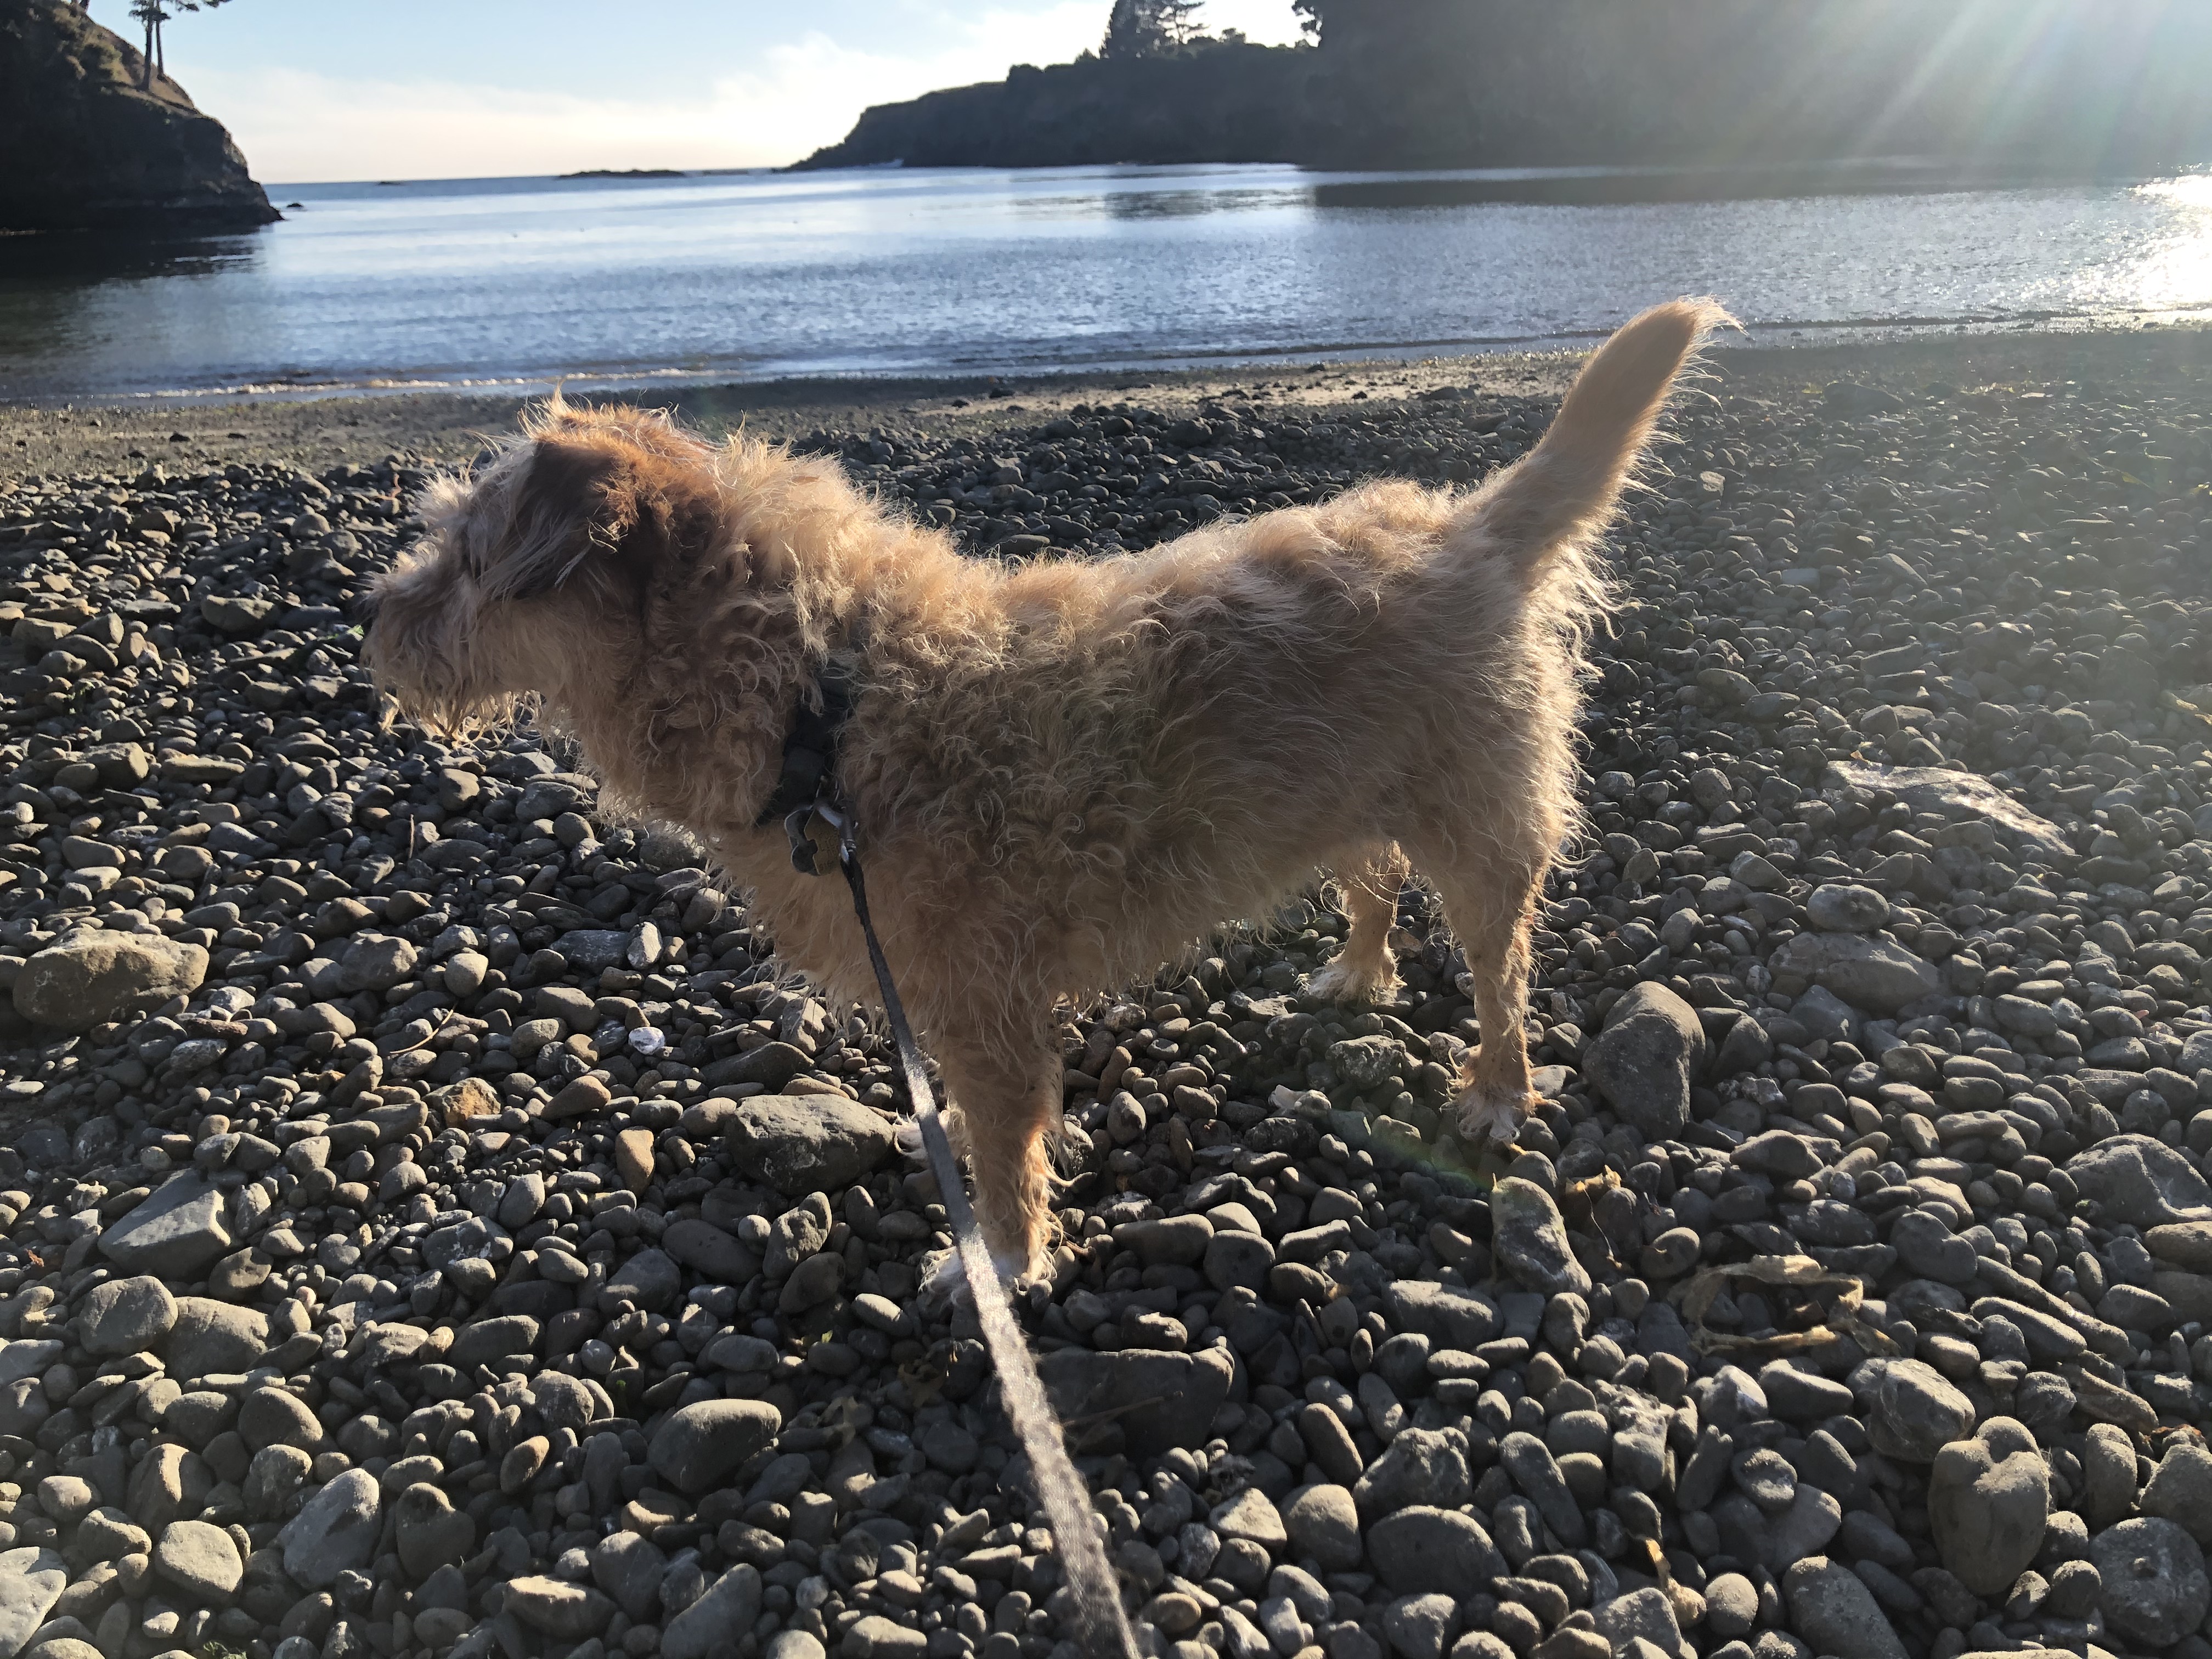
Let's try some of our own images. How about a cute (our) dog stylized with The Scream (Style weight = 1000000, epochs = 300):
Cute! There is a neat blend of color as well, while the consistent part of the water stays blue.
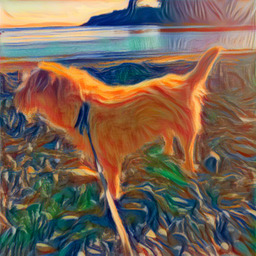
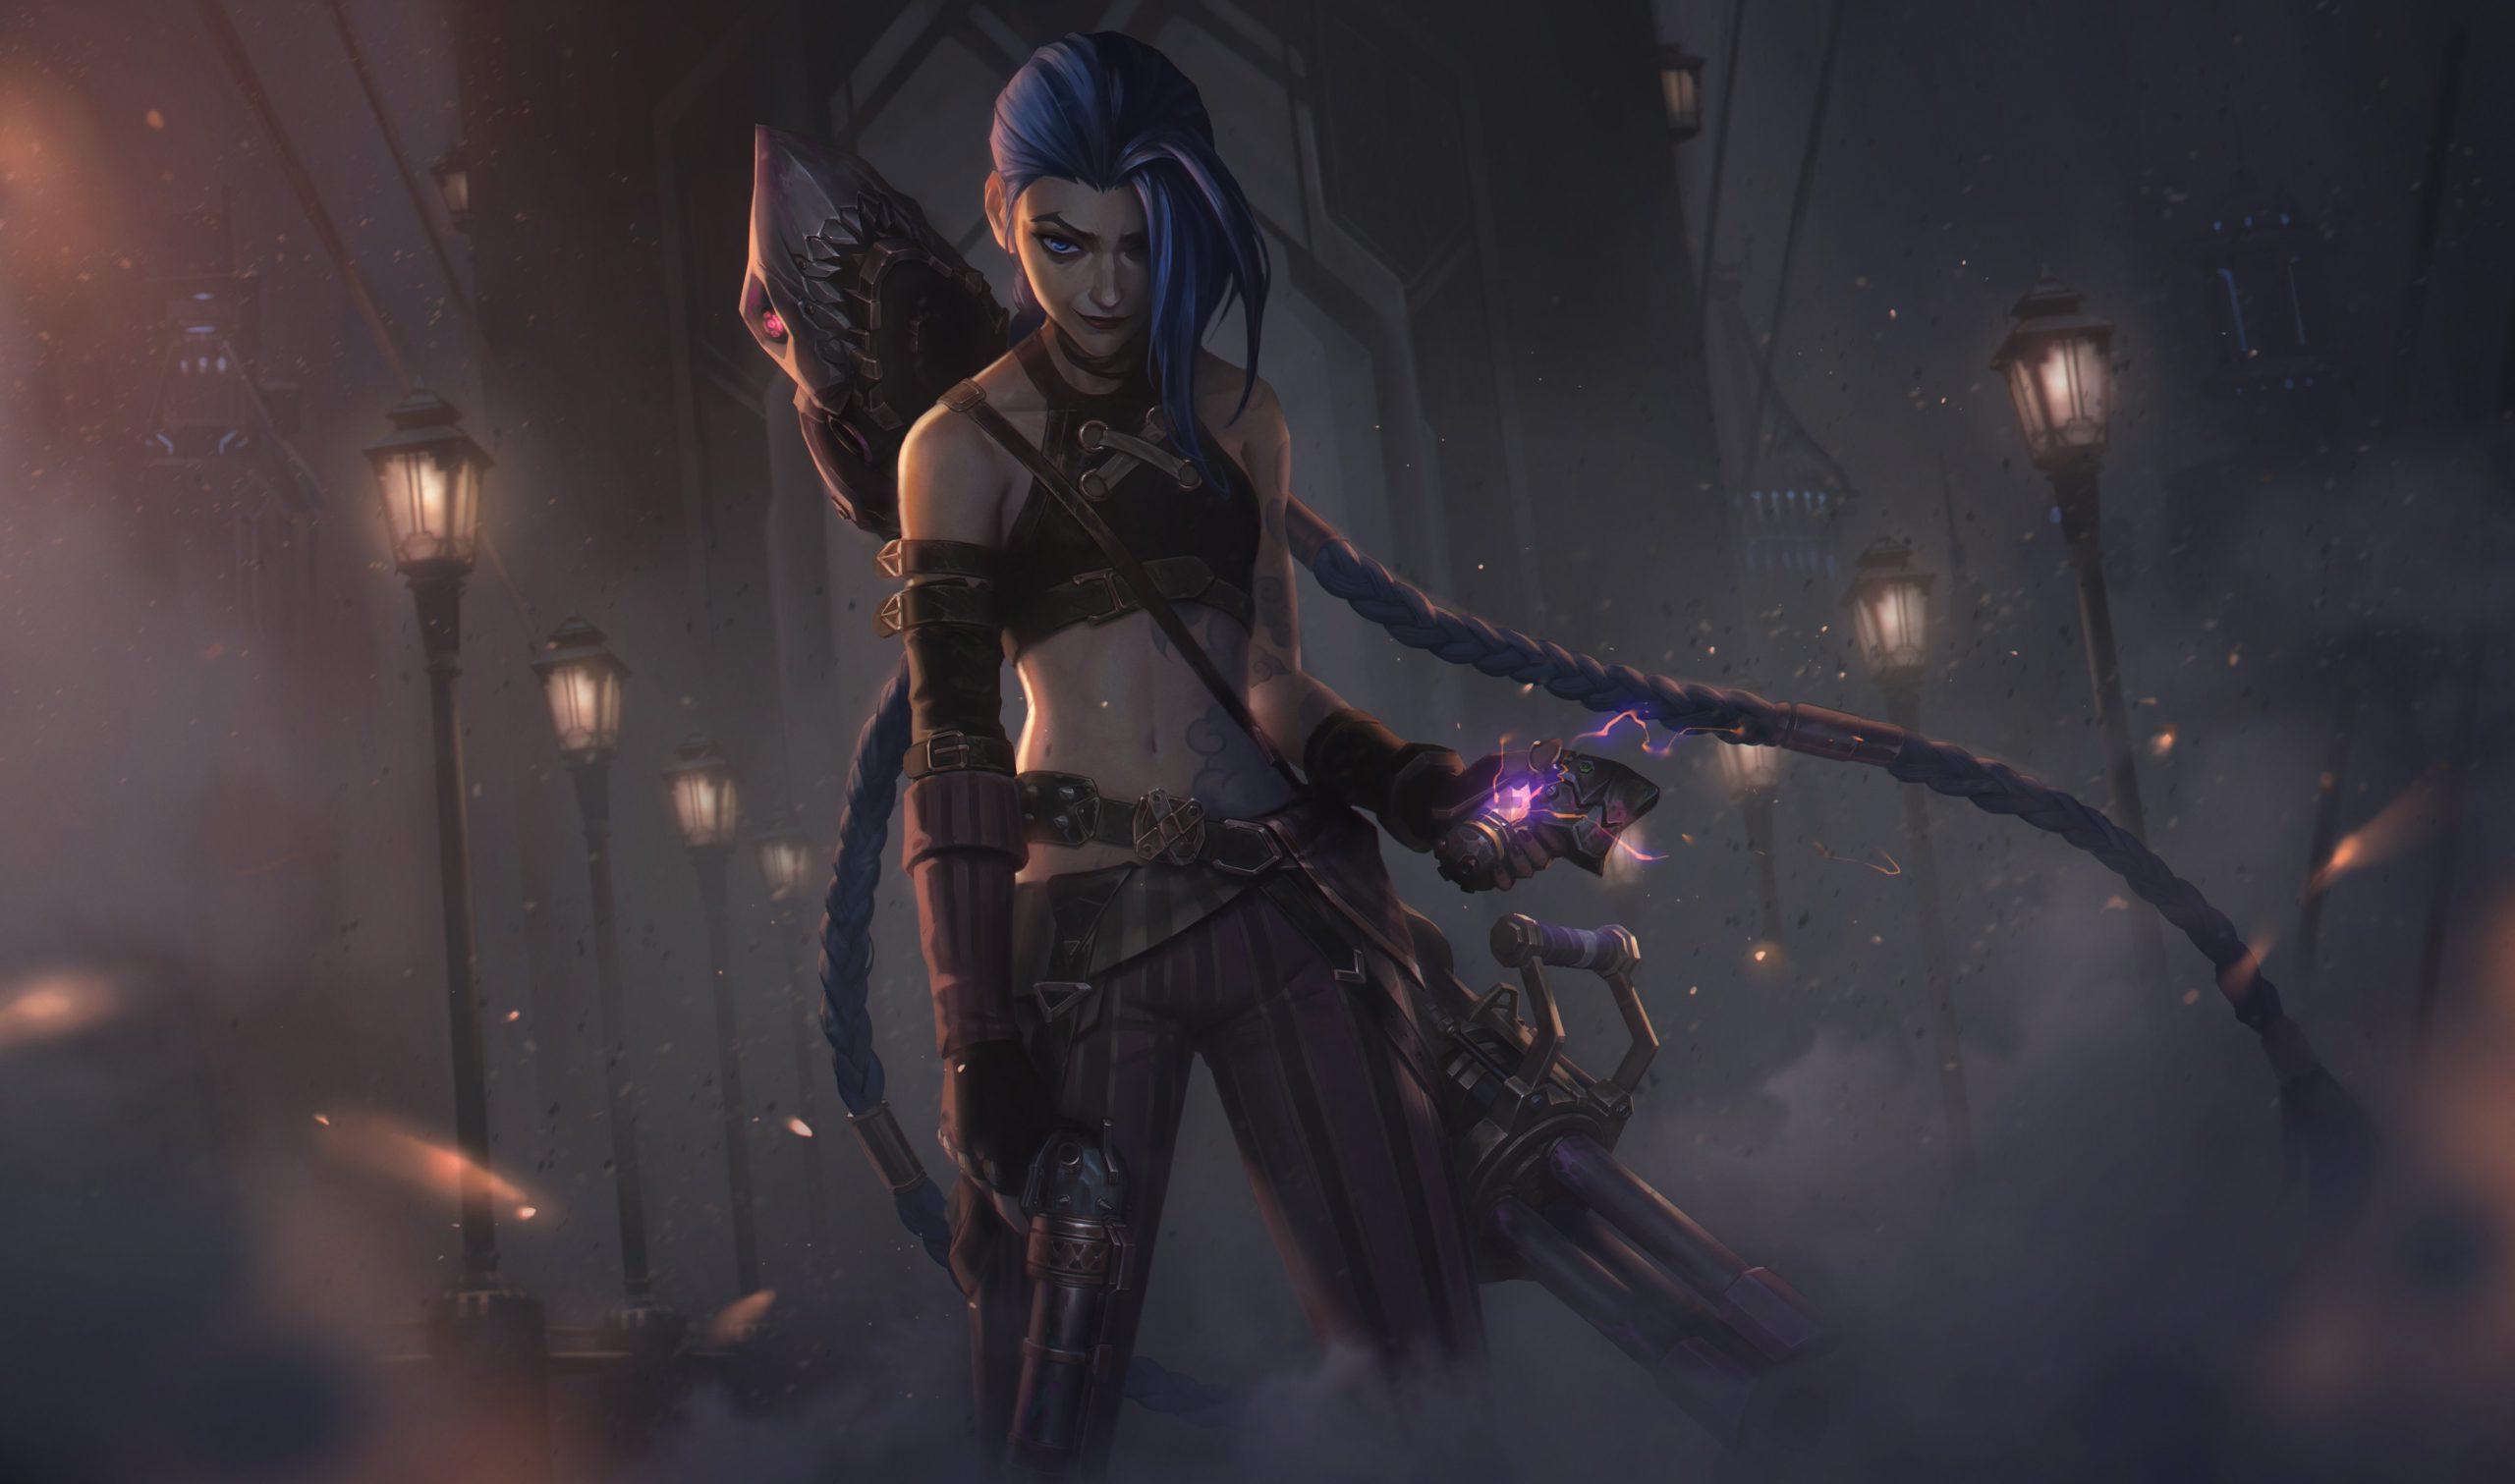
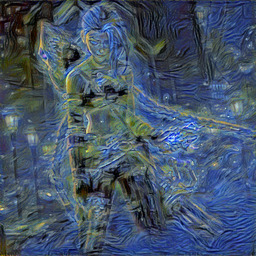
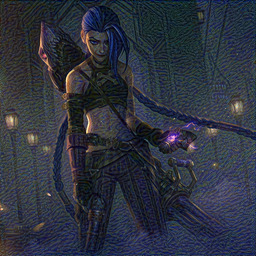
Finally, lets take an animated image: Jinx, from the recently released Arcane, contrasted with Starry Night (Style weight = 10e6, epochs = 300):
As a test, lets see the same images using different parameters. Left: same parameters, but using ADAM optimizer. Right: same epoch count, style weigh = 10000:
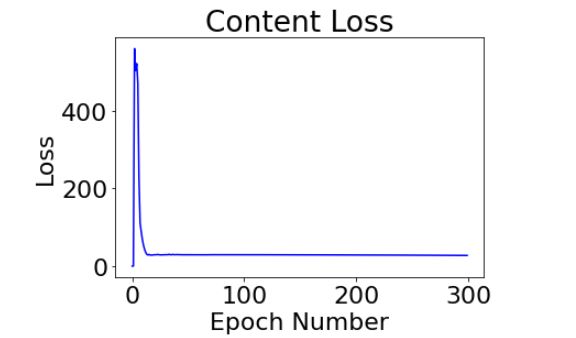
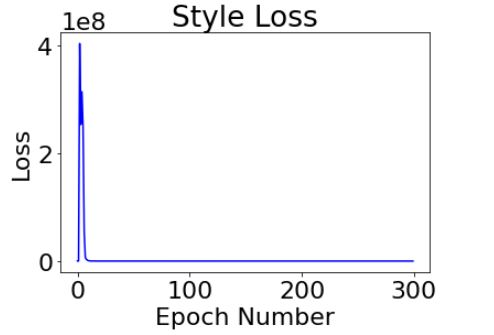
Here's our weighted losses for the style image and the content image for the Starry-sky Jinx:
Conclusion
This project has been a neat project that we can use to create new profile pictures. More seriously, this project is a nice testament to the usefulness of putting in as little "human" knowledge, and letting a network learn any possible feature.
Project 2: Poor Man's Augmented Reality
Augmented Reality has been promised by sci-fi movies for decades, so lets try our hand at making our own!
We'll be projecting a cube onto a box in the real world, and make it move along with a video.
Along the way, we might learn that it takes a lot more effort than we'd like it too, which keeps AR from being less prevelent.
Set up
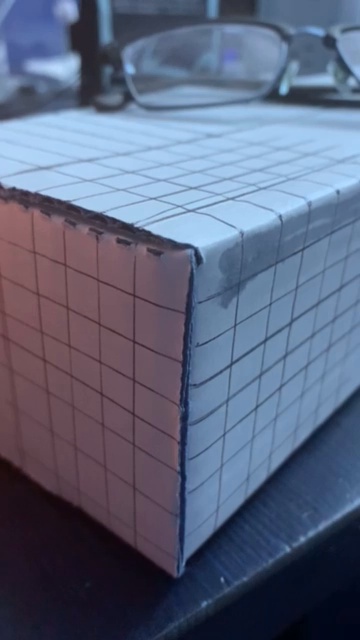
Here's the box that we use for the video:
Here's the video we took (with one of our glasses on top!):
On the box are a grid system for easier outlining. We will then use cv2.medianTracker to track these points across the video and use for sizing.
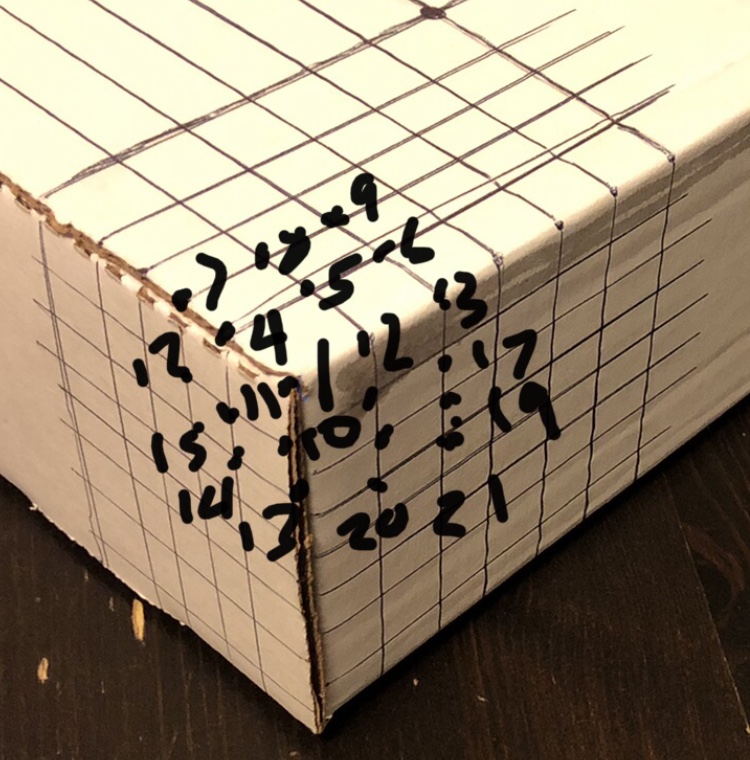
Here's how we organized our points:
Where the axis going to the right is the x axis, going left is the y axis, and the downward axis is the z axis, in the positive direction respectively.
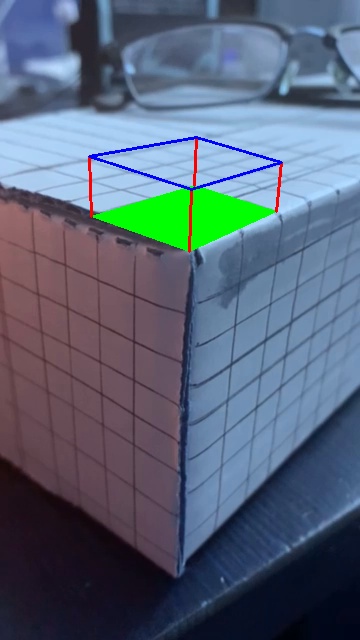
Darawing the Box
Now that we have our set up and our coordinate system, lets draw a box using the coordinate system we set up:
This drawn using the OpenCV library which fills in lines on an image.
Bending Reality
We have our box in one frame. But how should it move?
What we want to do now is redraw that box in every new frame during the video. The first step we need to do is to make a homographies matrix to see how the points have moved.
We can do this by using the points that we've identified, track where they've moved to, and then use the new locations for the points to compute the homography matrix.
Here's what the tracking looks like:
Once we've tracked the points to their new location, we can redraw the box like we did in the initial frame.
This took a while to get correct, as due to lighting, camera, and other factors, tracking frequently dropped for most of my takes.
The Box
After condensing all of the frames into one gif,
here's what that final product looks like!
The box starts looking a little wonky after the initial frame because the measurements in each axis aren't accurate, hence why the y/z plane looks a little curved.
Overall, a virtual box in our reality!
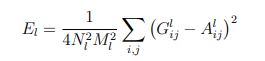 for the loss. The total loss for each layer is their individual loss multiplied by the its weight (for content vs style).