alpha=0
alpha=0.1

alpha=0.2

alpha=0.3

alpha=0.4

alpha=0.5

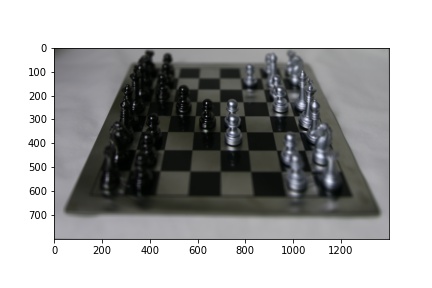
DUE TO COMPRESSION ISSUES, GIFS DO NOT REPEAT. PLEASE REFRESH VIA CTRL/CMD-R TO REPLAY THE GIF IF NECESSARYIn this project, we demonstrate that using basic computation, we can focus at different depth and mimic aperture adjustment given image data from multiple locations.
We take a dataset of images captured over one axis (each image shifted by a small amount on this axis). We demonstrate that we
focus at a specified depth after the fact by averaging these images in the post-processing step. If we average all images without any
shifting, we focus on the far away areas of the image since intuitively, shifts in far-away objects vary by a small amount in the image
while nearby objects vary by a larger amount in the image. By shifting by these 'larger amounts' to align the images, we can focus on
nearby sections of the image.
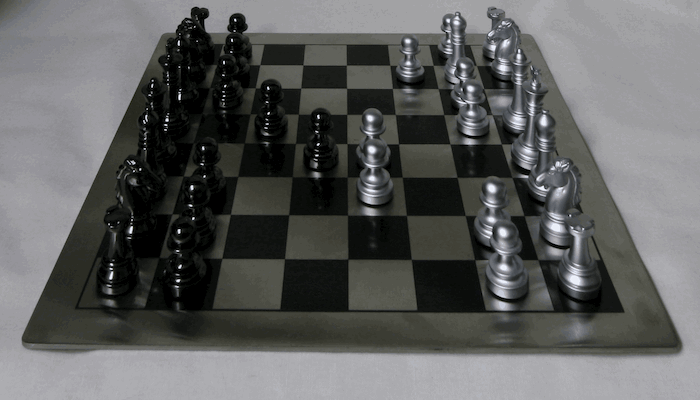
To do this, we select an image - I selected the image corresponding to the (8, 8) location on the grid. For each image, we compute the distance
to this reference image. We multiply this distance by a scalar alpha of our choice and call this the shift. We shift the image by these
amounts (in both directions) and compute the average image. Depending on the alpha we choose, we will focus on the image at different depths.
If we choose a larger alpha (i.e. 0.5), we'll focus on the closer areas since closer objects shift more. If we choose a smaller alpha,
we'll focus on the further sections of image.
alpha=0
alpha=0.1
alpha=0.2
alpha=0.3
alpha=0.4
alpha=0.5
Gif varying alpha in range [0, 0.5]
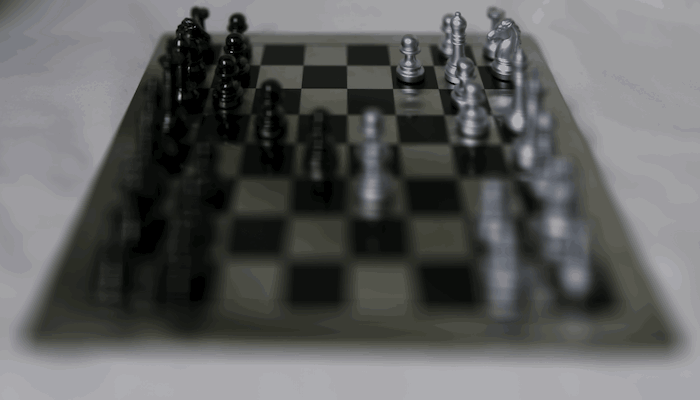
In this part of the project, we use the same dataset to mimic adjusting camera aperture. Intuitively, the more images we average together, the larger the aperture
seems - it seems like we're focusing on a smaller portion of the image - we're allowing more light to enter at different angles.
The more images we average, the more blury other sections of the images are (depending on the value of alpha) as the dataset consists
of images shifted along an axis. The fewer images we average, the smaller the aperture seems.
We choose the same reference image and fix alpha to be 0.25 to focus on the center of the image. We choose a radius
and only shift and average images within this radius of the center image --> (8, 8). The smaller the radius, the fewer images we use
and the smaller the aperture is.
radius=0

radius=2

radius=4
radius=6

radius=8

Gif varying the radius in range [0, 8]
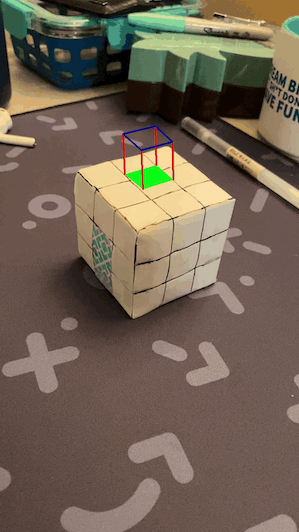
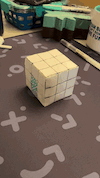
In this project, we will insert a synthetic cube into the scene shown below. All videos have been compressed into gifs in order to upload onto the site. To do so, we follow the steps below:
1. We label 2D points on the first frame of the video for which we know the 3D points for. These 3d points will remain absolute across the entire video while the 2D points will change for each frame. I chose to label 24 points shown below.
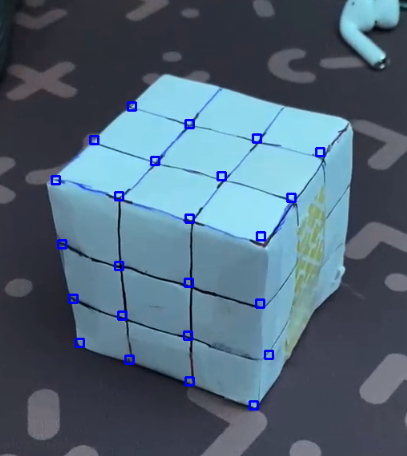
2. We use an open-cv tracker (TrackerMedianFlow) to track each of these points across all frames. I chose a bounding box of size 10 around all points. The results of tracking these points are shown below.
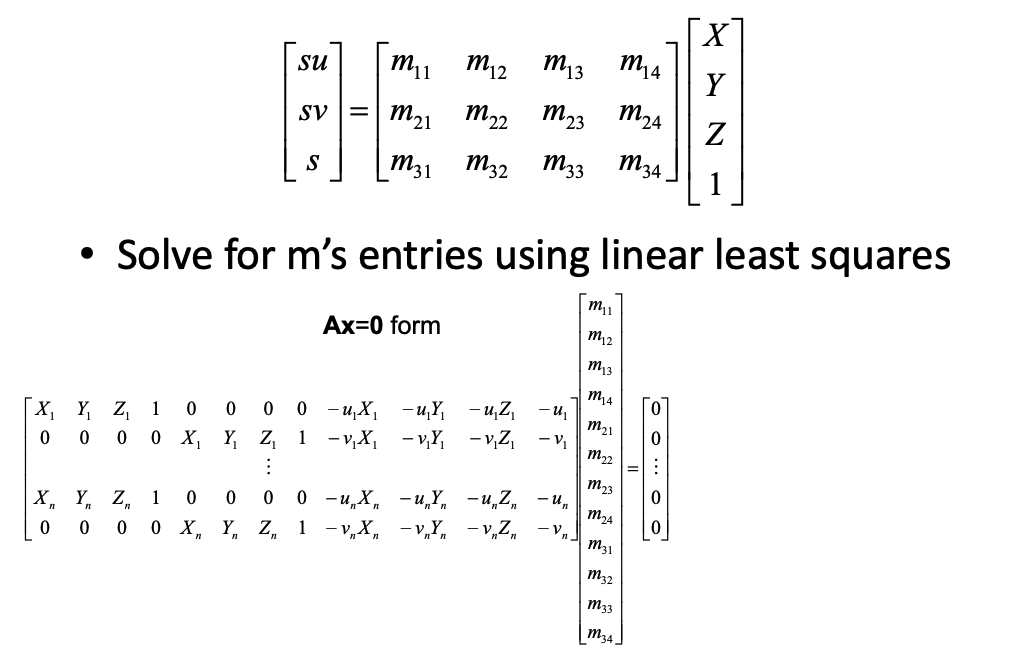
3. We then use the equation below to compute the projection matrix that projects our 3D coordinates into our 2D space. We solve this over constrained system of equations using least squares. Since we have the absolute 3D coordinates for our synthetic cube, for each frame, we compute this projection matrix and project the coordinates of our synthetic cube into the 2D scene in each frame. The equation and final results are shown below.