Part 1: Morph Sequence
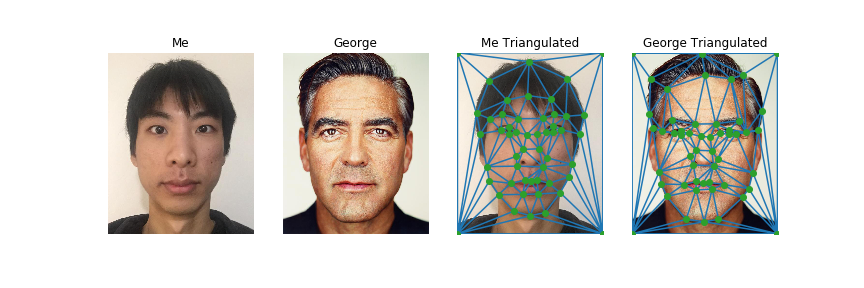
1.1 Face Correspondences
Naively taking a weighted average of two images, also known as cross-dissolving, does not work well in morphing. This is because the two images are usually not aligned. Even if the two image subjects have the same features, such as the two different faces, the locations and shapes of these features can vary wildly. Therefore, the smarter solution to morph two images together is to select corresponding features across both images, and use that information to align them better. In the face example, this would be things such as eyes, hair, nose, etc. I arbitrarily chose to label 48 points across George Clooney and my faces.
After definining correspondence points, we then partition the faces into sepaarate triangles. I used the Delaunay triangluation formula, which attempts to avoid as many narrow triangles as possible. By using the same triangulation between both images, we can match analogous features, even if they are of different shape, size, and location. Of course, using more points and triangles would make the feature matching more accurate; however, we need to maintain a balance between effort and payoff.
1.2 Computing the "Mid-Way" Face
After the triangulation has been defined, we can proceed with actual morphing. We first compute the final feature locations. For the mid-way face, we would expect the eyes to lie somewhere between mine and George's eye locations. We then compute the affine transformation (rotation, scaling, and translation) to convert both image's features to the mid-way face's features. Since we know both the initial and final endpoints, it is simply a matrix inverse and multiplication. We would compute a transformation matrix for each triangle for both images.
Afterwards, we morph both of the initial images to the mid-way feature space using the transformation matrixes. I used the inverse warping technique, where I enumerate the pixels in the mid-way picture and work backwards to get the color from the original image. Since pixel values are discrete, if the inverse warp pixel falls between two pixels, I simply rounded to the nearest pixel. There are other ways of resolving the problem, such as bilinear interpolation, but I found that the nearest neighbor solution to work fast and well.
After looping through all triangles for both pictures, we now have two images where the features are warped to the mid-way face. Now we can use the standard cross-dissolve method, as are two images are hopefully aligned.
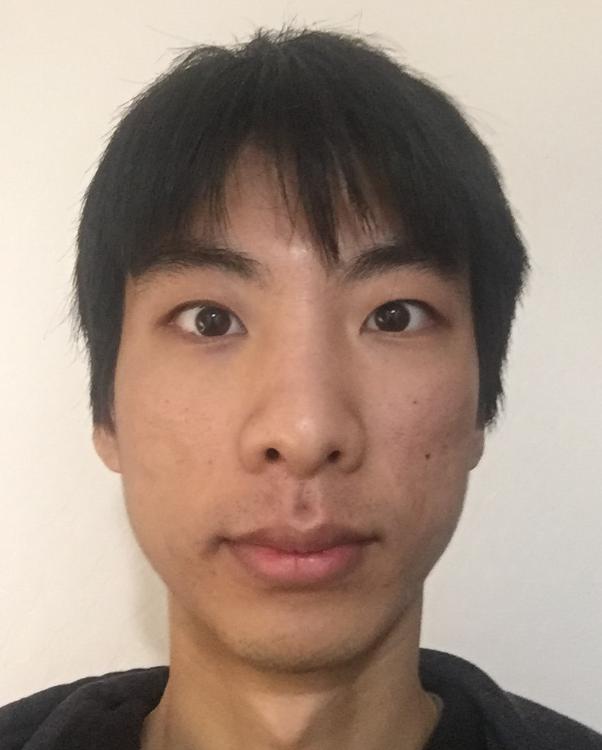
Me
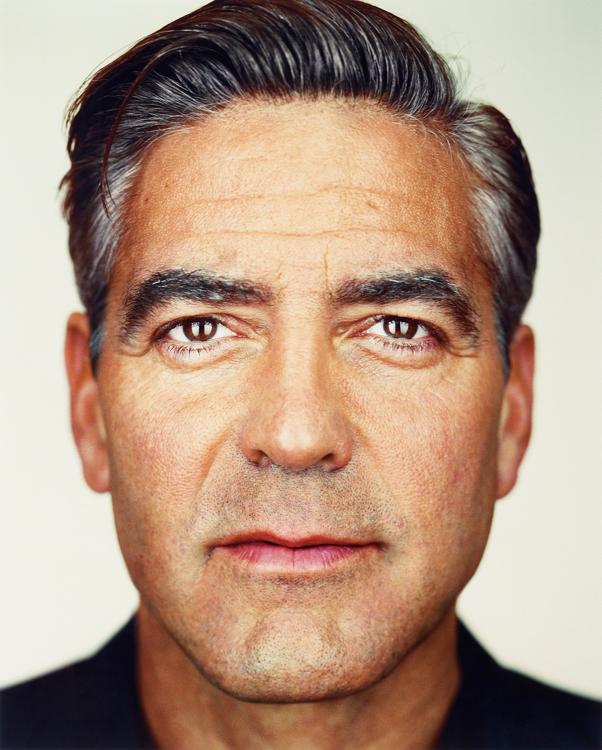
George
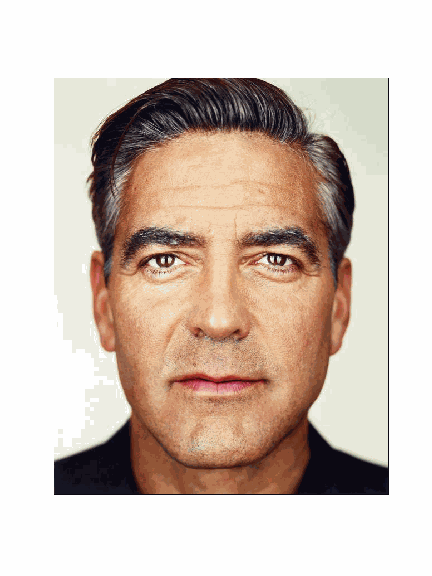
Mid-way Face

For the most part, the mid-way face looks realistic in the sense that there are no duplicated facial features. However, there are still a few minor issues. For one, my long hair made it hard to define appropriate correspondence points for the hairline, which shows with the ghost hair on the forehead of the mid-way feature. The fact that the top of George's head is cut off also breaks the illusion of the mid-way point. Lastly, my longer neck meant that the clothing ended up in different places; this could have been fixed by adding another pair of correspondence point at the intersection of the neck and the clothing.
1.3 Morph Sequence
To create the morph sequence, we extend the techniques used in the mid-way face. We have two parameters to change - the "warp factor" and the "dissolve factor". The warp factor states how far between the two images should the intermediate morph be. The dissolve factor is the cross-dissolve factor to blend the two morphed images. Keeping both factors the same across the range from 0 to 1 lead to the best results.
Part 2: Mean Face
2.1 The "Mean Face" of the Propulation
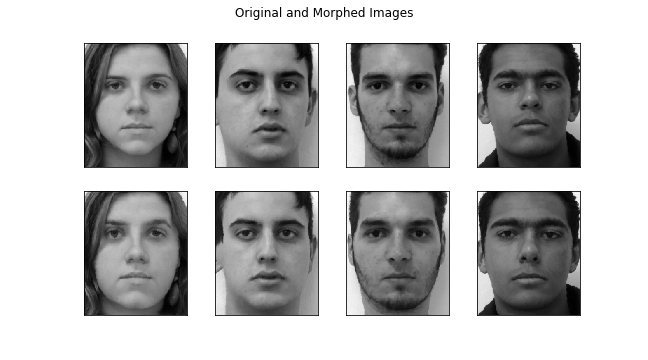
Finding the average face of the population is simply extending the morphing technique done in the previous part. From a standardized dataset (I used 20 images of non-smiling men and women from the Brazilian FEI dataset), we mass-label corresponding facial features. This time, the average feature location is taken over all images. We then morph individual to the average shape, and then take the mean across all pictures to get the average face. Below are some examples of the morphed faces, and the average face across the images of the dataset I chose. For the indvidual faces, the top row is the original portrait and the bottom row is the morphed version. While both look fairly similar, we can see from the chin locations that the warped images are better aligned.

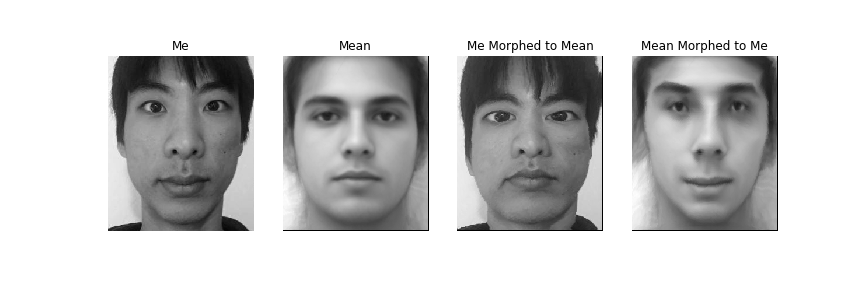
Note that the average face is generally prettier than the average individual. This is because blemishes and other things we find "ugly" is seen as noise that gets averaged out.
For fun (and because the assignment said to), I morphed my face to the mean face's shape, and vice versa. Since my face is longer and narrower than the mean, the results are strikingly different from each other.
2.2 Caricatures: Extrapolation from the Mean
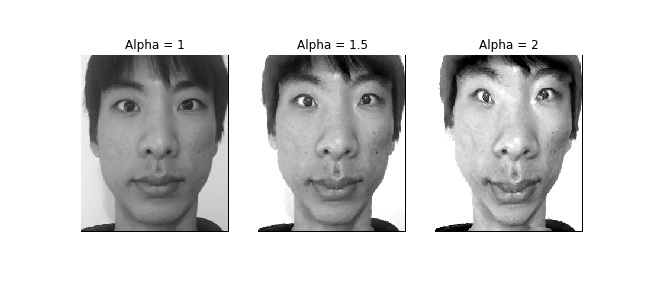
There are many cool things we can do with the mean face. One such example is caricatures. Since we can now compute the difference between a face and the mean face, we can exaggerate this difference to create a caricature. This is similar to the image sharpening from the previous project, where we enhance deviations from the mean. The caricatures can be calculated using the same morphing formula described above, where the second image is the mean face, and the warp and dissolve factor are outside the normal range of 0 to 1. The results are a bit unsettling, to say the least.
Part 3: Bells and Whistles
In this section, I decided to see how I would look with a different ethnicity and gender. I found photos of the average French male and the average Taiwanese female to act as my reference image. I tried three different morphings - morph my face to the average shape, morphy my face to the average appearance, and morph both shape and appearance. The first two is simply setting the warp factor to one end (0 or 1) and setting the dissolve factor to the other end. For the latter image, I computed the mid-way face as from the first part.
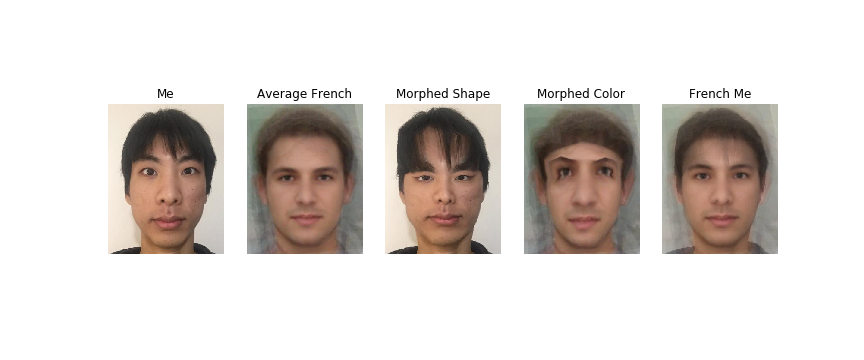
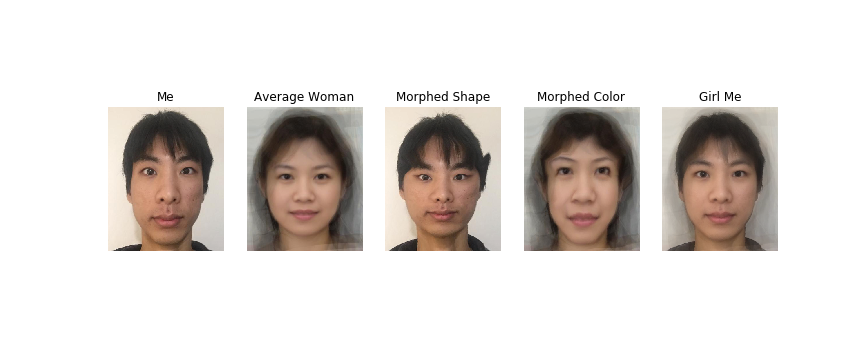
As seen in previous examples above, my long and narrow face combined with my long hair meant that the images where I morphed only appearance or only color looks off, as the facial features had to be elongated or compressed. However, the cross-disolved mid-way face looks much better, as it strikes a better balance between the two extremes. For French me, I changed the dissolve factor to 0.3 (of my original image) in order to enhance the white skin and brown hair of the average French. For the girl me where I morphed only the shape, the jut of hair on the right probably was a result of sloppy labeling of correspondence points.
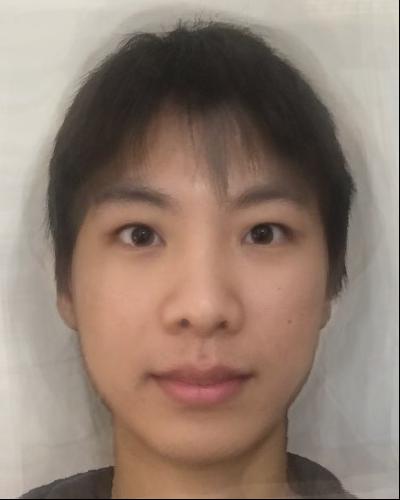
For viewing convenience, I copied the final images below at a larger size.
French Me
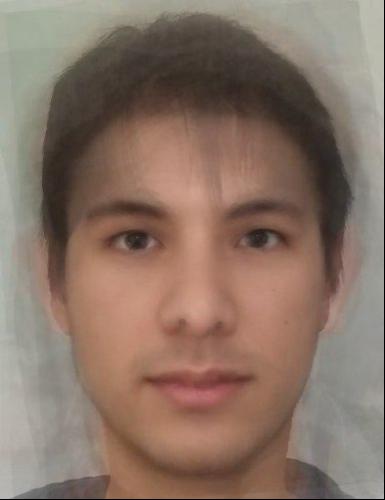
Girl Me
Part 4: Conclusion
I definitely had more fun with this project than the previous ones. Some of the morphed images, especially the failed ones, look hilarious. Nevertheless, I do feel that the final results of the bells and whistles section, where I change ethnicity and gender, look surprisingly good and realistic. The French me has a more stereotypical french color, and the girl me has more feminine features. The fact that the average face is generally prettier than the average individual definitely does not hurt as well.