Yibin Li, March 2020
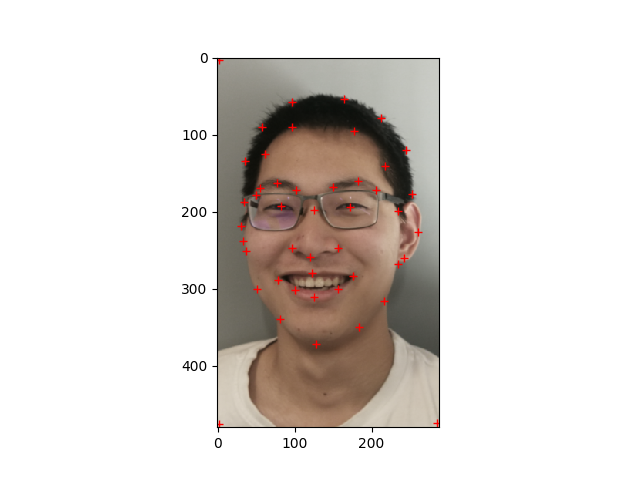
The first part is to define the correspondences between two images. This is to pick points on two images at roughly same positions. I followed this guide (https://imgur.com/a/HMOxskg) with matplotlib ginput function to label the points, and stored thses points data to local disk with numpy save function. Once saved, We could use numpy load to load the data for future use.
After obtaining correspondences points on two images, We created a Delaunay triangulation of the points from scipy Delaunay function. Here, I only created one triangulation becasue this triangulation will be the base frame for two images.
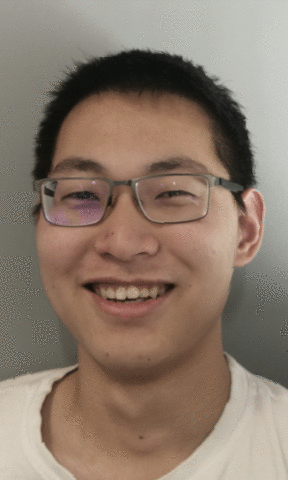
The other person's face was obtained from the FEI Face Databse.
An example of point labeling
Final result after triangulation
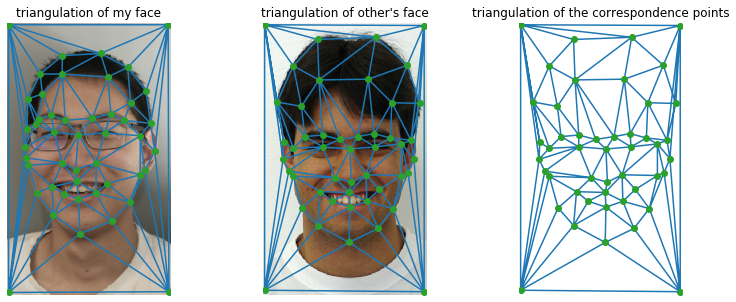
Note that the above images have different correspondence points but same triangulation! This will help the morphing sequnce caculation easily.
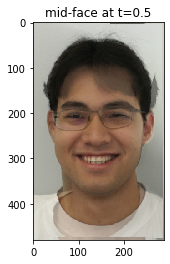
It is essential to define the "mid face" before computing the whole morph sequence. This would involve: 1. computing the average shape (a.k.a the average of each keypoint location in the two faces)
warping both faces into that shape
averaging the colors together.
We define the mid-way face correspondence points \(p(t)\) at time t as
\(p(t) = t × p_{0} + (1-t) × p_{1}\)
where \(p_{0}\) is the correspondence points of img0 and \(p_{1}\) is the correspondence points of img1.
Once \(p(t)\) is found, we can use the inverse wraping to transform \(p_{0}\) and \(p_{1}\) to the desired \(p(t)\). Since we have converted the points set to multiple triangle (triangulation), we only need to compute the transoformation between each triangle and then apply this transform to all the points inside the triangle. The inverse wraping transoformation is an affine transformation; we could solve a system of linear equation to find this transofrmation. The formual for solving the affine transofmration is:
\(T = AB^{-1}\)
where T is the transformation, A is the 3×3 matrix of source triangle coordinates in the homogeneous coordinates, and B is the 3×3 matrix of desired triangle coordinates in the homogeneous coordinates. Appling this transformation to every pixel (use skimage.draw.polygon to find all pixels) in the triangle, we will get a rough mid-face. Sometimes the transform will map the coordinates to the middle of two points; in this case we could use scipy.interpolate.interp2d to interpolate the points to fill in the gap.
Finally, we averaging the color of the two source images to add color effect of the "mid-face". This is done by
\(mid\_face = t × midimg_{0} + (1 - t) × midimg_{1}\)
where \(midimg_{0}\) and \(midimg_{1}\) are the transformed mid point images of img0 and img1 respectively.
Below is an example of midway face at t=0.5.
The morph sequnce is nothing more than using the for loop to find all frames at time t. Once saved all frames to local, we can combine them to a gif to show the morphing!
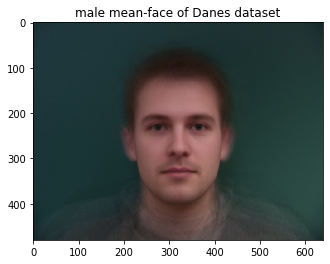
Here, we explore the mean face of a population. I leverge the database of Danes which contains annotated face data, and used only males' face.
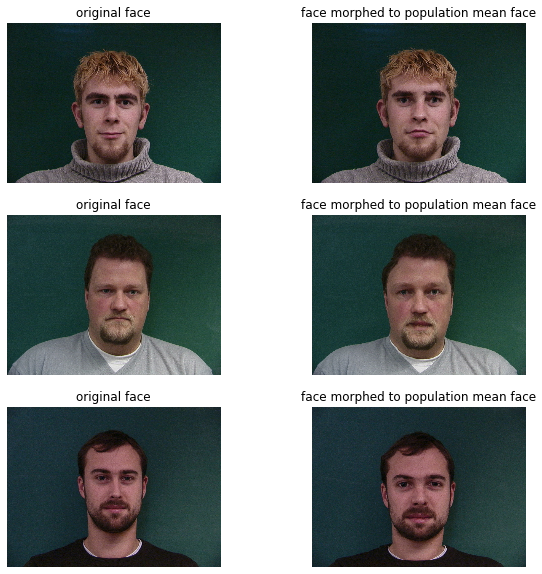
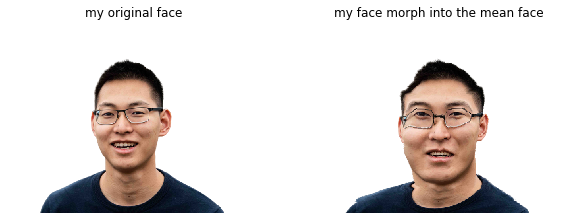
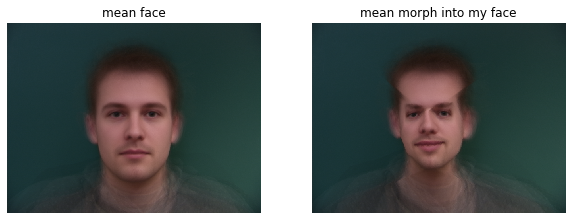
Here, I showed three people with their original face and the face morph into the "mean-face".
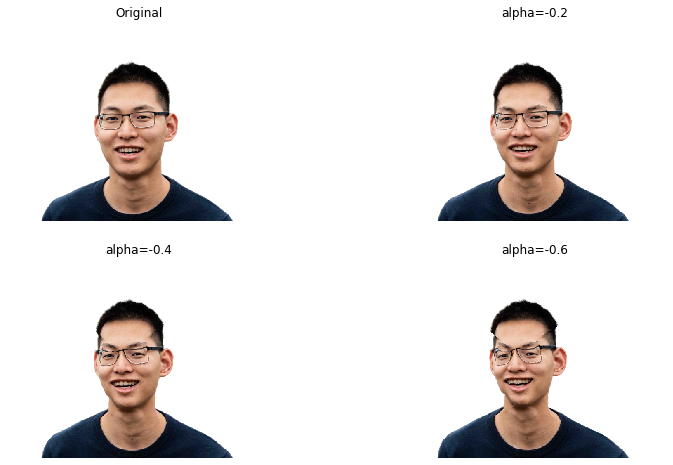
Here, instead of using t in [0, 1], we will use some negative value of t to create extrapolating effect of my face. Varying the alpha (negative t) will have different effects on the data.
Here, I created a female version of myself! Note that the mid-face with cross-dissolve doesn't align with each other. I used a mask of original feamle image to emphasize the hair color on the upper-left head.
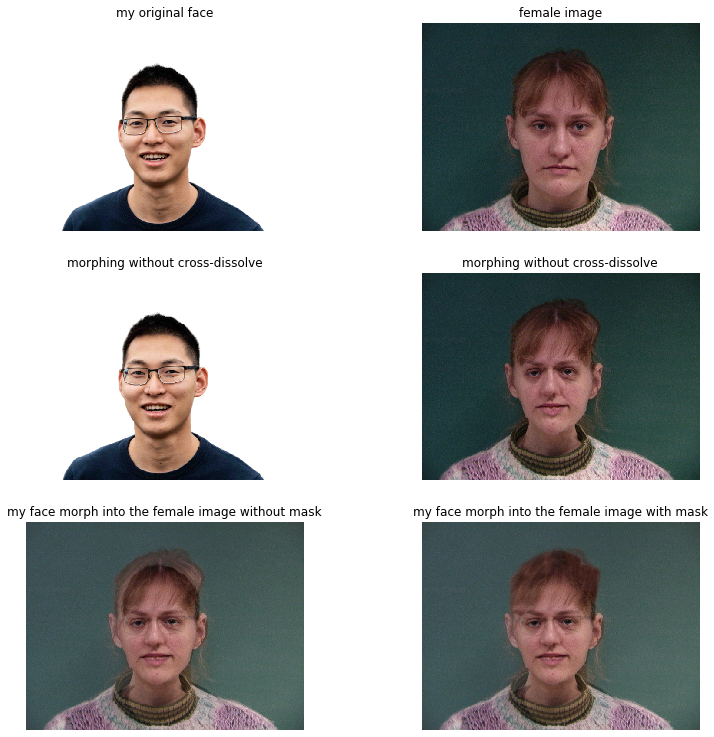
You will see a female-version of me wearing the glass!
I participated in a group morphing organized by Zixian Zhang.
(In case the above link doesn't work, the video can also be seen here: here )