Classification and Segmentation
Part 1: Image Classification
Spec parameters
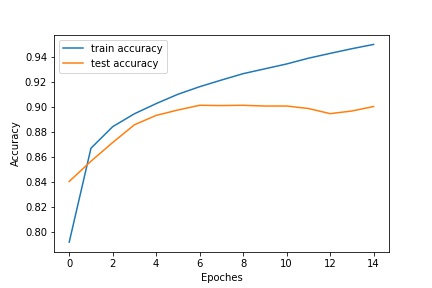
Using a simple two layer convolution neural network andthe hyperparameters suggested from the spec, I was able to get the test accuracy increased around 90%.
Structure of the CNN:

Training and testing Accuracy:
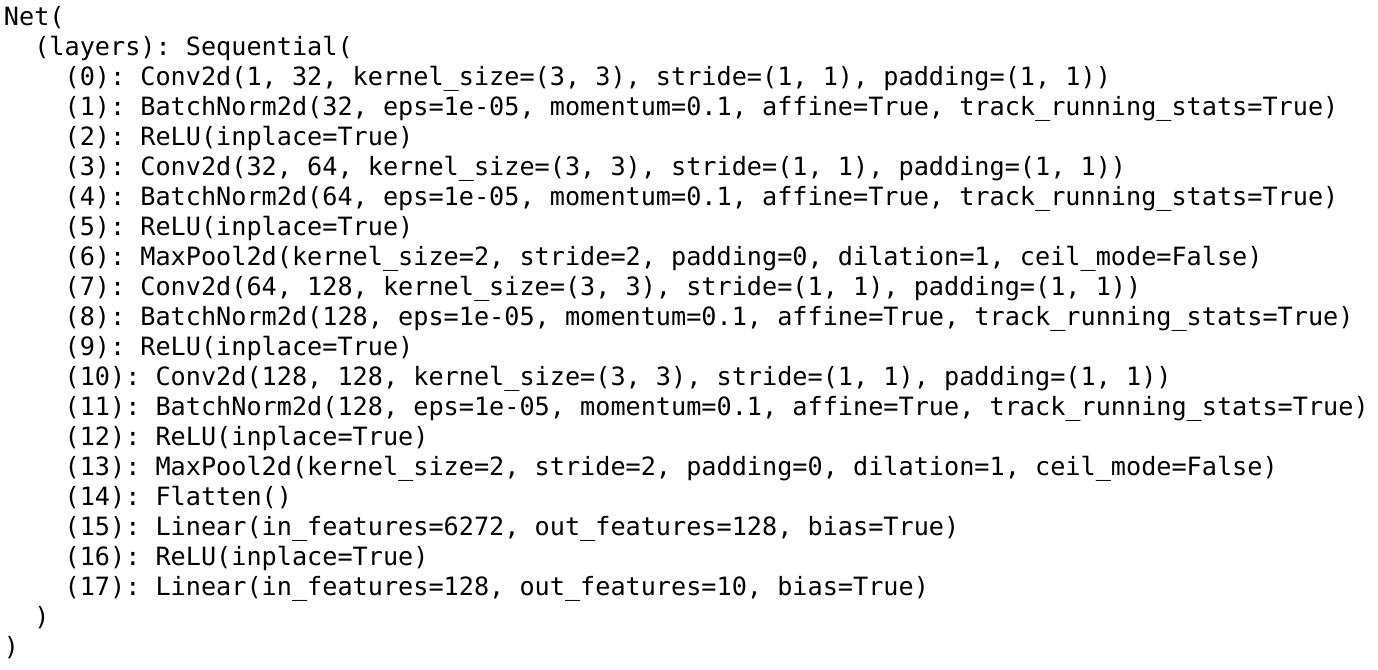
Improved Model:
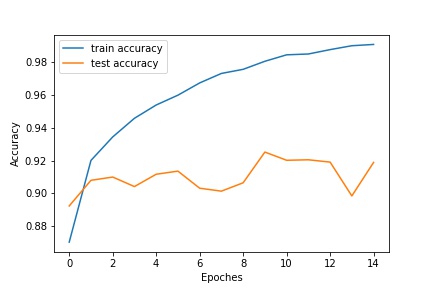
Using a deeper and wider CNN with batch normalization, the test accuracy can be further improved to 92.5%:
Structure of the CNN:
Training and Testing Loss/Accuracy:
| Loss | Accuracy |
|---|---|
 |
 |
Accuracy of Different Catagory
Accuracy of T-shirt top : 90%
Accuracy of Trouser : 97%
Accuracy of Pullover : 92%
Accuracy of Dress : 94%
Accuracy of Coat : 81%
Accuracy of Sandal : 98%
Accuracy of Shirt : 72%
Accuracy of Sneaker : 95%
Accuracy of Bag : 98%
Accuracy of Ankle boot : 97%
It performs the worst on shirt. I think it is because all the pictures are only 28 by 28 pixels, making the buttons and other features of the shirt is very hard to distinguish with other clothes, each as coat and T-shirt, which also has low accuracy.
Example of Correct and Incorrect Predictions
| Class | Correct Predictions | Incorrect Predictions |
| T-shirt top | 
|  |
| Trouser | 
|  |
| Pullover | 
|  |
| Dress | 
|  |
| Coat | 
|  |
| Sandal | 
|  |
| Shirt | 
|  |
| Sneaker | 
|  |
| Bag | 
|  |
| Ankle boot | 
|  |
Filter visualization
The below image is the visualized channels of the first layer of the CNN:
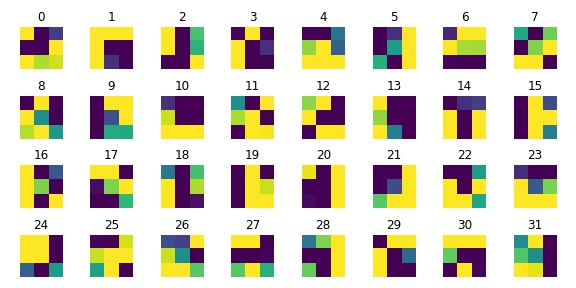
As we have learned different convolution kernels, the trained kernels seem to extract blurry edges, contours, and boundaries from the original graph.
Part 2: Semantic Segmentation
CNN Design
For hyperparameters, I use CrossEntropy loss functions and AdamOptimizer with learning rate of 0.003 and weight decay of 0.0001 for all models.
Simple Approch
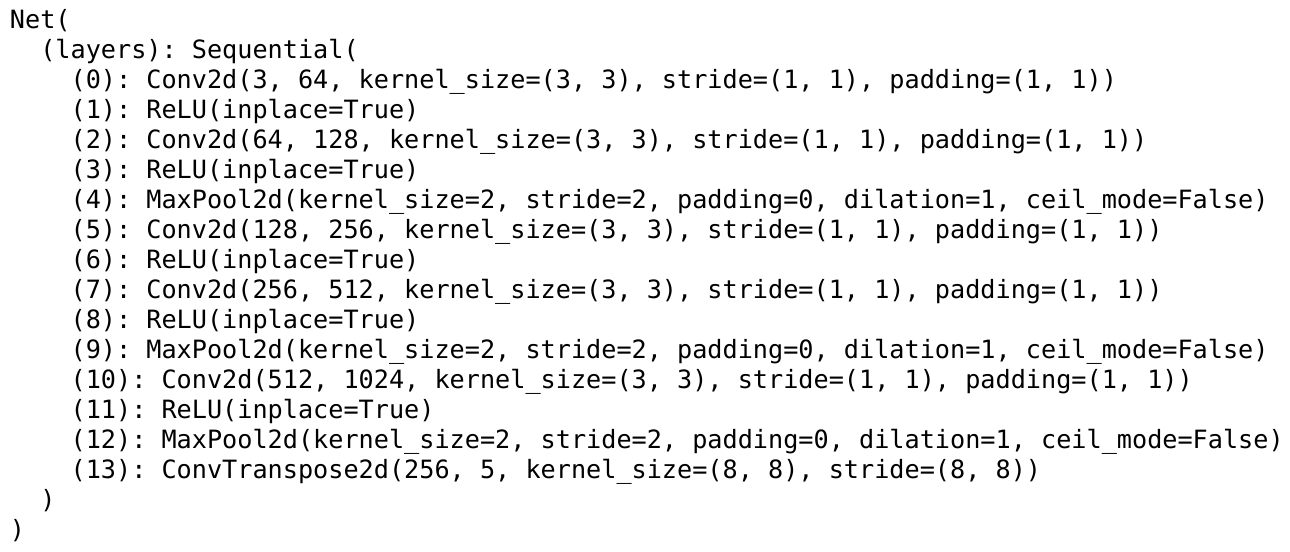
By trying with different parameters and different layers of Conv2d, I use 5 Conv2d with increasing channels(64-128-256-512-1024) and padding of 1 with kernel size of 3.
To restore the channels and the resolution, the final layer is a conv2dTranspose layer with 5 output channels with kernel and stride of size 8.
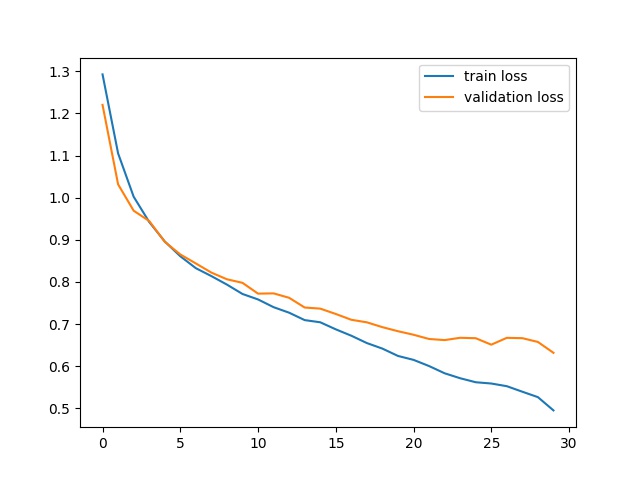
Training and Validation Loss
Results
| CLASS | AP |
|---|---|
| others | 0.6828809643454818 |
| facade | 0.7903953947401656 |
| pillar | 0.23578283817459583 |
| window | 0.854123292949606 |
| balcony | 0.5521705116866344 |
| Average Test AP | 0.6230706003792967 |
Detailed Structure
Best Approch
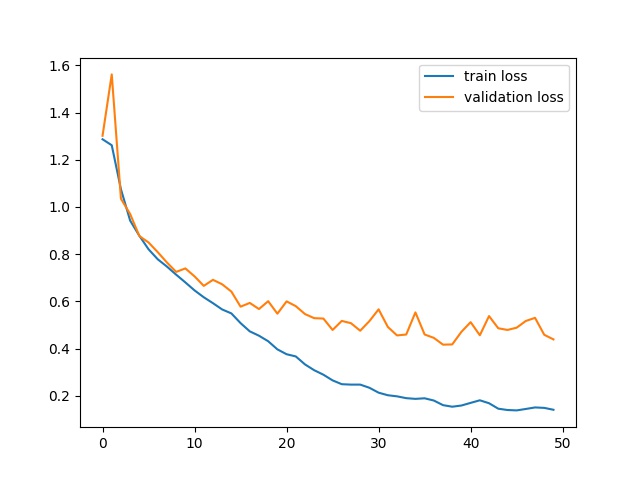
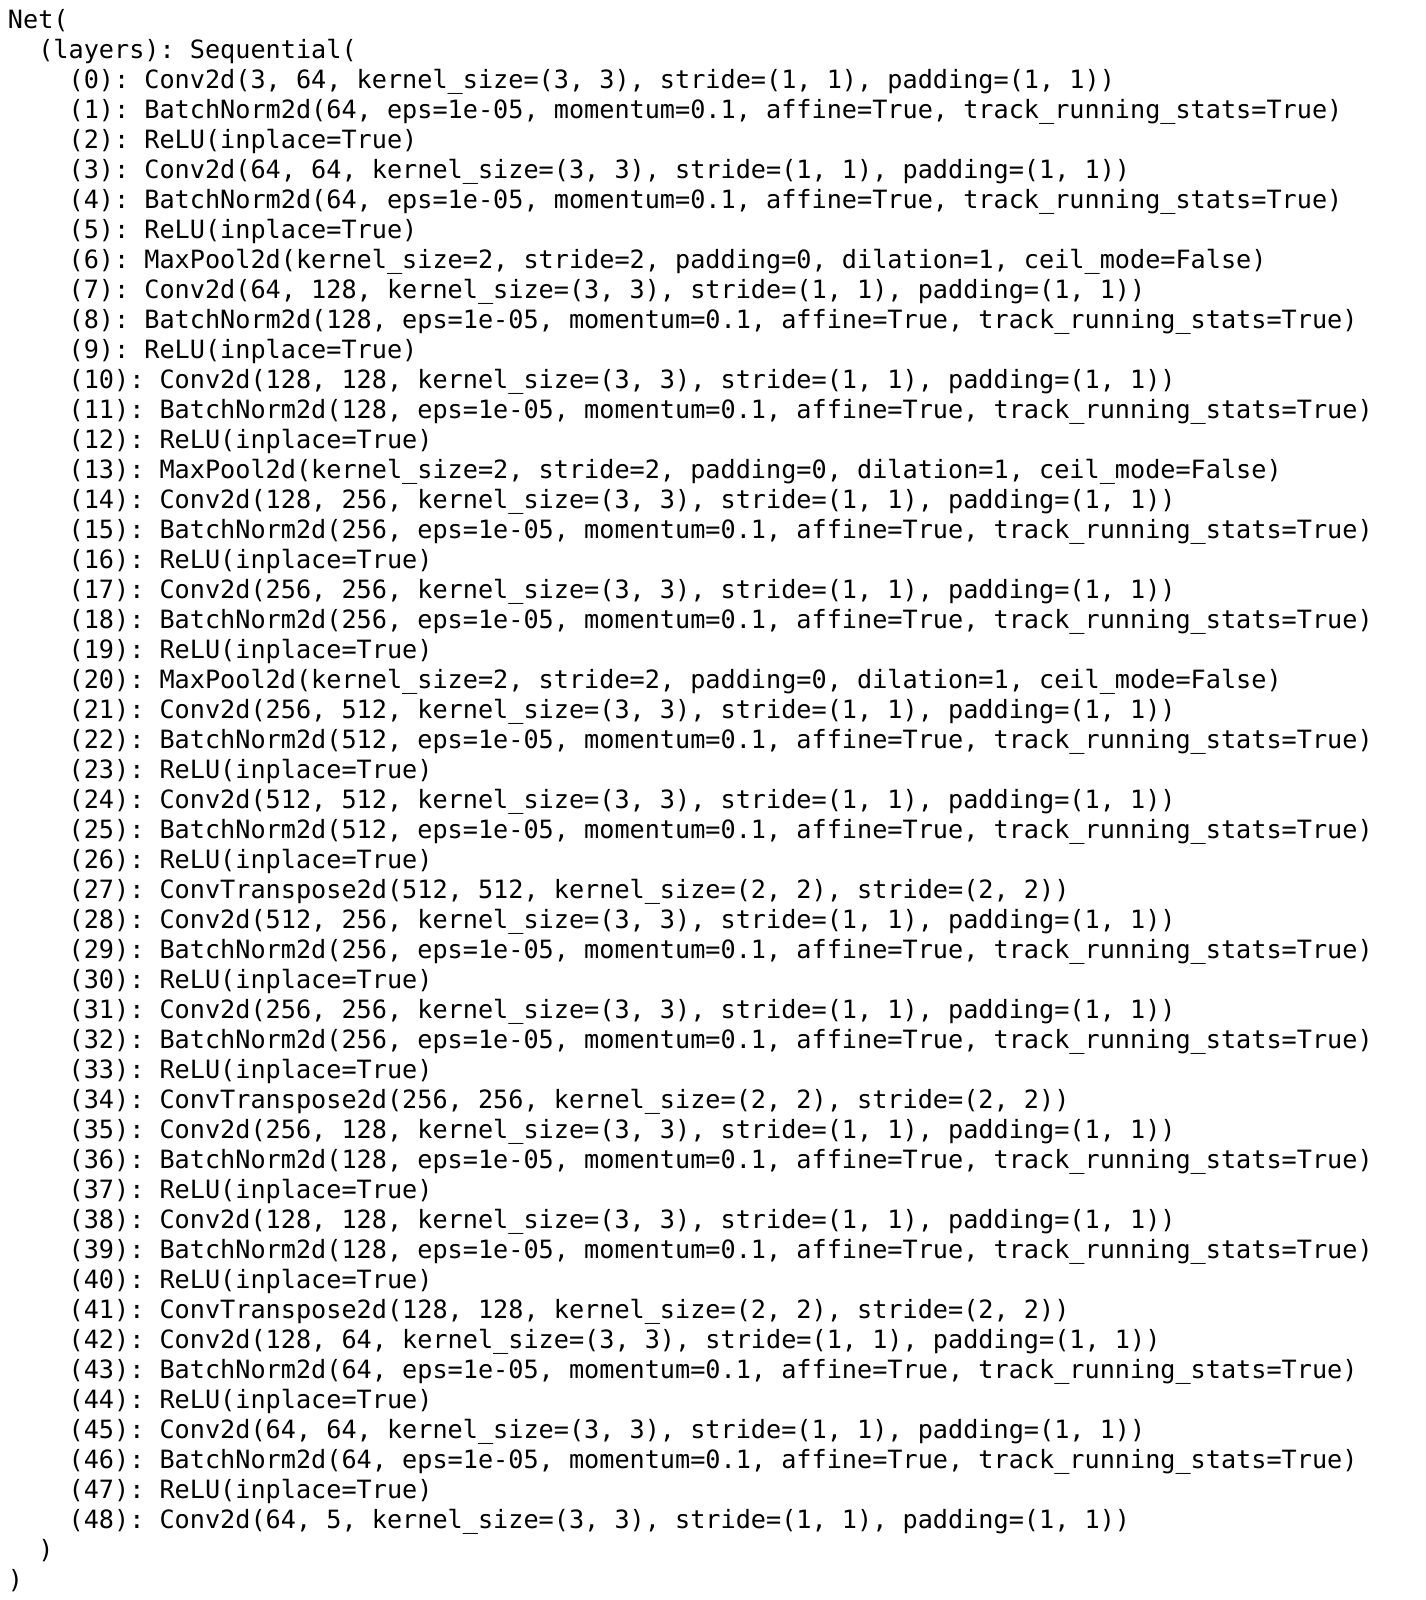
Inspired by the U-Net, I use a very similar but shallower CNN model to get the best result. Instead of only 5 convolution layers, there are total of 16 convolution layers with batch normalization to get the best result. The channel starts at 64 and maximize at 256. Also, for the purpose of symmetry, their are 3 conv2dTranspose layers with kernel and stride of 2 to upscale the resolution back to 256x256 instead of using only 1 layer.
Training and Validation Loss
Results
| CLASS | AP |
|---|---|
| others | 0.7603433060379275 |
| facade | 0.8369236856459152 |
| pillar | 0.30451121379695517 |
| window | 0.8817632233245439 |
| balcony | 0.7031278175049809 |
| Average Test AP | 0.6973338492620645 |
Detailed Structure
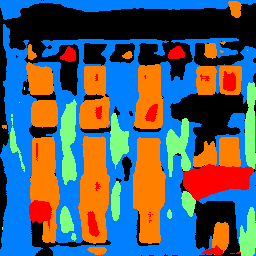
Examples
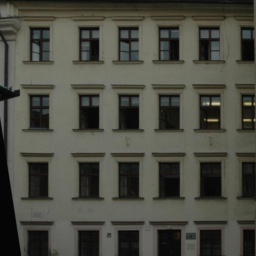
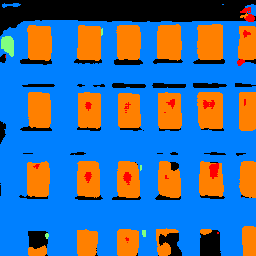
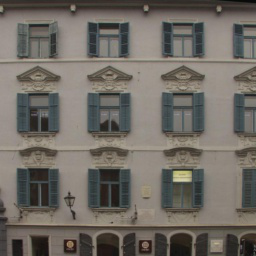
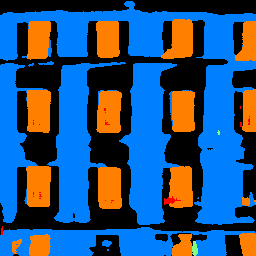
Below are some example result of the network from the test set and one of my images:
| Original | Result |
|---|---|
 |
 |
 |
 |
 |
 |
 |
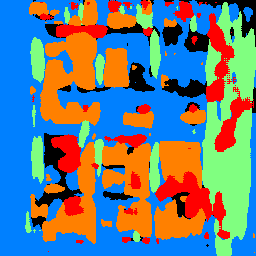 |
The first two example are very good. However, the last from the test set and my own image perform not so well because they have a more complex light effect and very different color channels due to the light effect.