Image Quilting
Kenny ChenOverview
The goal of this project was to implement the image quilting algorithm for texture synthesis and transfer, described in this SIGGRAPH 2001 paper by Efros and Freeman. Texture synthesis is the process of creating a larger texture using a small sample image. Texture transfer is used as a way to render some image with the same texture as some sample texture.
Textures
The following are some example textures used.


Randomly Sampled Texture
We first start with perhaps the most obvious method of texture synthesis. We randomly sample $n$ x $n$ patches of the sample texture and put them in an initially empty output image. The results don't look half bad for some of the textures, as can be seen below.


Overlapping Patches
We now add some overlap between added patches and calculate some error metric to assess the best patch to place at a spot in the output image. Say we have two image patches that overlap, $B_1$ and $B_2$. We define some amount of overlap between the two patches being compared and calculate the sum of squared differences (SSD) between the overlapping parts, $B_1^{ov}$ and $B_2^{ov}$, of each image: $$SSD=\sum\left(B_1^{ov}-B_2^{ov}\right)^2$$
We initially sample some random patch in the texture and place it in the top left of the initially blank output image. We then look at filling the first row of the output. For the first row we only have to compare the left overlap of the new patch. We sample from the set of all patches in the input texture, $S_B$. We compute the SSD between the overlap between each patch in $S_B$ and the patch already placed to its left. We find patches that satisfy $$SSD_{S_B} < \min_{SSD_{S_B}} * \,\,(1+\epsilon)$$ where $\epsilon$ is some small constant and $SSD_{S_B}$ is the list of SSD's between each patch in $S_B$ and the patch being compared to. We randomly choose a patch that satisfies this inequality and place it in the output image. We do this random sampling rather than choosing the patch with minimum SSD so there is less repetition in the synthesized texture. We repeat this process for the first column of the output image, except the overlap between patches is now the top overlap. We then have to do the general case for the rest of the rows, where we calculate the SSD of the top and left overlaps.
After doing this process, we get some pretty good results:


Seam Finding
Although the overlapping patches method works pretty well, we can still see the edges of patches in the synthesized texture. To help make the edges look more seamless, we find the seam of lowest cost in the overlap region. We find these seams using the method described by Avidan and Shamir in their 2007 SIGGRAPH paper. We then remove the part of the patch past the seam in the overlap area.
Below we illustrate the process of finding the overlapping areas, finding the SSD and then the minimum cost seam based on the SSD image.


Our results look pretty seamless (pun intended):


Texture Synthesis Summary
We summarize all of this with some poorly-drawn diagrams:


Texture Transfer
We can transfer the sample texture onto some image. We do this by redefining our error metric. We first define some variables, $\alpha$ a constant between 0 and 1, $SSD_{\textrm{overlap}}$ the error for overlapping regions, and $SSD_{\textrm{corresp}}$ the error between the new patch and the target image. So we have $$SSD = \alpha * SSD_{\textrm{overlap}} + (1 - \alpha) * SSD_{\textrm{corresp}}$$
The results aren't amazing, but we improve on these using iterative texture transfer:


Extras
Iterative Texture Transfer:
Oftentimes, one pass of synthesis is not enough to create a pleasing result. We therefore do multiple passes. We now define $$\alpha=.8 * \frac{i-1}{N-1} + .1$$ where $i$ is the current iteration and $N$ is the total number of iterations. We also define $SSD_{\textrm{prev}}$ as the SSD between the new patch and the previous iteration's patch at the same location. We now define a new error metric $$SSD=\alpha * (SSD_{\textrm{overlap}} + SSD_{\textrm{prev}}) + (1-\alpha) * SSD_{\textrm{correp}}$$
Our results are noticeable better using this iterative approach:


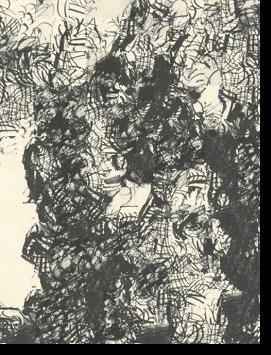
Some Failures
Some result images due to bugs in my code actually looked rather cool. In these cases I was trying to apply a texture to a photo of Richard Feynman. I believe these were created as a result of an incorrect SSD function.

Conclusion
This project was fun to implement and allowed me to appreciate the simplicity of the algorithm. I also enjoyed implementing this because it was the work of Prof. Efros, my current professor for computational photography. It was really cool seeing the texture transfer portion work. One thing I had trouble with was vectorizing my operations and cutting down on the runtime of my program, because the synthesis sometimes took on the order of tens of minutes for small patch sizes and large output images. Nevertheless, I loved the cool images generated!