Project 1: Reimplement A Neural Algorithm of Artistic Style
Overview
In this project, we reimplement the ground-breaking paper, A Neural Algorithm of Artistic Style by Gatys et al, to transfer the style from a style image to a target content image using a Neural Network (VGG-19). Here, we take an image an reproduce it with a new artistic style.
In particular, the paper uses the following drawings as its style images:
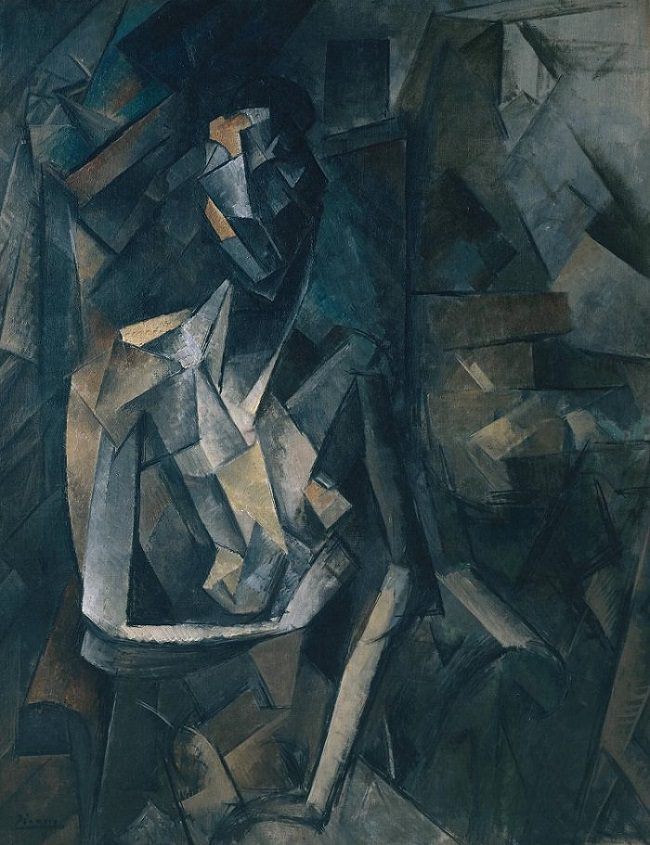 Seated Nude
|
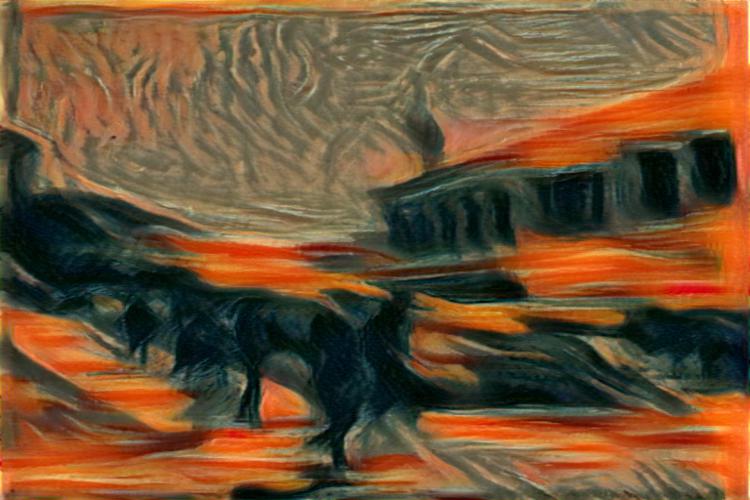
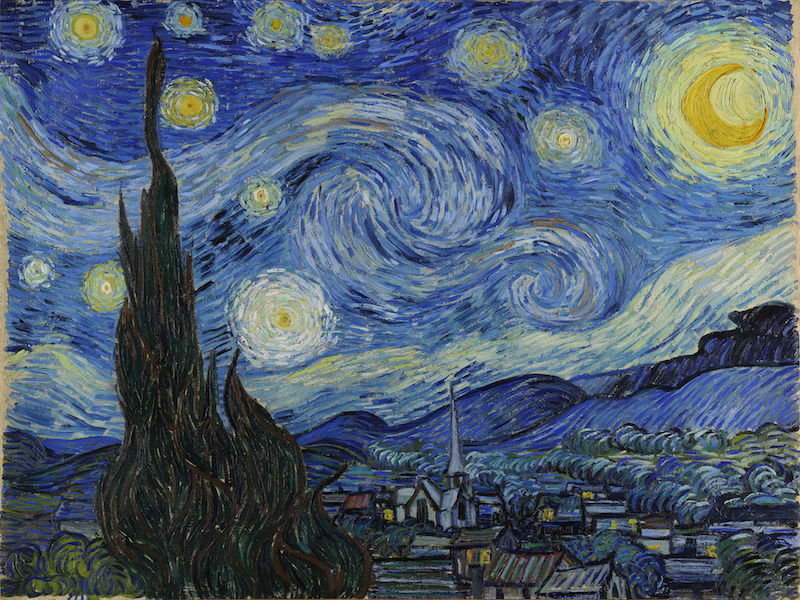 Starry Night
|
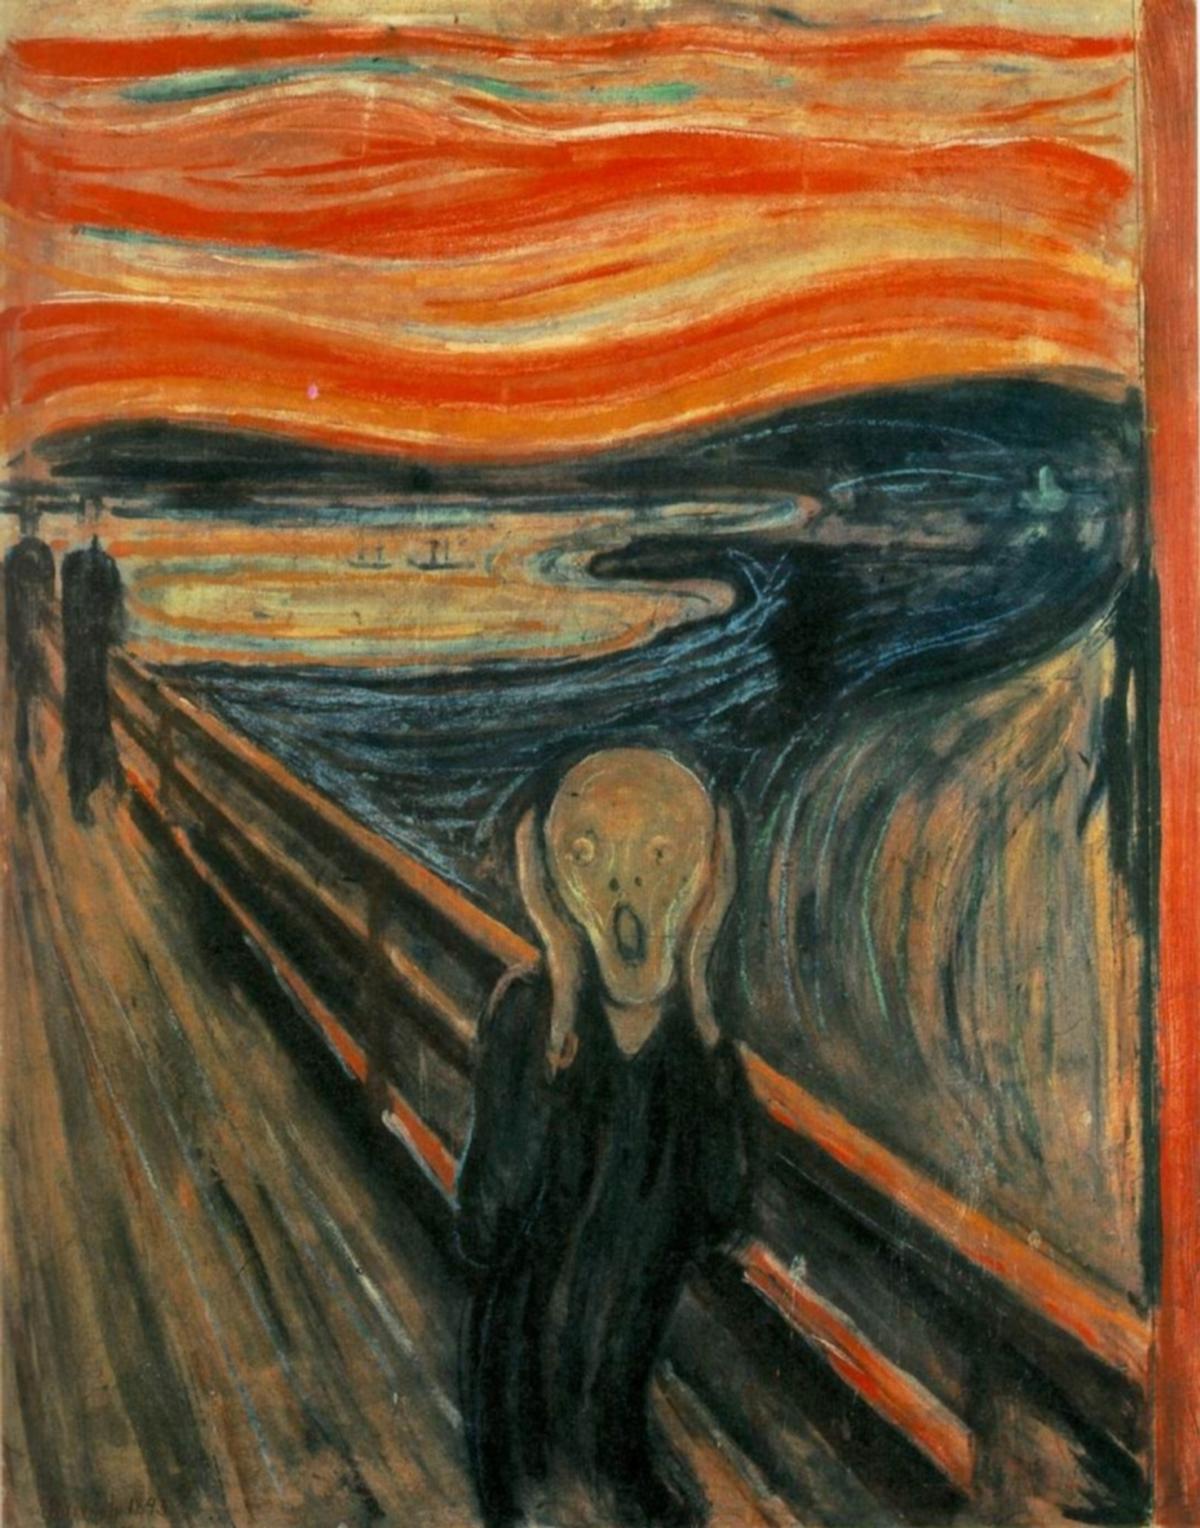 The Scream
|
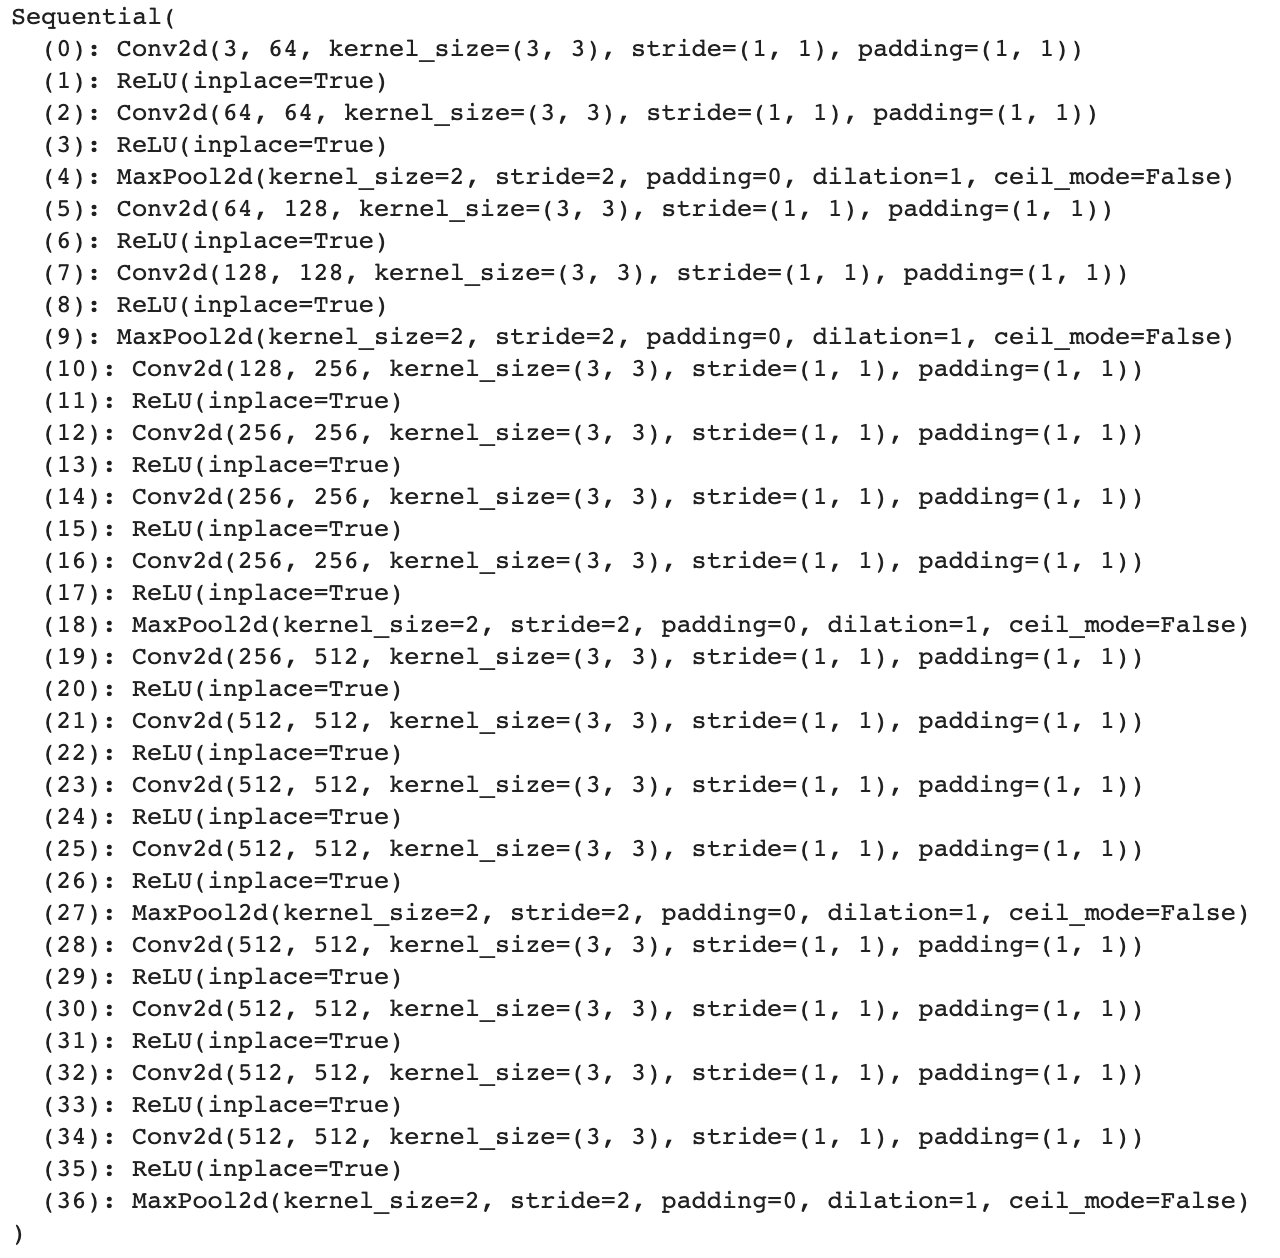
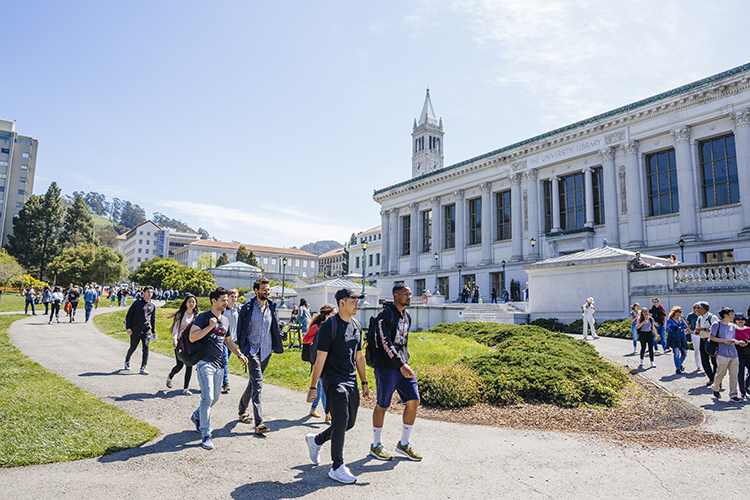
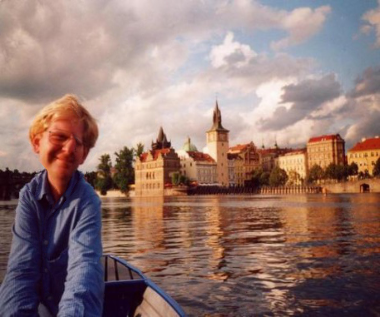
The paper uses the following image as its content image:
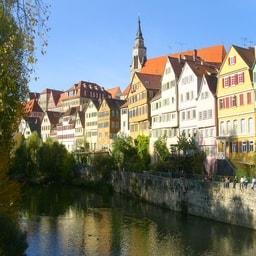 Neckarfront
|
Implementation Details
Overview: We use the pre-trained VGG-19 architecture. The main principle is simple, we define two distances, \(D_C\) and \(D_S\). \(D_C\) measures how different the content is between content image and the produced image and \(D_S\) measures how different style is between content image and the produced image. The produced image, then, attempts to minimize both \(D_S\) and \(D_C\), weighted.
Content Loss \(D_C\): Content loss is the average of the difference between the content representation of the target (produced) and original image
Style Loss: We compute the Gram Matrix for each style feature and compare between the target image and the style image
Total Loss: We compute the content loss and style loss, and weight them accordingly. In each of the pictures below, we use different ratio of content-to-style loss, and outline them in the results. Typically, we found that letting style weight to be \(10^6\) and content weight to be \(1\) worked best.
Network: We use the VGG-19 architecture, with some changes. Specifically, Layer 21 was used for content Representations, and layers 0, 5, 8, 19 and 28 were used for the style representations. This was done using the original paper. There is no difference in the network itself between the main paper and our network.
 VGG19 Architecture
Hyperparameters: We use learning rate of \(3 \cdot 10^{-3}\), \(1000\) epochs with varying style and content-loss hyperparameters. Style and content loss hyperparameters differ from the paper as the paper recommends mostly \(1\) and \(100\). However, given resource constraints, we pushed the ratio up so that training happens more quickly with more vivid results.
Optimizer: LGBFS
Results
Results from Paper
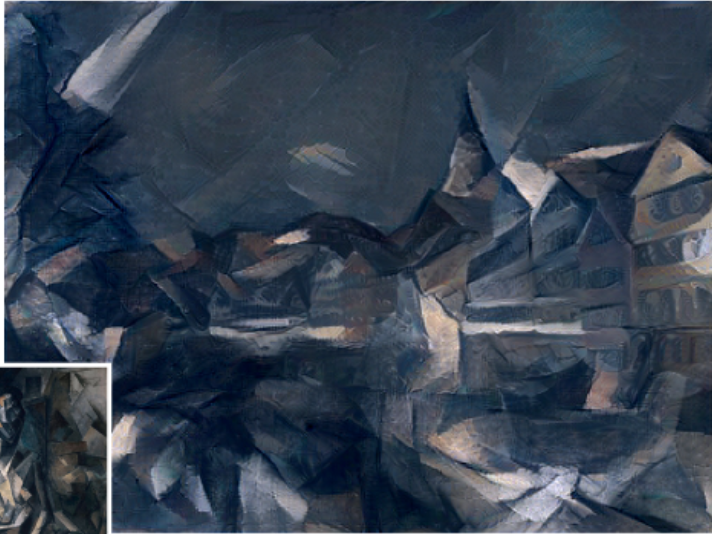
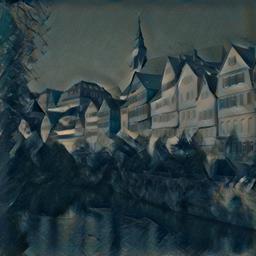
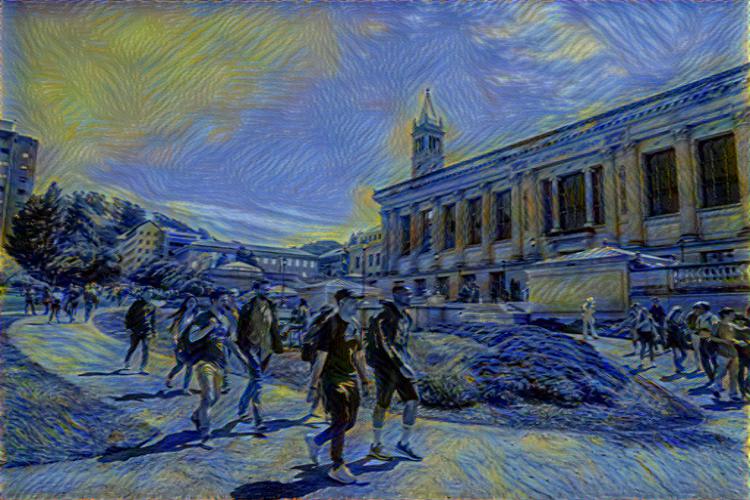
We first show the results of transferring the content image of Neckarfront (above) to 3 selected styles listed in the paper. Our results do not look as similar to the style picture as those in the paper, primarily because of lack of training, compared to those in the paper. With longer training time, given that the network used are the same, we expect to achieve similar-quality results. However, whether we should retain more "style" or more "content" is an artistic choice, and on photos like the Seated Nude, we argue our results look better, as the original paper's results overly muffle the source image. On the other hand, the result from paper is better on Starry Night, and it captures the Starry Night on the skies, whereas in our results, we see traces of the "sky" in the buildings.
 Result from Paper (Seated Nude)
|
 1:10000 content-style ratio on Neckarfront
|
 1:1e6 content-style ratio on Neckarfront
|
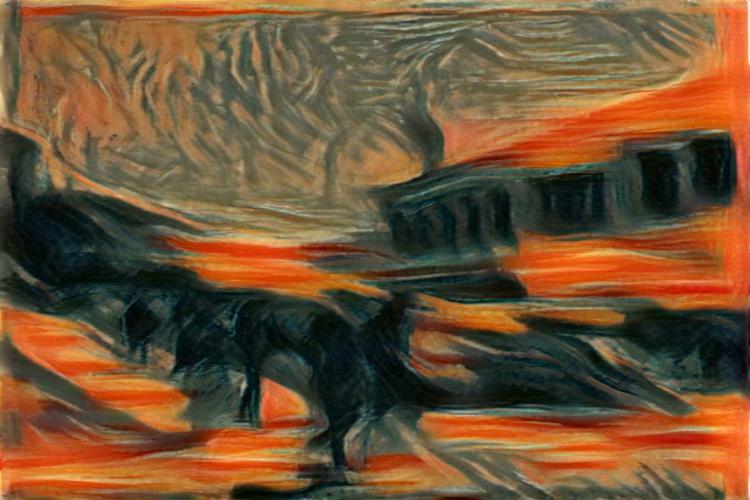
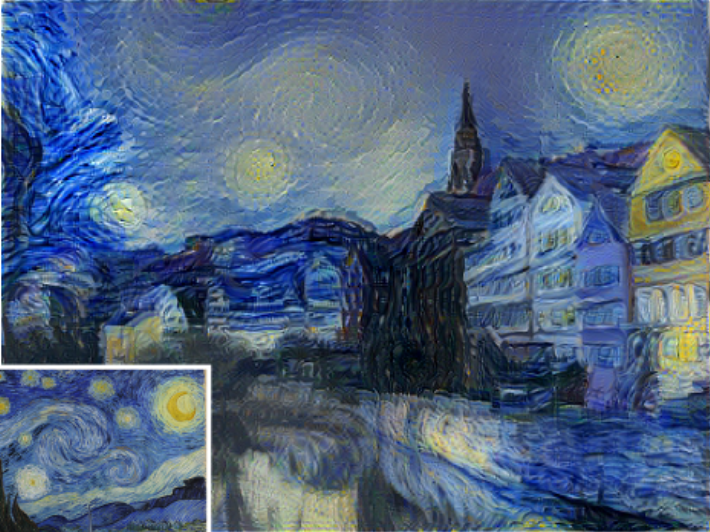 Result from Paper (Starry Night)
|
 1:1000 content-style ratio on Neckarfront
|
 1:1e6 content-style ratio on Neckarfront
|
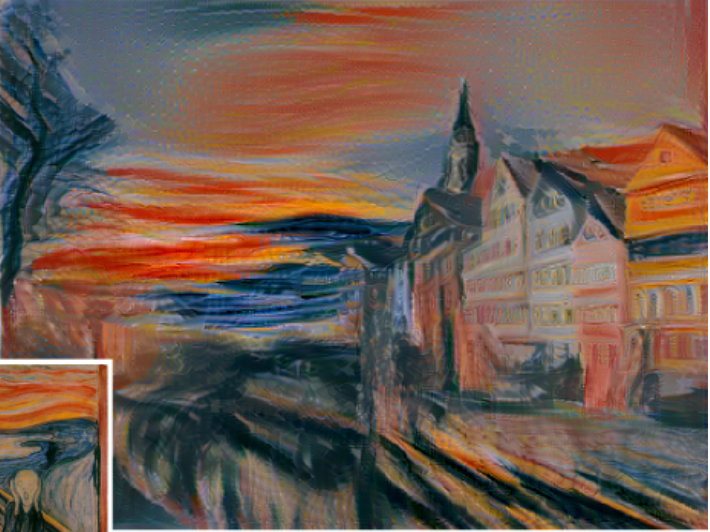 Result from Paper (Scream)
|
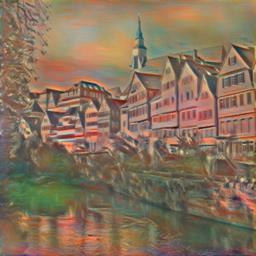 1:300 content-style ratio on Neckarfront
|
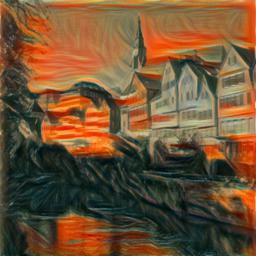 1:10000 content-style ratio on Neckarfront
|
Good Results
We use our own selection of photos, and some selected styles, to create
beautiful style transfer results.
Scream and Berkeley
|
Style (Scream)
|
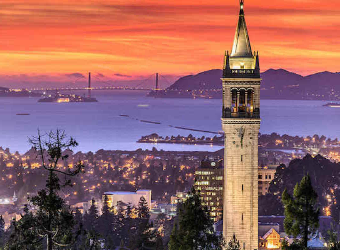
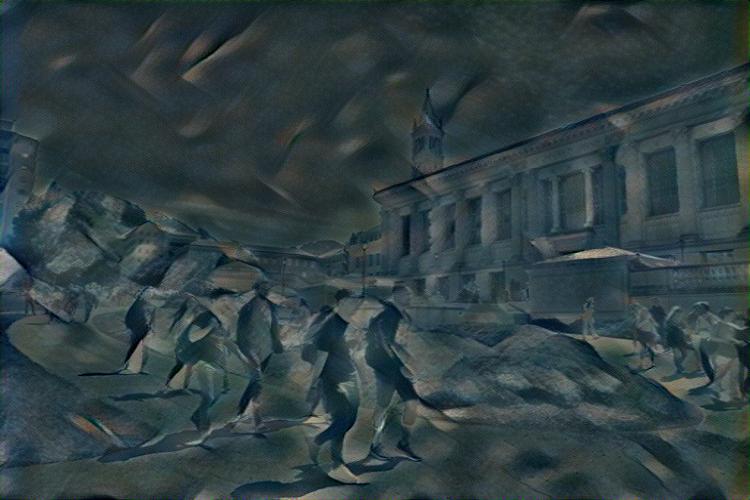
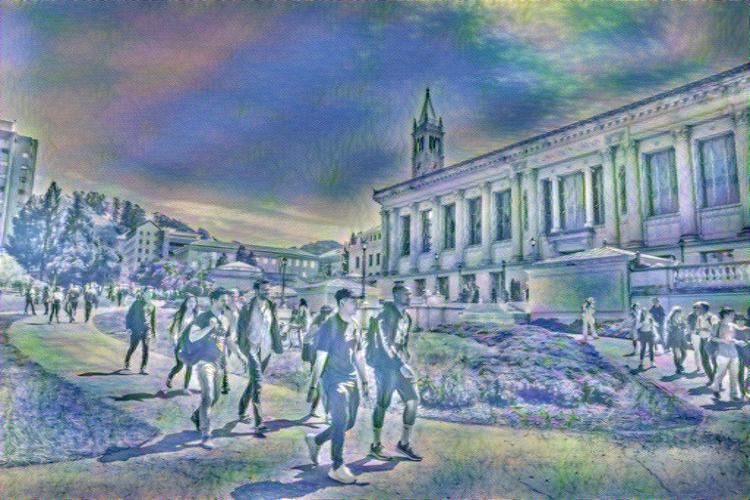
 Content (UC Berkeley)
|
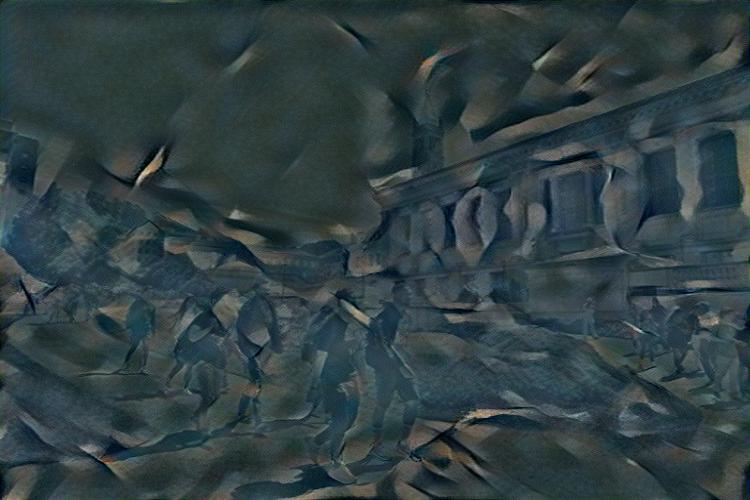
 1:10000 content-style ratio on Berkeley
|
 1:1e6 content-style ratio on Berkeley
|
Starry Night and Berkeley
|
Style (Starry Night)
|
Content (UC Berkeley)
|
 1:3000 content-style ratio on Berkeley
|
 1:10000 content-style ratio on Berkeley
|
Seated Nude and Berkeley
|
Style (Seated Nude)
|
Content (UC Berkeley)
|
 1:3000 content-style ratio on Berkeley
|
 1:10000 content-style ratio on Berkeley
|
Garden and Berkeley
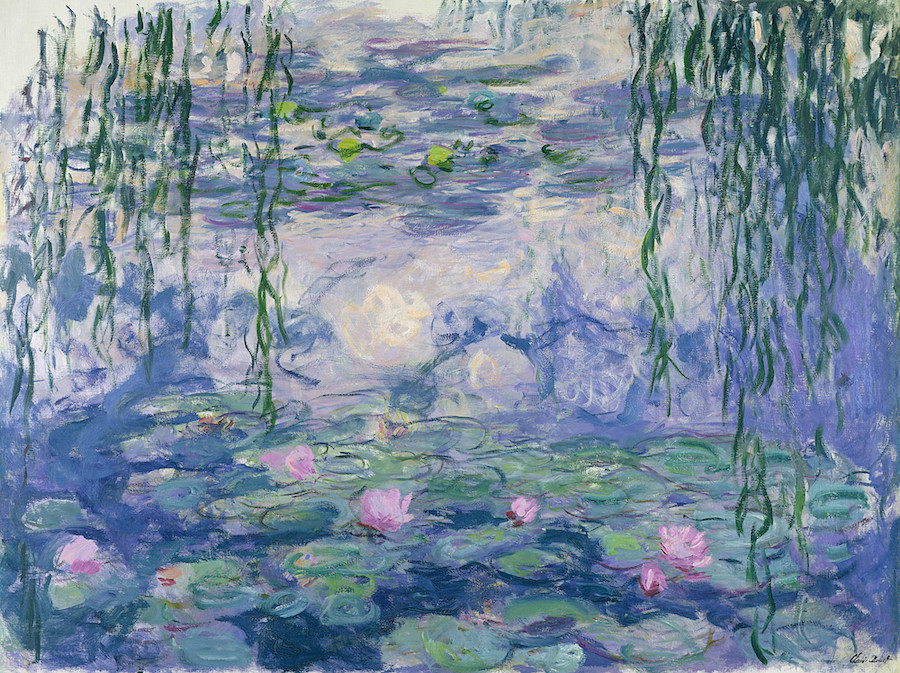 Style (Garden)
|
Content (UC Berkeley)
|
 1:1000 content-style ratio on Berkeley
|
Nude Prof. Efros
|
Style (Seated Nude)
|
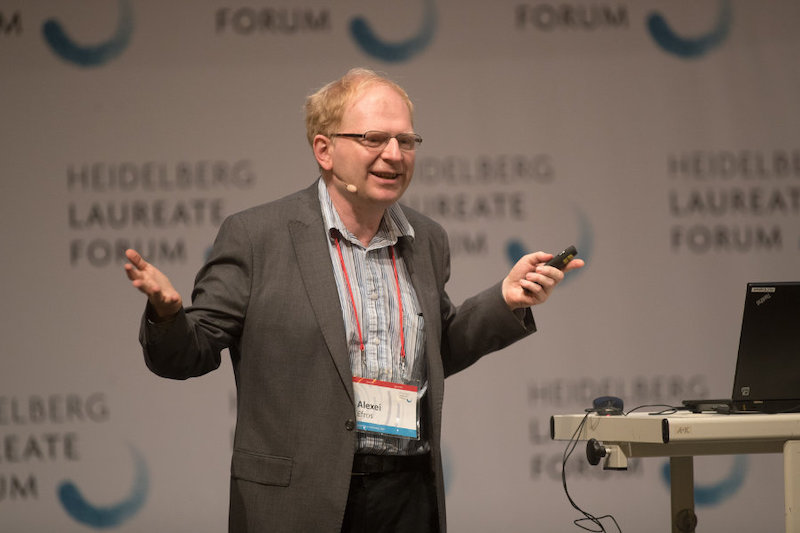
 Content (Prof. Efros)
|
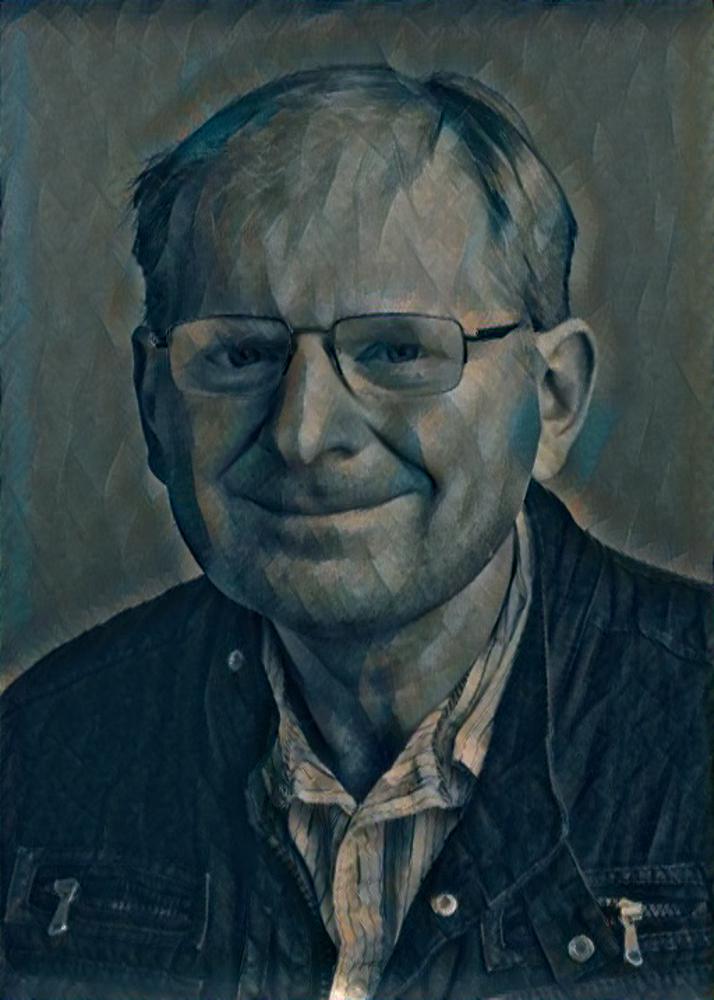 Nude Efros? (1:1000 content-style ratio)
|
Failure Yet Still Okay-Looking Cases
Here are some failure, yet okay-looking cases, where we took the failure cases in section below, and tuned the hyperparameters until it looked decent. We will analyze why they failed in the section below.
Berkeley in Waters?
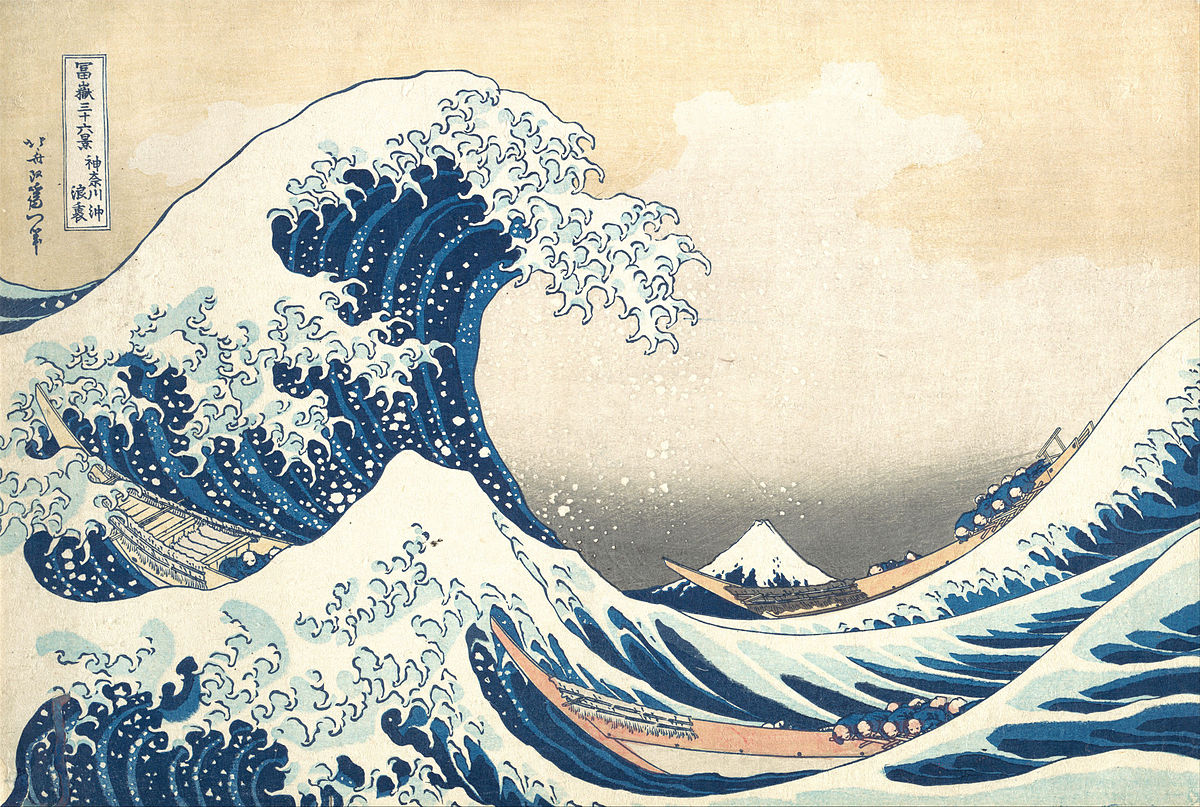 Style (Great Wave)
|
Content (UC Berkeley)
|
 1:1000 content-style ratio on Berkeley
|
Failure Cases
Berkeley in Waters?
One reason for the failure case below is lack of tuning. However, 1:2000 ratio typically gave me very content-oriented results. In this case, not so. We can combine this with the "okay"-looking result above, and the issue is that "Great Waves" style has too strong a texture of the waves. In fact, above, it recognized a lot of objects, and re-styled it with waves, which is not what we expect.
|
Style (Great Wave)
|
Content (UC Berkeley)
|
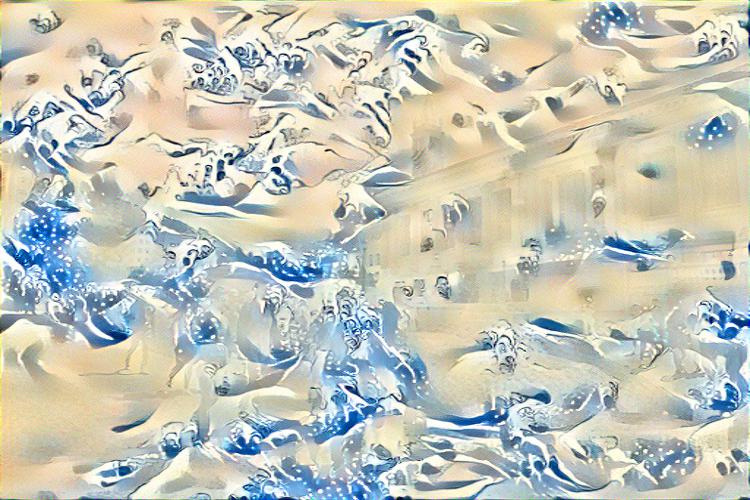 1:2000 content-style ratio on Berkeley
|
Screaming Prof. Efros
One reason for the failure case below is that face and style did not go well together, which has a different object representation than the others, which were mostly landscapes. In the case of Seated-Nude, it is still some representation of a human, but in case of the Scream, most of the texture is in its background.
|
Style (The Scream)
|
Content (Prof. Efros)
|
 1:1000 content-style ratio on Prof. Efros
|
Project 2: Seam Carving
Overview
In this project, we explore seam carving, which was first explored in the groundbreaking paper, Seam Carving for Content-Aware Image Resizing. Seam carving is an algorithm for content-aware image resizing . What does this mean? When we want to resize an image, we often do so by squeezing or expanding the image, or cropping it. These lead to suboptimal image results. Seam carving is content-aware, so it finds areas/paths of least importance and automatically removes them.
Implementation Details
Overview of Implementation
To implement Seam Carving, we have two main ideas: energy function and DP algorithm to find the seam with least energy.
Energy Function: The purpose of the energy function is to define a metric of which regions in an image are not important/important, so that we can carve them out. Intuitively, pixels that blend in with their surroundings are unimportant and should have low energy values. The original paper proposes gradient magnitude as the energy function:
$$e(I) = | \frac{\partial}{\partial x} I | + | \frac{\partial}{\partial y} I|$$
What does this mean? This equation tells us that, for every pixel in the image at every channel, we find the partial derivate in the \(x\)-axis and \(y\)-axis, and sum the absolute values.
This brings us to the point: how do you compute the derivative of an image? We discussed multiple ways in class, and I experimented with finite difference operators and Sobel operator (recommended in the paper). They give similar results, but Sobel gives stronger results. We used Sobel operator, where I convolve the image with:
$$\begin{bmatrix} +1 & +2 & +1 \\
0 & 0 & 0 \\
-1 & -2 & -1
\end{bmatrix}$$
for the \(y\)-axis and
$$\begin{bmatrix} +1 & 0 & -1 \\
+2 & 0 & -2 \\
+1 & 0 & -1
\end{bmatrix}$$
for the \(x\)-axis.
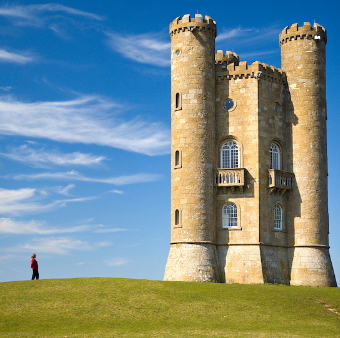
For example, below we show results of the Sobel filter for the classic Castle picture:
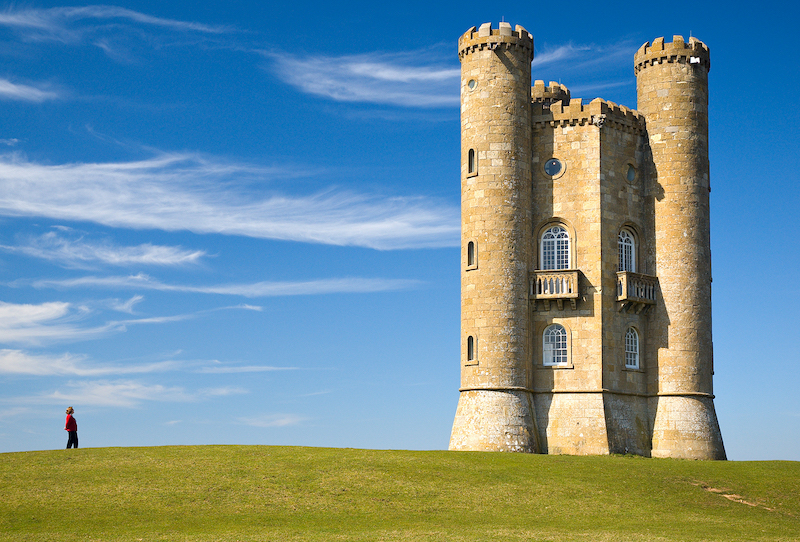 Original Photo
|
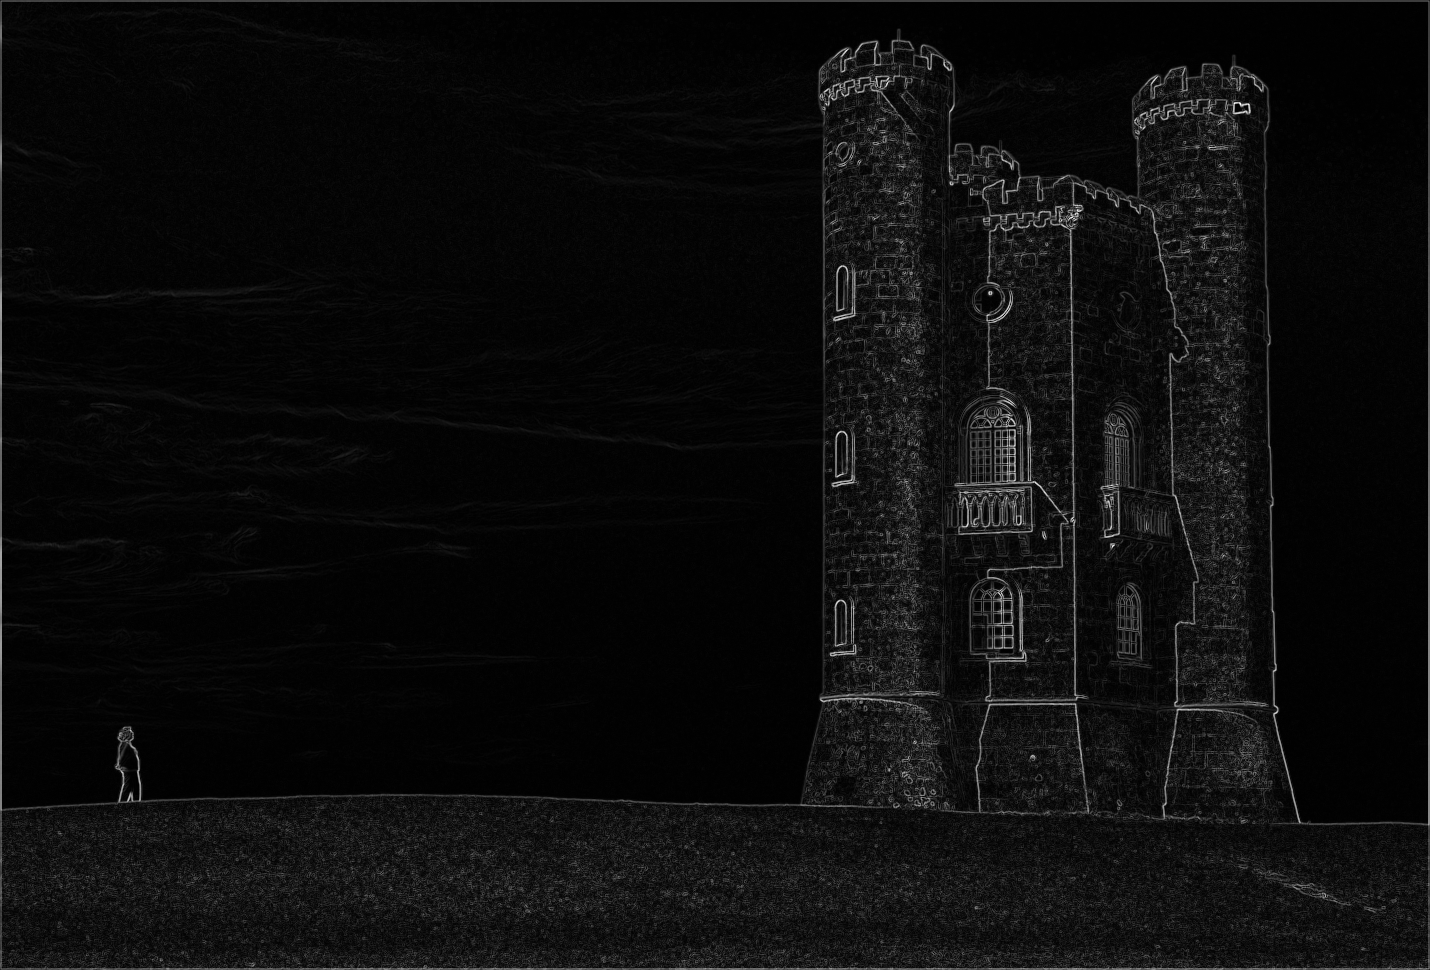 Energy Map
|
Finding the Optimal Seam: To find the optimal seam, we use a DP algorithm outlined in the paper to do so. We traverse the image from second to last row and ccompute the cumulative minimum energy for all connected seams, and fill in the DP table. Specifically, our recurrence is:
$$M(i, j) = e(i, j) + \min (M(i - 1, j-1), M(i-1, j), M(i -1, j + 1))$$
where \(M\) represents the DP table of all minimum energy.
Vertical Seam Carving: The examples we show above are mostly horizontal seam carving. Then, how can we take the ideas to do vertical seam carving? It turns out the idea is very simple: transpose the image, run horizontal seam carving onto the transposed image and transpose it back.
Results
Horizontal Seam Carving
Below, we show the results of horizontal seam carving on several images, and credited:
Vertical Seam Carving
Below, we show the results of vertical seam carving on some images, and credited:
Bells and Whistles: Seam Insertion
On top of
deleting seams, we can also insert seams, by modifying the removal process. We follow the algorithm described in the main paper.
Implementation Details
Let us say we want to enlarge an image by \(k\), then, we find \(k\) seams for removal. Then, we add them back into the picture by averaging the pixel values across the seam.
Results
Failure Cases
Below, we show examples of some failed cases and explanations of why.
 Original Photo (link)
|
 Cropped (80%)
|
In this example, we can intuitively reason that the photo decided the background had more energy, after all, there are lots of buildings and do not blend in with surroundings due to their edges. On the other hand, on Prof. Efros' face, some parts of the face blend well to each other, especially since the face is at the foreground and is large! In fact, take a look at the energy map below:
|
Original Photo (link)
|
 Energy Map
|
The above energy map shows that indeed, there is more energy around the buildings.
Main Takeaway
It's surprising that such a simple DP algorithm does so much magic to resize images, and this project tied up a lot of loose ends of CS 194-26, where I was reminded by one of the first few projects with the energy function, to DP algorithms. This was a delight to play with!