Lab 14: Spark
Due at 11:59pm on Friday, 12/2/2016.
Starter Files
Download lab14.zip. Inside the archive, you will find starter files for the questions in this lab, along with a copy of the OK autograder.
Submission
By the end of this lab, you should have submitted the lab with
python3 ok --submit. You may submit more than once before the
deadline; only the final submission will be graded.
- You will be conducting this lab on the Databricks Spark platform which can be accessed via a browser.
- Each completing each question on Databricks, you will copy a token into
lab14.py. - Questions 1, 2, and 3 are required. After completing and passing the tests
for each question, you should see a token. Copy the token that is shown in
the last cell into your
lab14.pyfile as a string. - After completing the lab, you may run OK as usual.
MapReduce
In this lab, we'll be writing MapReduce applications using Apache Spark.
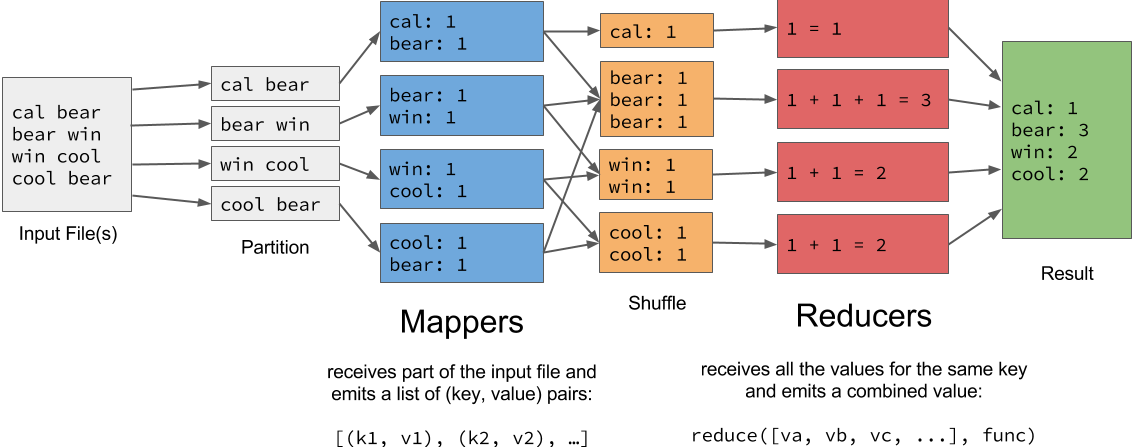
A MapReduce application is defined by a mapper function and a reducer function.
- A mapper takes a single input value and emits a list of key-value pairs.
- A reducer takes an iterable over all values for a common key and emits a single value.
The following diagram summarizes the MapReduce pipeline:
Apache Spark and Databricks
Spark is a framework that builds on MapReduce. The AMPLab (here at Cal!) first developed this framework to improve upon another MapReduce project, Hadoop. In this lab, we will run Spark on the Databricks platform, which will demonstrate how you can write programs that can harness parallel processing on Big Data.
Databricks is a company that was founded out of UC Berkeley by the creators of Spark. They have been generous enough to donate computing resources for the entire class to write Spark code in Databricks notebooks.
Creating an Account
Before you can even get started with the lab content, there is a little bit of setup you must go through first.
Login To Databricks Community Edition
- If you have not already registered for a free account at Databricks Community Edition, you will need to signup here. Email verification is required.
- If you do already have an account, login here.
The Databricks Community Edition accounts are completely free, available for anyone, and include compute resources with 6GB of memory.
Uploading Lab Files
Once you have a Databricks Community Edition account, you can start to prepare your training workspace:
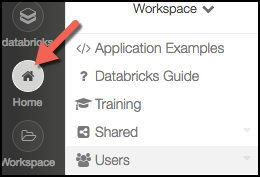
On the left edge of the window, click the "Home" button. You'll see a file browser appear.
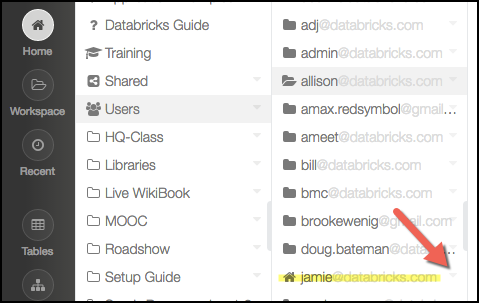
Locate your username, and then click on the triangle icon to the right of your username.
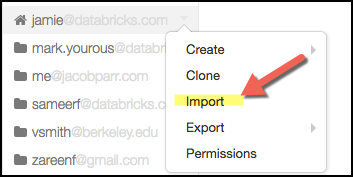
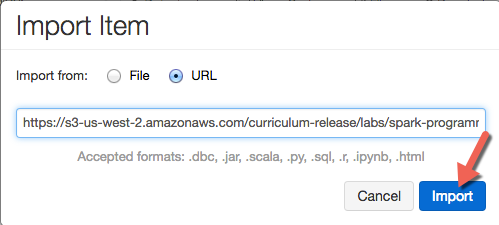
In the popup menu, select "Import."
Select "Import From URL" and copy paste this URL into the dialog box:
https://s3-us-west-2.amazonaws.com/berkeley-cs61a/cs61a_lab.dbc- Click "Import." It may take up to 60 seconds for all files to successfully import. (They will progressively appear.)
Install 3rd Party libraries required for the exercises
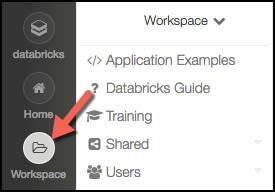
On the left edge of the window, click the "Workspace" button. You'll see a file browser appear. (Note: "Home" goes to your home folder, whereas "Workspace" goes to the most recently used location in the file browser.)
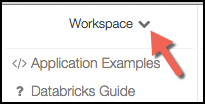
At the top of the file browser, you'll see "Workspace" with a downward arrow next to it. Click on the arrow.
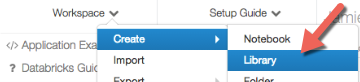
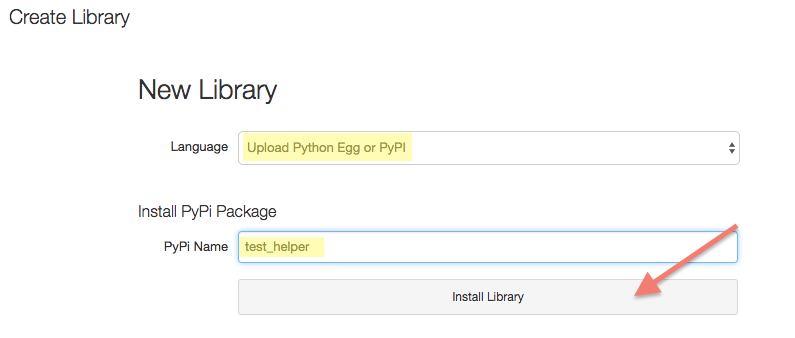
In the popup menu, select Create -> Library. Then opens the "New Library" screen.
- Install the Python test_helper by specifying the following values:
- Source/Language: Upload Python Egg or PyPI
- PyPi Name: test_helper
Click: Install Library
By uploading these libraries, you ensure all the computers in the Spark cluster have access. The library is used to check your assignment locally. You can learn more about uploading libraries and many other topics in the Databricks Guide.
Creating a Cluster
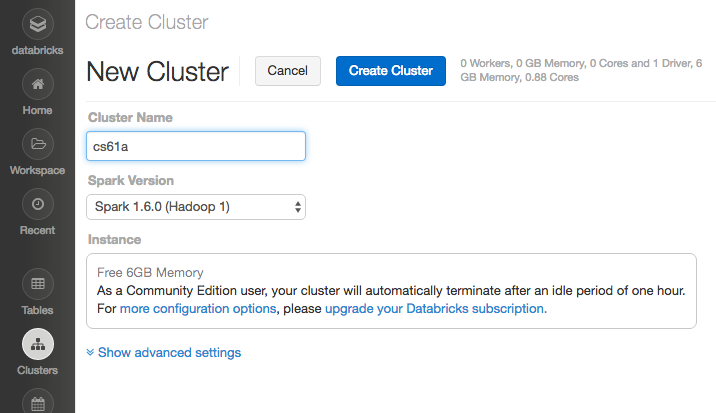
The first thing you should do is create a cluster. In the sidebar on the left, click on the "Clusters" icon and select the "Create Cluster" button. Enter the name "cs61a" for your cluster, then hit "Create Cluster" to start up the cluster; the default Spark version should be fine. This can take anywhere from a minute to ten minutes, so be patient! Once your cluster appears as "active", you can proceed to the next step.

Important note about clusters:
- Be patient, some operations can take a while to run.
- If it's taking a really long time, make sure that the cluster hasn't fallen asleep. You can check this by looking at cluster status. If the status is pending, then you should probably keep waiting.
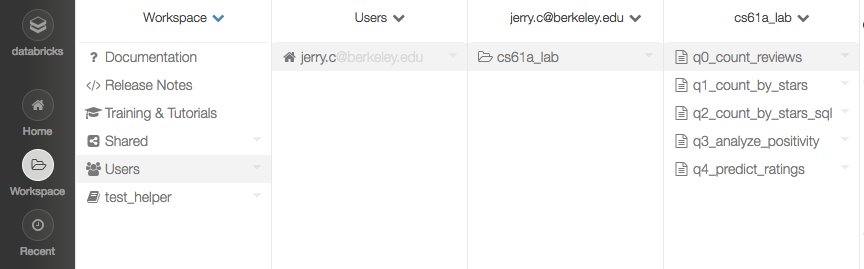
Loading the Workspace
In the sidebar, select the "Workspace" icon. Find the cs61a-lab folder that
you imported from before. Navigate into it and check out question 0 as an example:
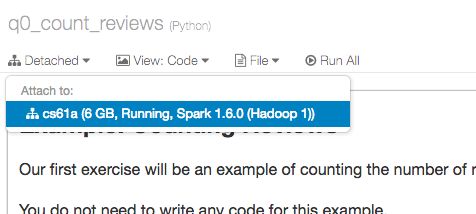
To get started on this problem, first attach to your cluster. In the menubar at the top left, you should see a button that says "Detached." Click on it, then select the cluster that you created earlier:
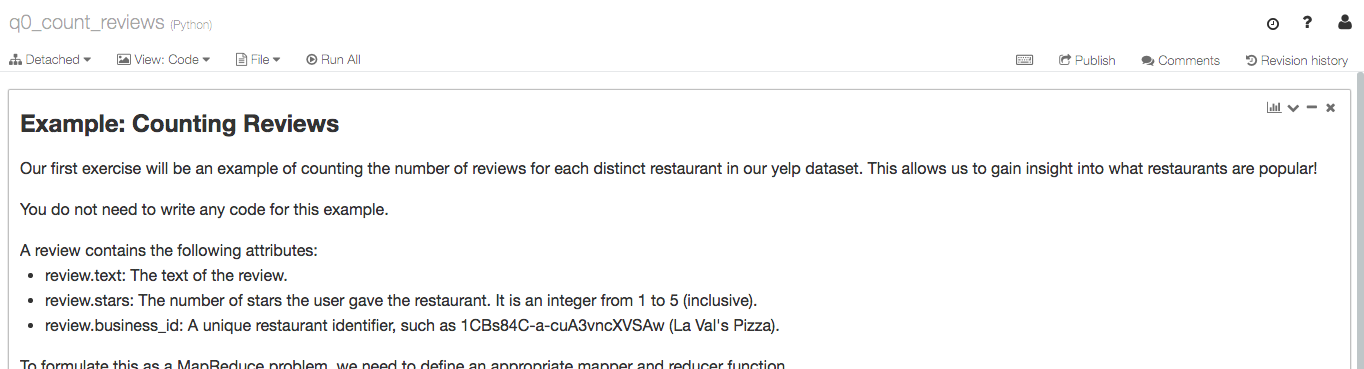
Interacting with Notebooks
A Databricks notebook is very similar to an IPython notebook, which is a Python instance that can be interacted with inside of a web browser. Databricks and IPython notebooks can contain code, text and even images! Here is a screenshot of a notebook. You can see that we have code that are in cells. We can run all the cells by pressing the 'Run All' button or we can run a single cell by pressing the Shift+Enter keys when our cursor is in the desired cell.
Lab Questions
Now that you know how notebooks work, complete questions 1-3, which are
mandatory. Question 4 is optional but recommended. After completing and passing
the tests for each question, you should see a token. Copy the token that is
shown in the last cell into your lab14.py file as a string.