Assignment, Week 7: Noise Reduction
This week's assignment is to try out a few of the noise reduction methods demonstrated in class on one (or more) of your high ISO images from the Week 5 or Week 6 assignments.
The primary tools we'll be using is a noise reduction called Neat Image. Neat Image is a freeware program for non-commercial use that can be downloaded below. If you are running Mac OS and have Photoshop or Photoshop Elements, you can download a freeware plugin of Neat Image. Otherwise, you can try Noise Ninja, which runs on Windows, Mac OS, and Linux, but won't let you save photos without a watermark. Noiseware is also a free program (less controls, but more automatic than Neat Image), but for Windows only.
- Neat Image (Windows): Download "Demo edition setup"
- Neat Image for Photoshop (Mac): Download "Demo plug-in /Mac Universal Binary" (this is a plugin for Photoshop only)
- Noise Ninja (Windows/Mac/Linux): Download the appropriate version for your operating system
- Noiseware (Windows): Download "Noiseware Community Edition Standalone 2.6"
After installing the program, you can follow these steps for processing your images for noise reduction (written for Neat Image, but this and the other programs should be intuitive - email if you have any problems)
- Open your picture. "Open Input Image" and find your file.
- Move to the next tab - Device Noise Profile
- Profile your image by clicking "Auto profile". Profiling the image takes a blank, detail-less area, and analyzes the noise characteristics of the image (this is how the program differentiates between pixel variations that are detail and not noise). For best results, you might want to manually select a blank patch that is somewhat dark (click and drag a box on the image) - try to avoid an area with actual detail or varying brightness/color (as this will confuse the profiler), bright areas (since these don't have much noise), or near-black areas (since the noise deviation is too low to detect).
- To verify your profile completed successfully, look at Profile Quality and match on the bottom-right of Neat Image. Profile Match should be at least 90% and Profile Quality should be at least 80% for best results.
- Move to the next tab - "Noise Filter Settings"
- Click "Preview" to open the preview box - zoom in to see the changes in detail
- Experiment with the different Filter Presets, or if you're feeling especially adventurous, try playing around with the actual settings.
- When you're happy with the preset used, go to "Output Image", Apply the filter, and then save your output image
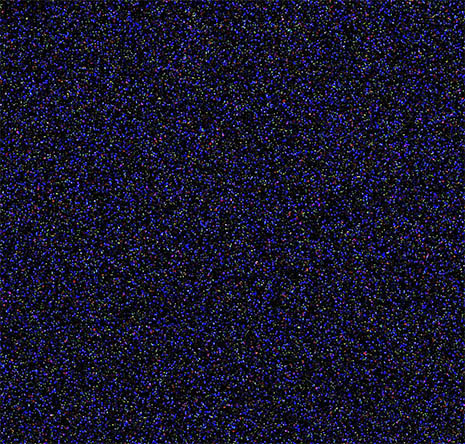
Original noisy image |
Luminance noise (chrominance noise filtered) |
 Chrominance noise (luminance noise filtered) |
 Clean image (luminance & chrominance noise filtered) |
We also played around with a few other techniques, if you'd like to try any of these:
Dark Frame Subtraction: We've dealt mostly with fixed pattern noise, but another kind of noise which is caused by problems with the camera's sensor or electronics is fixed pattern noise - noise which shows up in the same place, in the same amount, no matter what. Fortunately, since fixed pattern noise is 100% predictable and reproducible, if we can get a measurement of this fixed pattern noise we can simply subtract it from the noisy image and get our original (think of fixed pattern noise as Signal s + noise n: the image is s+n, but if we know n, we can subtract S+n-n = s and get the actual signal (the noiseless image).
To do a dark frame subtraction, follow these steps (you will need Photoshop or a similar image editing application):
- Take a long exposure image (on modern cameras, fixed pattern noise only becomes a problem at very long shutter speeds - you will need to take a picture of at least 30 seconds. If you have it, use the "BULB" mode to manually control the exposure time).
- Immediately after taking the image, put your lens cap on the camera, and take another picture with the lens cap on (or hold your hand over the lens) for the EXACT same amount of time as your original image.
- You will know have the original image, and the lens cap image, which is your "dark frame" - it should be completely black, and any kind of brightness is noise generated by the sensor itself.
- Load the original image into Photoshop, then copy+paste the dark frame image directly over it. Change the blending mode of the dark frame image to "Difference". On other image editing programs this may be called "Subtraction"
- The noise from the dark frame should be subtracted from the image, leaving a noiseless image. Note that this will only remove fixed pattern noise, and any random noise (from fluctuating light input) will still be present.
Fixed Pattern Noisy Image: Move mouse over image to see result of dark frame subtraction
 :
: 
Assignment Summary:
- You can either email the assignment to me, or upload the files to bspace
- Run one of your high ISO images from Week 5 or Week 6 assignments through one of the noise reduction programs. Send the before and after images.
- Alternatively, take a long exposure image and use dark-frame subtraction to remove the fixed pattern noise. Send before and after images, and your dark frame image.
- week7_darkframe.psd (.psd, 1.79MB): File contains original image and dark frame on seperate layers, use this to play around with dark frame subtraction